R&R Tech
- Subject: Converter damage caused by improper bolt placement (Toyota); case & center-support wear (Ford)
- Units: A245E/A246E; 4R100/E4OD
- Vehicle Applications: Toyota, Ford
- Essential Reading: Rebuilder, Diagnostician, R & R
- Author: Steve Logeman
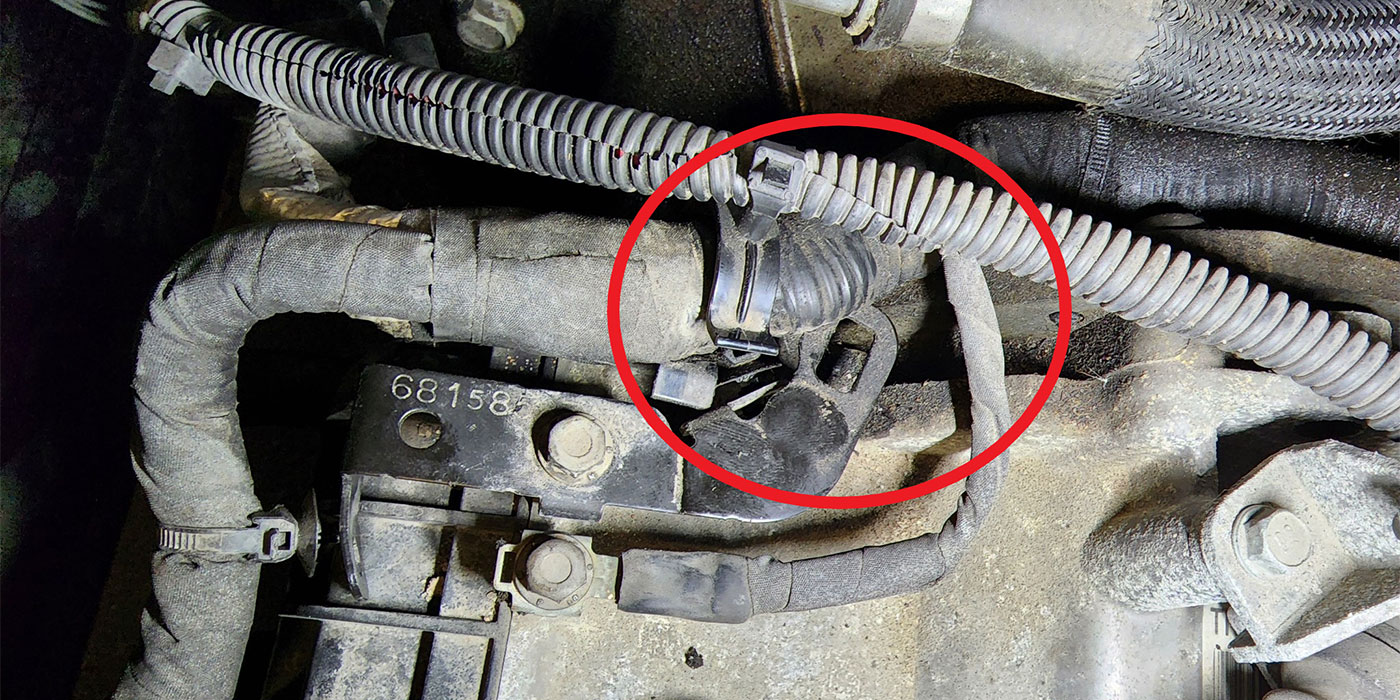
This all started with my looking at multiple converter failures caused by the converter bolts damaging the backs on Toyota A245E/A246E transmissions used with the 1.8-liter engine. We also see this in other Toyota applications, maybe more so than with other vehicle manufacturers.
My intentions were to order some factory bolts to get the proper dimensions and possibly send these reman units out with new bolts, either OE or an economical replacement bolt. I was hoping this would eliminate any confusion for the R&R technician as to which bolts were the proper ones to go into the converter, hence eliminating unwanted warranty repairs.
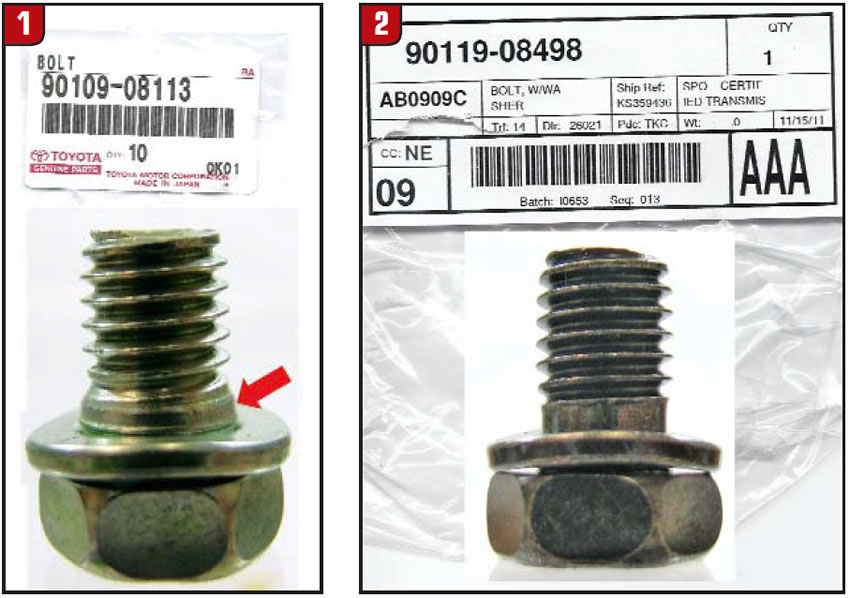
What I found was very humbling. I have worked on my share of Toyotas over the years and consider myself a pretty well-rounded transmission technician. So I was pretty shocked to find out that for this transmission/engine combination there are in fact two different torque-converter bolts. Five of the six bolts are part #90119-08498, and the other one is part #90109-08113.
At this point I ordered some bolts to see what the difference was between the two and also asked my local dealer to give me a list of vehicle applications that use these bolts. Not to my surprise, these bolts fit a wide range of vehicles going back as far as 1985. So now I was really curious and racking my brain for any remembrance of the bolts being different.

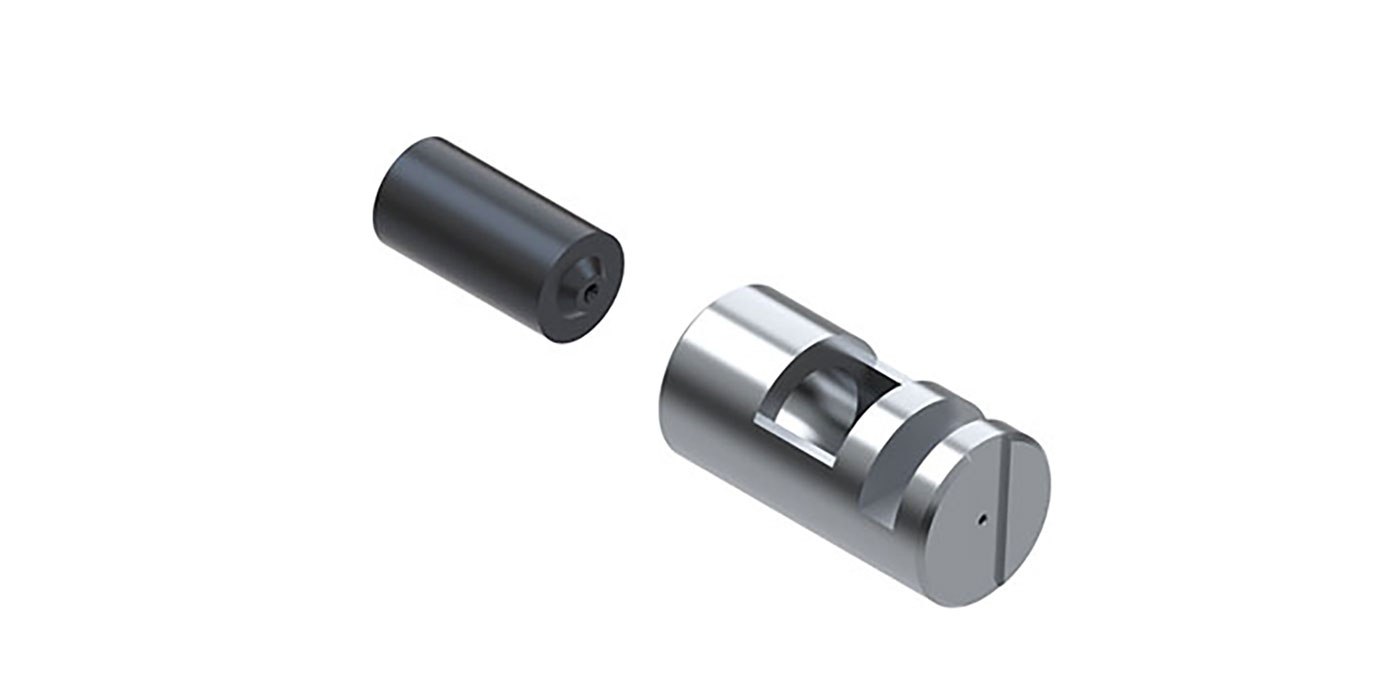
You can see that bolt #90109-08113 (Figure 1) has a shoulder; not a very noticeable one, but it is enough that if you install this bolt first it will center the flywheel to the converter so the other five bolts #90119-08498 (Figure 2) can be installed with no misalignment. They are also different colors. As I was waiting for these bolts I had our purchasing manager and the dealer look at other Toyota vehicles and transmissions, and they too had one bolt that was different, so I had other bolts ordered for other applications, and the one standalone bolt was shouldered also and a different color.
You can see how this opens a huge window to all kinds of scenarios on why an R&R technician might resort to searching through his box or five-gallon bolt bucket for a bolt to screw into the converter.
For instance, you take all six bolts out, throw them in with the rest of the R&R bolts and don’t really pay that much attention to what color they all are, and on top of that they’re probably covered with oil, dirt and dust. So now you’re putting it back together and you have only five converter bolts of the same color; or do you have all six the same color but one came from somewhere else – a dust cover, heat shield, your five-gallon bucket? You follow where I’m going with this?
Talking with one of my co-workers about these bolts and my thoughts of writing an article about them triggered an internal TSB card file in his head. His comment was, “I think there is a bulletin about that somewhere,” and sure enough, after digging through his old Toyota folder for a short time, he pulled out a copy of it: Toyota bulletin number 016, dated September 1989.
The larger bolts in figures 3 and 4 were ordered for a vehicle equipped with the A750, used in 2003-up 4Runner and a wide variety of other Toyota vehicles.
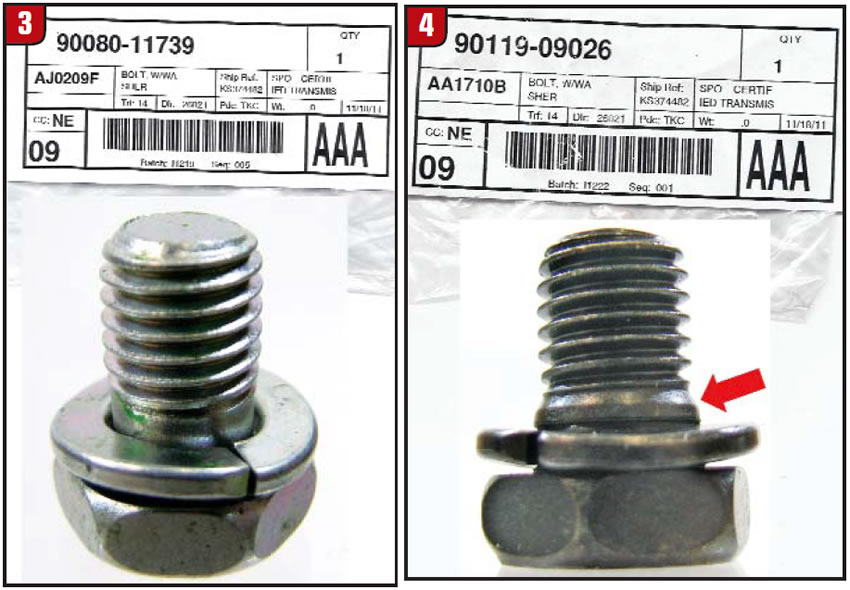
Note that the shouldered and non-shouldered bolts are different colors but with a color scheme opposite that of the bolts in figures 1 and 2.
4R100/E4OD case & center-support wear
Moving to a different subject altogether, I was thinking of other topics to write about when this thought popped into my head. What transmission failures or broken parts have I seen in my career that I have seen only once? Surely if I have seen it once that is not the only time it has ever happened. So here are some parts failures on 4R100s and E4ODs that I have seen only once.
It is part of a normal overhaul on these transmissions to address the wear at the case and center support by machining down the support and installing a snap ring inside the case. This not only reclaims the parts (case and support) but also makes for a better transmission by helping to distribute the load over the whole outside diameter of the support.
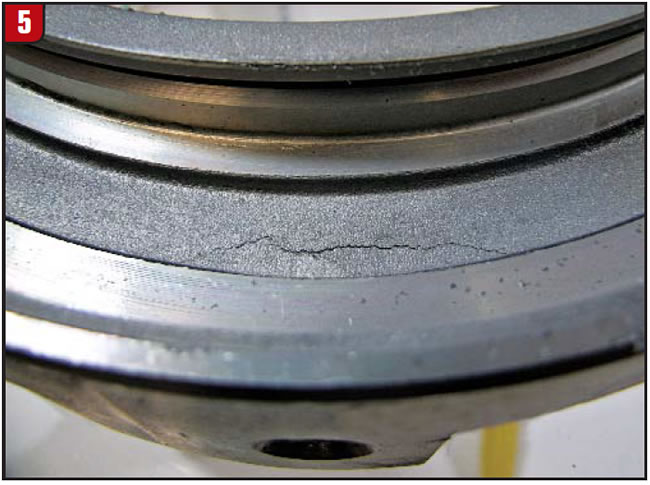
Figure 5 shows an overdrive/intermediate-piston housing that has a hairline crack in it because of a much-worn case and support. The housing got to rocking up and down so much that it cracked at the bottom of the overdrive-feed bolt hole.
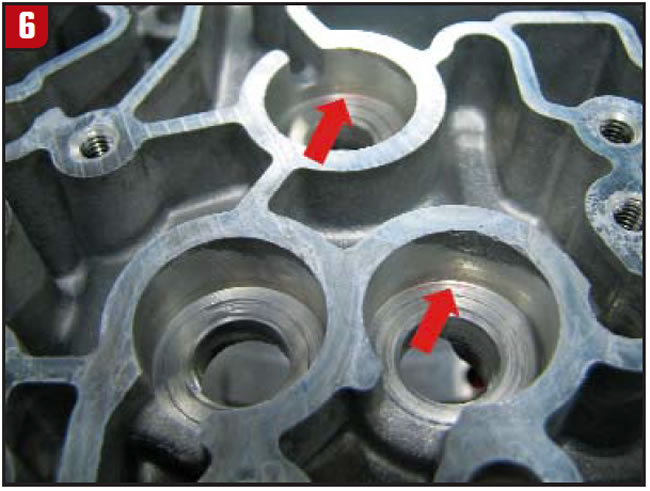
The photo in Figure 6 is not of an actual broken case but where I have seen them crack because of the same wear issue of the case and support or from overtorquing of the feed bolts during previous rebuilds. In both the forward- and overdrive-feed bolt-hole pockets on separate occasions I have seen small cracks. These cracks were almost impossible to see when you inspected the case empty. Only after you torqued the bolts and pulled the case down to the supports were the cracks noticeable – yeah, after you are almost finished building the transmission, and you will not catch this on a routine air test through the bolts.
I have also seen thread-locker buildup give a false torque reading on the feed bolts, and the shoulder of the bolt never seals against the case. The problem is that the combination of old thread locker in the hole and the new thread locker on the new bolts creates too much resistance. Here’s a build tip that can catch this: Before you install the separator plate, with the valve-body mating surface facing up squirt some oil into the feed-bolt-hole cavities around the heads of the bolts and see whether it drains through to the inside of the case.
Steve Logeman has been with Certified Transmission about 16 years and is a technical director at the company’s remanufacturing center in Omaha.