I want to talk a little bit about a common diagnostic misstep or overlooked problem that is prevalent in the automotive repair industry and seems to be on the rise. Pin-fit or tension can deal us a fit sometimes (pun intended), especially if we do not have the proper tools to determine if this mode of failure might be the cause. I have a couple of case studies to share that I have seen recently, and will share some testing protocols that I have used over the years to attempt to correctly diagnose a related issue or a code.
My first case study involves a 2010 Ford E350 equipped with the 6.0L diesel engine and a 5R110W transmission. This vehicle showed up at one of our shops after a competing shop refunded the vehicle owner his money after failing several attempts to get the transmission to operate correctly. The original problem was unknown, but the van showed up at our shop in failsafe mode with burnt fluid and several codes. The transmission had failed and slipped badly in fifth gear, usually attributed to a common direct clutch failure. The van had gear ratio codes, an over-temperature code and a couple of electrical codes, one of them being a P0768 (direct clutch solenoid SSPCD). The description of this code is as follows: “Circuit failed to provide voltage drop across solenoid. Circuit failure or PCM driver failure.”
The transmission needed a replacement, so we ordered a remanufactured transmission from our reman center and installed it into the van. Right out of the bay, the CEL light came on for a P0768 code, as I expected. I’d hoped that cleaning the case connector and applying dielectric grease during the transmission installation would clear up the code. That was not the case, so now I had some digging to do.
12V power to the solenoids comes from the PCM and the PCM controls the ground side, so it’s easy to check both sides of the circuit live at the PCM. I back probed pin 32 at the PCM and connected the scope to monitor the circuit activity, and surprisingly, the pattern looked pretty good. I had battery voltage on the high side, and when pulling it close to ground, about .2V (See Figure 1, above).
The code hadn’t reset yet, so I took the van for a road test, and everything was working well. Fifth gear was functional again, shifts felt good and no codes were setting. I was unsure why it was working properly at this point since I hadn’t really fixed anything yet, but I was just trying to get it to act up again.
After a few road tests I unhooked my test equipment and sent my protégé out for another test drive. He came back after about ten minutes of driving and said that the light came back on and the transmission again went into failsafe mode. I hooked up the test equipment again and once again the circuit pattern looked normal, and the transmission functioned normally. I was scratching my head at this point, because the only thing I was doing was back probing wires at the PCM for testing. Oh, wait a minute here…ding, ding, ding!
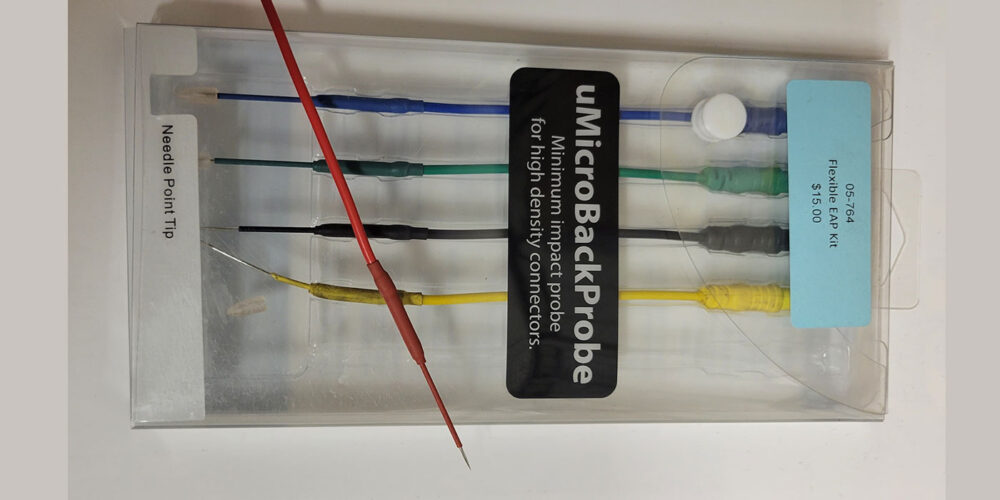
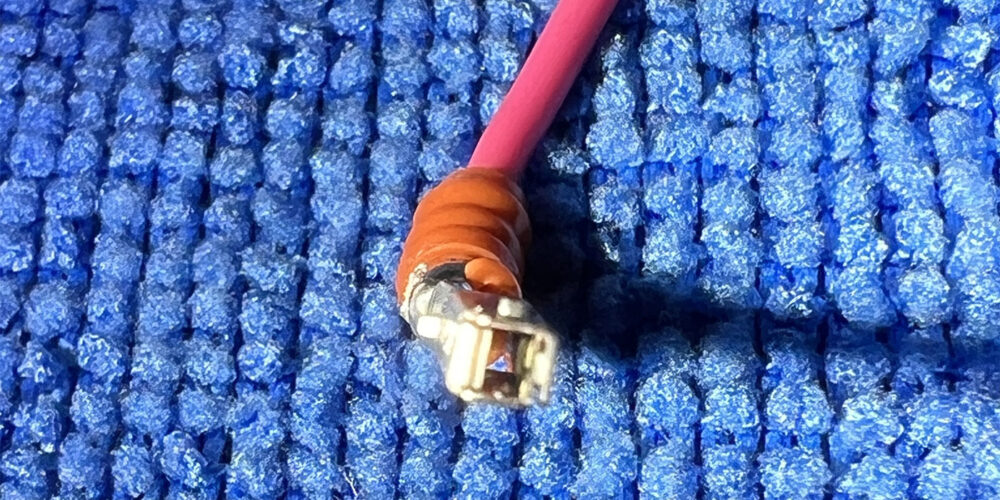
I learned long ago to use the smallest conductor you can for a back probe test. I am a big fan of AESwave and I have a few of their tools, one of which is the UMicroBackProbe which is just a small needle attached to a banana plug with about six inches of wire. (See Figure 2.)
Back to my “discovery.” I removed the back probe tool and pierced the wire with a Pomona wire piercing plug, and it took less than 30 seconds before the code set. Basically, the PCM was not pulling it to ground because the female terminal in the PCM connector was so spread out that it could not make good contact with the PCM pin until I placed the back probe into the connector. After several attempts at trying to get the repair wire and terminal from the local Ford dealer, I finally got the correct one, spliced it into the circuit, and code was gone for good.
I have heard several arguments about how to check circuits: what tool to use, back probe, pierce the wire, don’t disconnect the plug, etc. I could find reasons to agree or disagree with any of these methods. Is any one way correct for every application? In my opinion, no. It depends on what conditions and circumstances we run into on a case-by-case basis. It also depends on what test equipment you are comfortable with and know how to use properly.
My second case study is about a 2012 Nissan Murano 3.5L with the RE0F09B CVT. This one came in with three codes: P0845 (transmission fluid pressure sen/sw B), P0841 (transmission fluid pressure sen/sw A) and P1715 (input/primary speed sensor).
This one was straightforward. It was highly improbable that two pressure sensors and a speed sensor failed simultaneously, so whenever I see something like this, I try to find what is common for all the involved components. A review of the circuit revealed that all shared the same power wire from the TCM. Very suspect.
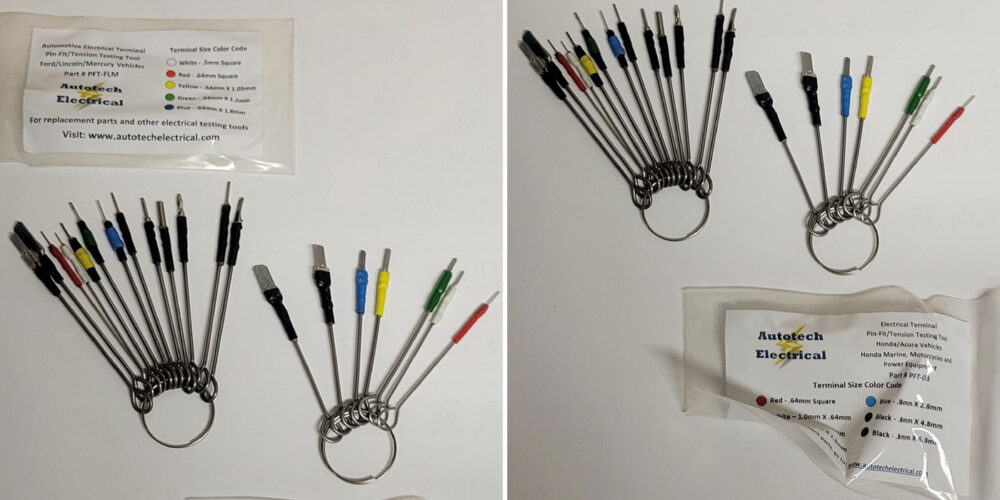
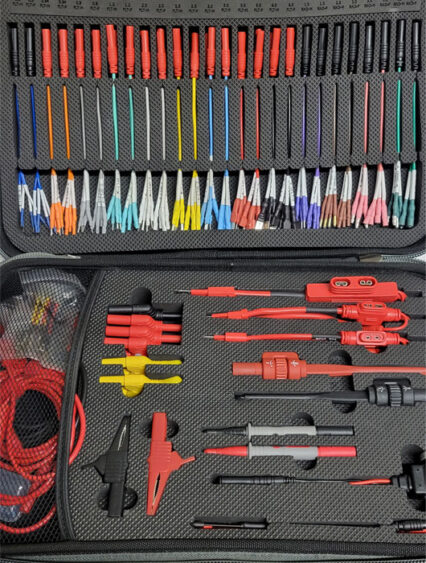
I disconnected the case connector and checked for 5V on the power supply circuit. It correctly measured 5V there. Shoot…I thought for sure I was going to nail this one on the first shot. I moved on to checking grounds and internal components and could not find anything wrong until I checked voltage on the control side of the pressure sensors, and it was very low. I thought about this for a moment and then grabbed my trusty pin-fit tools from Autotech Electrical. They now offer an “all makes” set that is very reasonably priced. (See Figure 3).
Pin 20 on the case connector wiring was completely spread out. (See Figure 4).
Trying to get a replacement pigtail or just a wire from Nissan is next to impossible, but I did find a core at our Core and Teardown facility that had a connector still attached. Sometimes it is handy having thousands of cores available for me to pick stuff from when needed. After splicing the new wire and terminal into the circuit, all was well with this CVT again.
Pin-fit has always been a diagnostic challenge, but for some reason it seems to be getting worse for us in the transmission industry. I cannot say if it is because the pins are getting smaller or if sub-par materials are being used, and it is certainly affecting several makes of vehicles. We see it on domestic, Asian, and European vehicles alike. Having the proper tools to determine if a particular terminal is the cause is the key to success here.
Figure 5 shows another set of tools that I believe is crucial to electrical testing, again from AESwave: the Utest Advanced Terminal Test Kit.
I can’t tell you how many times I have asked a tech, “Is the connector ok?” and I get a “Yup, looks ok” response. Usually a pin-fit issue cannot be seen with a quick visual inspection; you must have tools to check it, and jamming a paperclip into the terminal is not the way to test it. Sometimes that can cause damage where the proper purpose-built probes aim to protect the integrity of the circuit.
Read more stories in our R&R Tech series here.
Chris Adams started with Certified Transmission in 1986 as an R&R technician, and currently works as a diagnostic lead and trainer. His current duties involve training and advising Certified’s retail diagnosticians, as well as assisting in the research and development of their remanufactured products. He is also holds ASE Master and L1 certifications.