One of the things I have always enjoyed about this job is when we are able to help another shop out with a problem that they have been fighting for a while and just have not been able to find the source of the problem. The following story is one of those situations, while it may not be something you see often, it does show how getting a new set of eyes on something can be of real benefit.
The vehicle was a 2004 Hyundai Santa Fe AWD equipped with a 3.5L engine with 181,000 miles on the odometer. As previously stated, this vehicle had been to another shop for some work before it came to us, and upon arriving at our shop, it was explained that the vehicle owner had brought the vehicle to them with the complaint of a clicking sound while turning. The shop had inspected the vehicle and found that the sound was being caused by a worn CV axle on the passenger side where it goes into the PTU. On the surface, this seemed like a basic issue that would be easily corrected by replacing the faulty axle.
A replacement axle was approved by the customer and was replaced. According to the shop, the vehicle was test-driven after the replacement and appeared to be functioning properly, so it was delivered back to the customer. However, after a short time the vehicle returned to the shop on a tow truck and had no movement. Inspection revealed that the axle that had just been replaced had partially backed out of the PTU. The installing shop removed the axle and did not see any reason for the axle to have come out as the retention clip was in place and looked perfectly good, so they attempted to put the axle back in. This is where they ran into a problem.
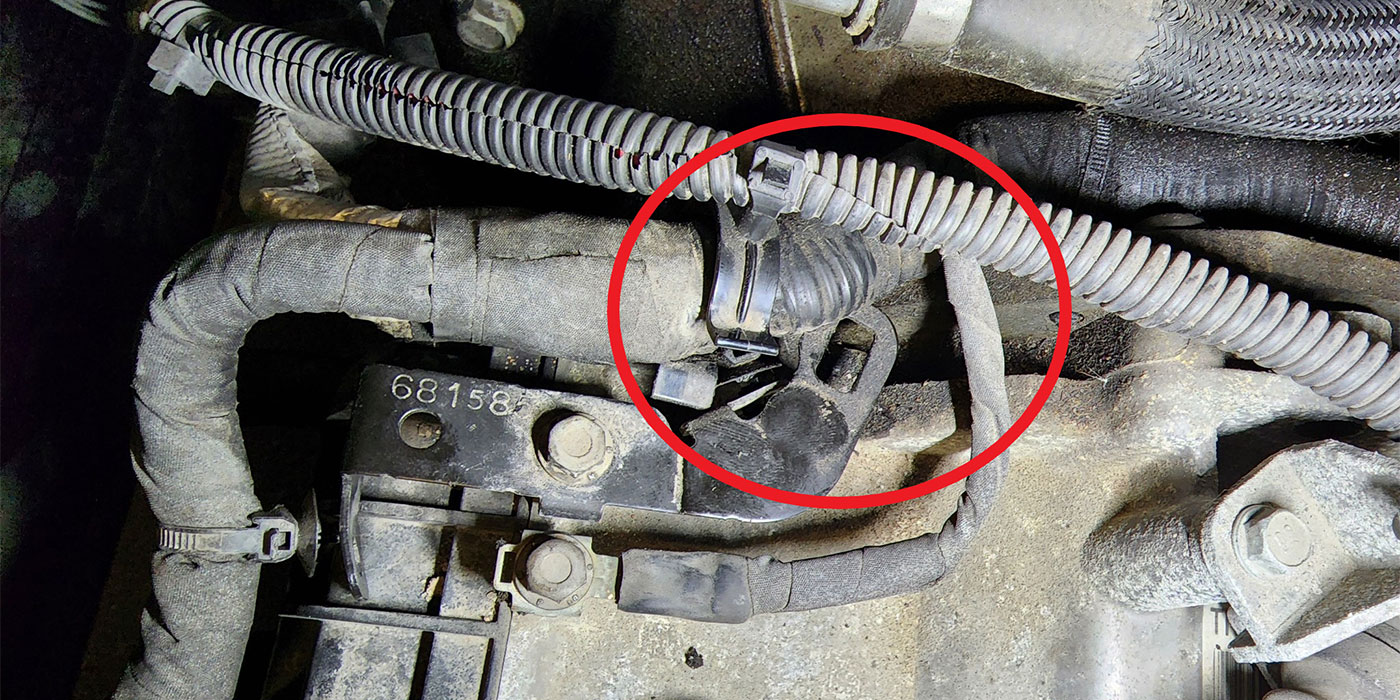
The axle would not fully engage into the PTU. Since they still had the original axle they attempted to install it, but had the same results. That is when they called us and had the vehicle towed to our shop. The previous shop provided us with both the original axle as well as the replacement so that we could inspect and compare them. When we got the vehicle up on the hoist we found that the passenger axle was out of the PTU past the sealing surface. It was solidly in place and would not engage any further. At first, we thought that it could be the wrong axle, but we quickly confirmed that the part number was correct and that it matched the original identically.
Once we removed the axle from the PTU, we took a good look at the PTU shaft protruding from the unit that the axle engages onto.
The stub shaft coming out of the PTU appeared to have quite a bit of endplay. When moving it in and out it would travel almost 3/8” both ways. This seemed like an excessive amount, and it would certainly make it nearly impossible to get the CV axle to engage to the clip when trying to push it onto the shaft due to the inward movement of the stub shaft.
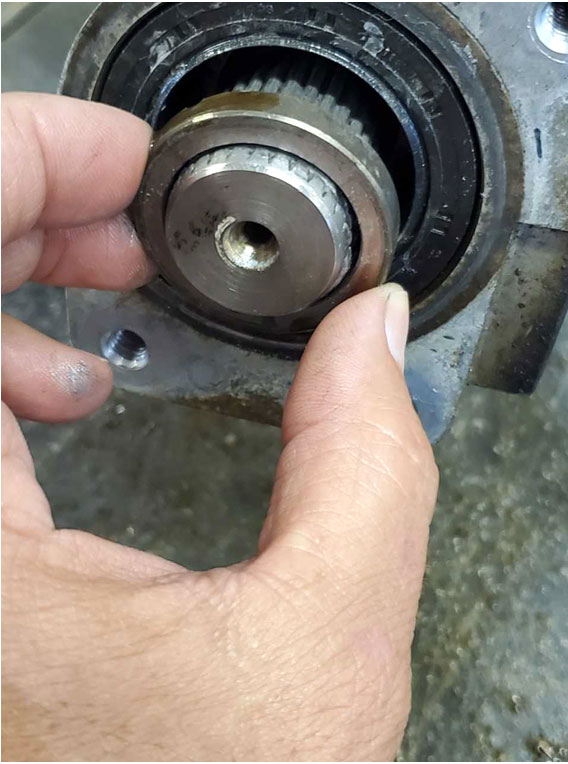
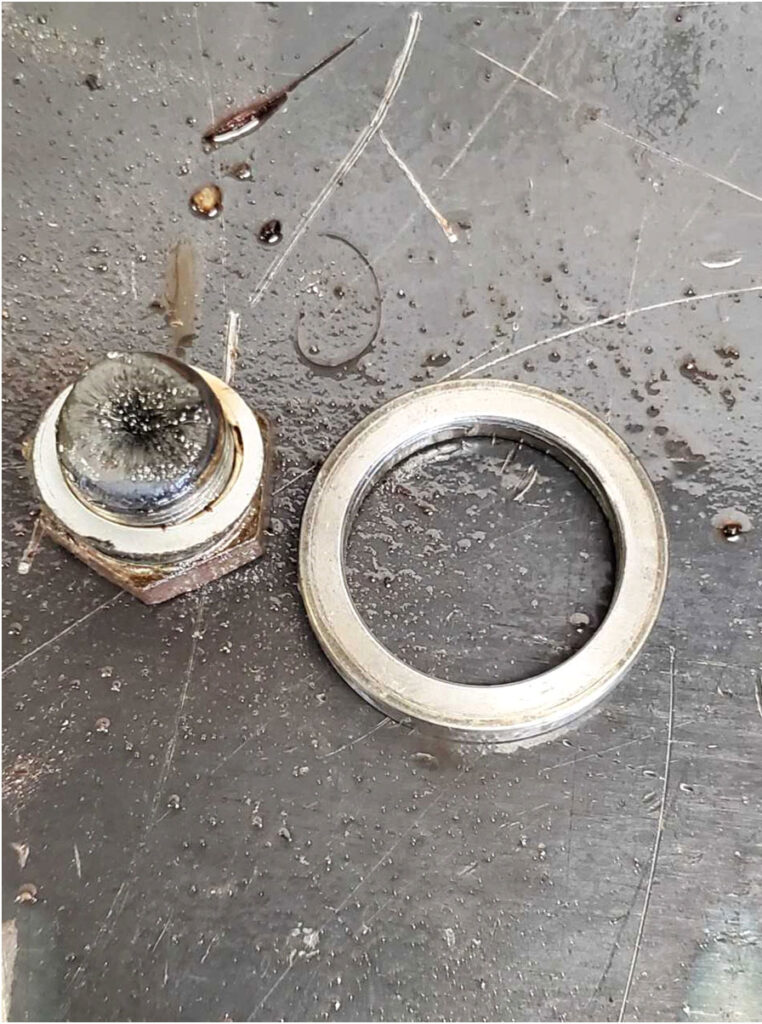
At this point it seemed obvious why the axle would no longer stay engaged, but why was there so much movement in the stub? We decided it would be a good idea to pull the drain plug and see if there was any debris inside the PTU. The plug had metal all over it telling us something was indeed coming apart. We proceeded to pull the axle seal to get a better view inside. Once the seal was out, we were able to see what was causing the stub shaft to have excessive endplay.
The stub shaft on this PTU is retained by a thick ring that is pressed onto the machined portion of the shaft. This ring had come loose from the stub shaft, causing the excessive movement in the stub shaft.
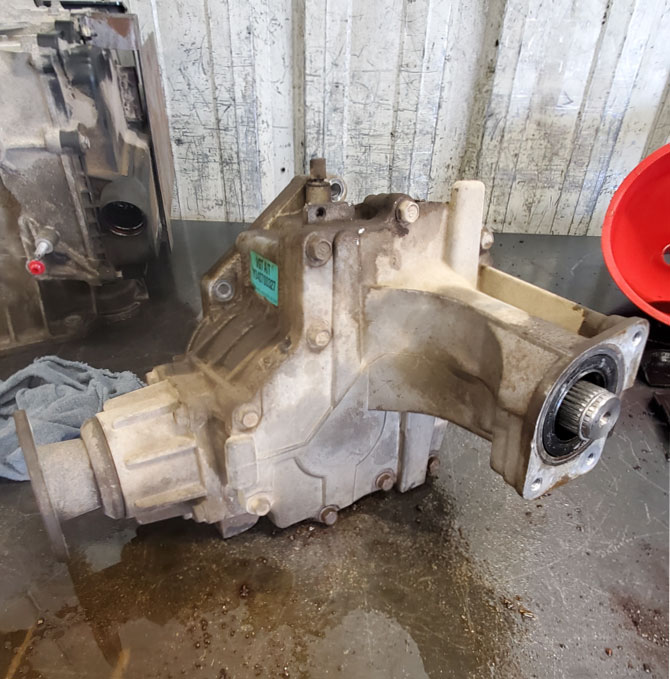
When first looking at everything you could not tell the ring was loose and floating on the shaft as seen in figure 1 at the top of the page. We pulled up an exploded view of the PTU and confirmed that the ring was supposed to be pressed onto the stub shaft. The ring had some witness marks on it where the axle had been contacting it, likely while trying to seat the axle. It was not clear how the ring had come loose but it was clear that it was the reason for the issue we were having. At this point we contacted to original shop and explained what we had found. They approved replacement of the PTU, so we moved forward with the repair.
We replaced the PTU and then installed the new axle with no further issue with engagement into the clip on the stub shaft. The vehicle was test-driven and cleared for delivery to the customer. The original shop was very thankful that we were able to find the source of the problem and get their customer back on the road. While we do see a lot of electrical gremlins coming into our shop, sometimes it is the old school hands-on problems that can still throw us the occasional curveball.
The Santa Fe has been out on the road for several weeks and passed a recent follow-up inspection. Another pleased customer and successful repair entry in the history books.
Read more from TD’s R&R Tech series of articles here.
About the author: Dana joined the Certified Transmission team in 1991. Dana has worked in all positions at our Lincoln, Nebraska location, starting as an R&R technician and now working as our diagnostician for that facility. He enjoys car racing and spending time with family and friends.