In this article we will discuss bad connections, starting with the battery and ending with, well, the battery. Seemingly every week, we at Certified Transmission get a vehicle in that has an issue at the battery terminals; and if it isn’t causing an issue right now, it will sooner or later.
All the following cars in this article came into our shop with reported transmission problems. We seem to trace these “transmission problems” to battery issues more often of late.
Our first example is a 2009 Honda Civic. The Civic came into our shop from another shop that couldn’t figure out the problem. The root cause turned out to be something basic: the tech who first looked at it just skipped some of the most basic initial diagnostic steps and looked right past the real problem.
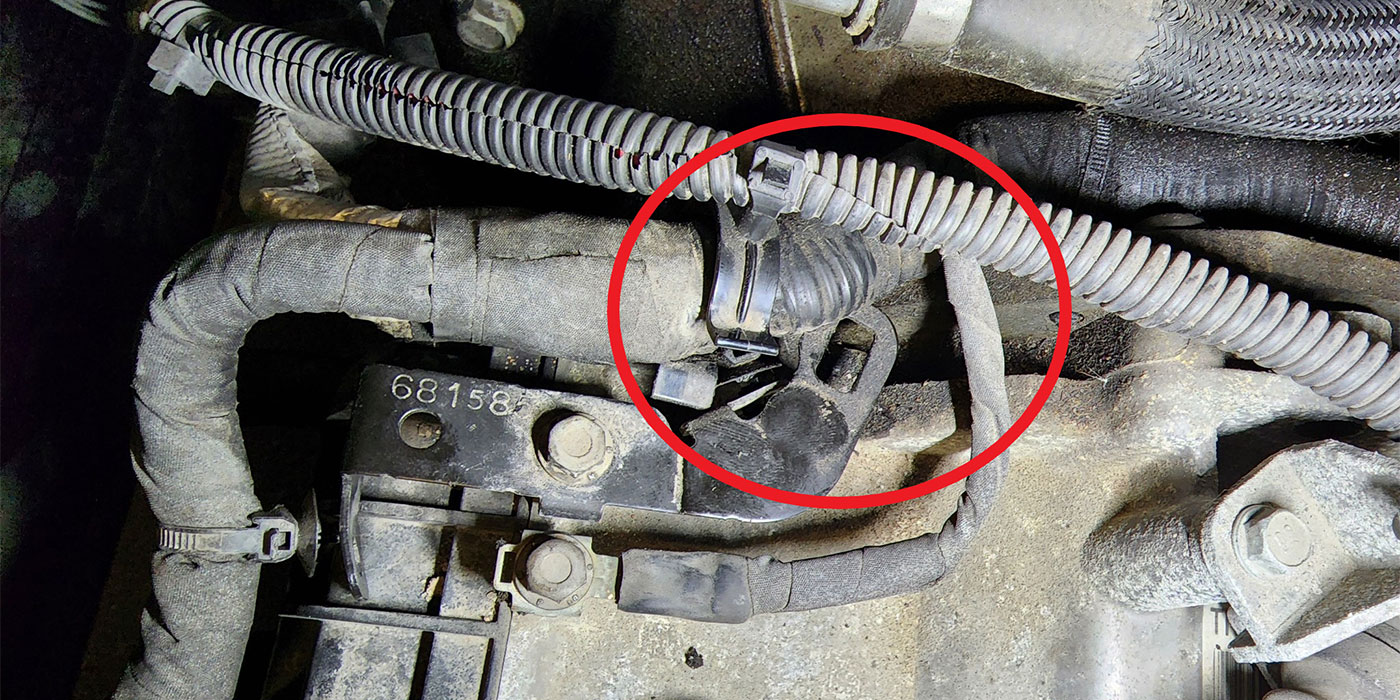
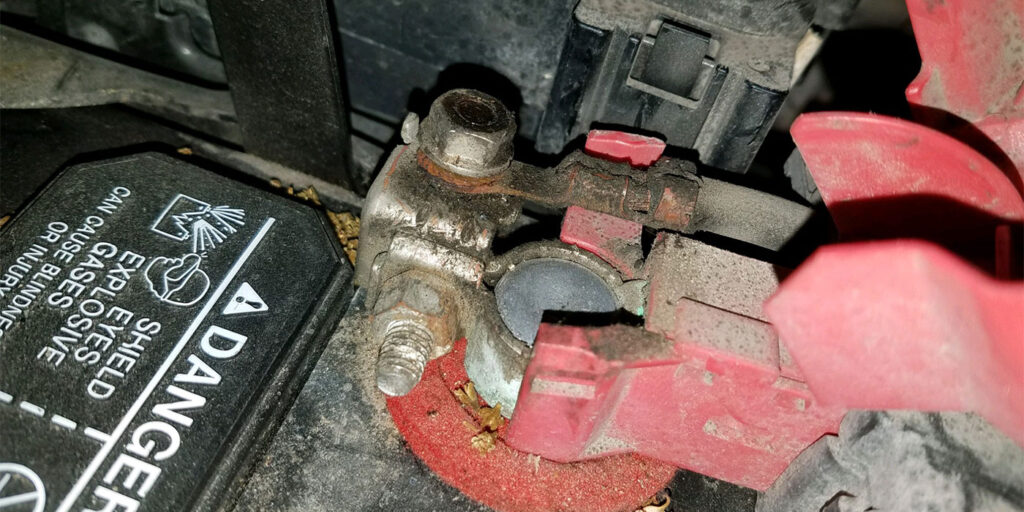
In this case, this customer came in with printed wiring diagrams and an Alldata diagnostic test. It had code P0966 (A-T clutch pressure control solenoid valve “B” open or short) in permanent memory. This was an immediate hard code that created a failsafe condition, so I did not even take it off the lot. While performing initial diagnostics, I opened the hood to see a nail in the negative battery cable post between the post and cable end. (See Figure 1).
The cable ends must have either been really stretched out, or corrosion and previous cleaning had made them too large to fit tightly anymore. Since everything starts and ends at the battery, I got some post shims and cleaned up the battery cable to make the connections clean and tight.
I cleared the codes and went for a road test. No codes were set, and the transmission seemed to work correctly. As a side note, this transmission and the following example have their original transmissions in the car, and neither have been back to the shop since.
Read more stories in our R&R Tech series here.
The next example was a 2014 Honda Pilot that was towed in by the customer. The customer’s concerns were that the vehicle wouldn’t move, the dash lights were on and the car would not shift out of Park. I did the normal preliminary evaluation then started the engine. I got it out of Park by using the hidden button in the console by the shifter and got it into the shop. I scanned the system to find a U0122 code (F CAN malfunction ECM / PCM-VSA control module unit) in permanent memory. There were multiple other codes stored in almost every module on the vehicle.
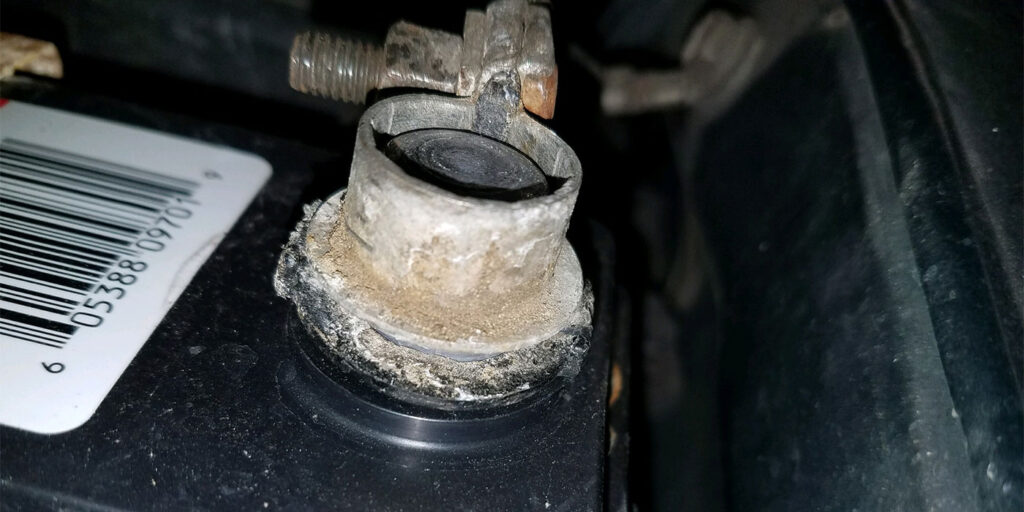
I opened the hood to start checking things out and saw that there was a new battery in the car. From the picture (Figure 2) it doesn’t look like a new battery because of a very poor installation and a big plastic cover over the battery.
If you look closely at the nut at the top of the cable, you can see that it was loose and that this was the cause of all the problems. Again, all I did was clean up the cable ends, tighten everything up then clear the codes. It then came out of Park normally, and I drove it for 20 miles, and everything worked normally. No codes came back, it came out of Park all the time, and the SUV never came back. Another simple success.
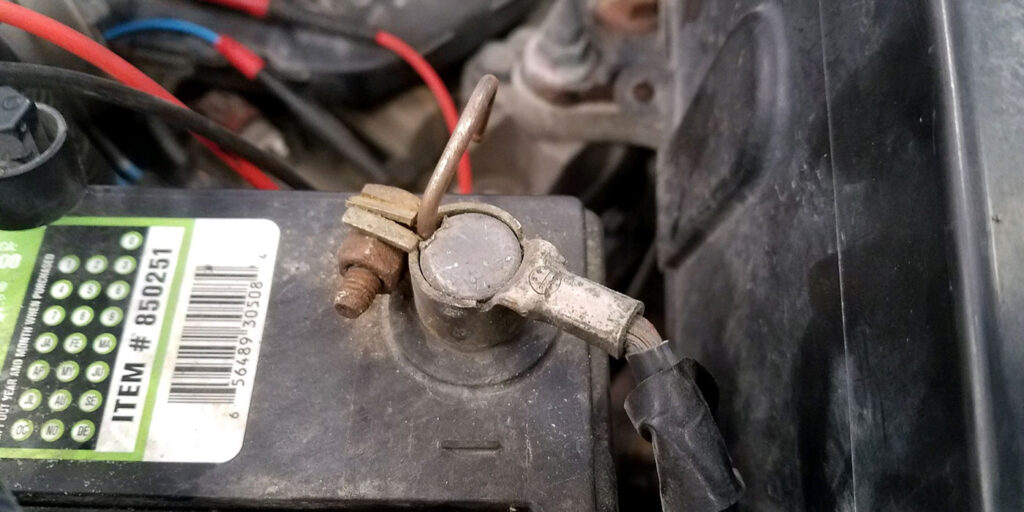
Our next example came from a shop that buys a lot of reman transmissions from us and refers a lot of customers to us. It was a 1999 Toyota 4Runner which had the dash light on. This was our transmission that was purchased about three weeks earlier, so I scanned it and there was a P0770 code (solenoid E electrical). I had also noted on the repair order that the battery cable ends needed to be addressed. The negative terminal was only put onto the post about halfway. (See Figure 3).
Was this (Figure 4) an attempt at a fix?
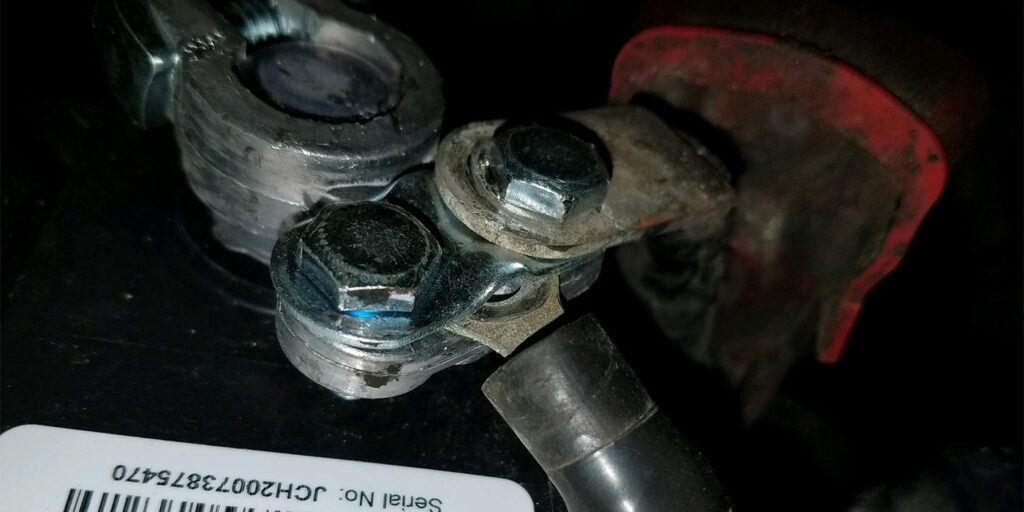
Figure four is not a permanent fix for cable ends at all, obviously. Just to be sure that the transmission was OK I checked the resistance of all three of the solenoids. (Side note: Remember back in the day when there were only 1-3 solenoids? Sigh.) They are all supposed to be between 11-15 Ω and these were all at 13 Ω, so for the fix we have permanent crimpable cable ends for the positive post. I cleaned and reinstalled the negative cable all the way onto the battery post. I cleared the codes and delivered the vehicle back to the customer. All of these issues were easily verified by a voltage drop test, which is about the simplest test you can do right at the start of a diagnosis to keep yourself from going down the wrong path.
One final example is one that came in very recently. It was a Hyundai diagnosed at another shop as having a bad TCM. A new TCM replacement was not available, so the customer showed up at our shop with a used TCM and just wanted us to install and program it. But wait for it… (Figure 5).
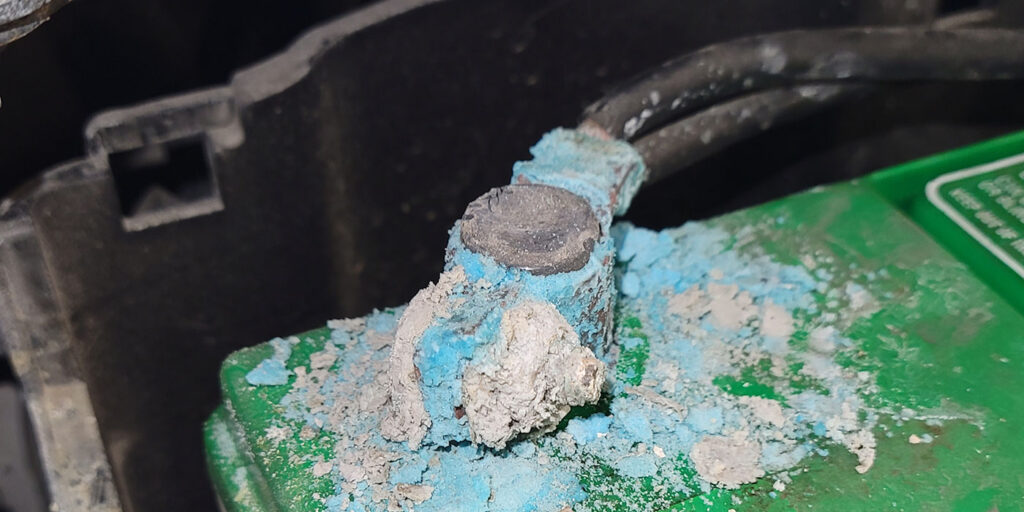
Once again, I cleaned up battery terminals and problem was fixed. This really isn’t rocket science; repair the obvious and then recheck.
There is an easy fix for bad battery terminals, and it is not the emergency “cheapo” cable repair ends with the two bolts that clamp a bare cable into like what was shown in figure four. Those were never meant to be a permanent fix, yet we see shops every day using them as if they were.
Hydraulic crimpers are available from multiple suppliers, and they are inexpensive yet very functional. I was skeptical at first, so I did a test. The replacement crimpable ends are zinc-coated copper and available at most auto parts supply stores in different sizes. I crimped one together and then cut it in half; the crimper applies so much pressure that the cable and terminal almost fuse together to form a solid piece of copper. (See Figure 6).
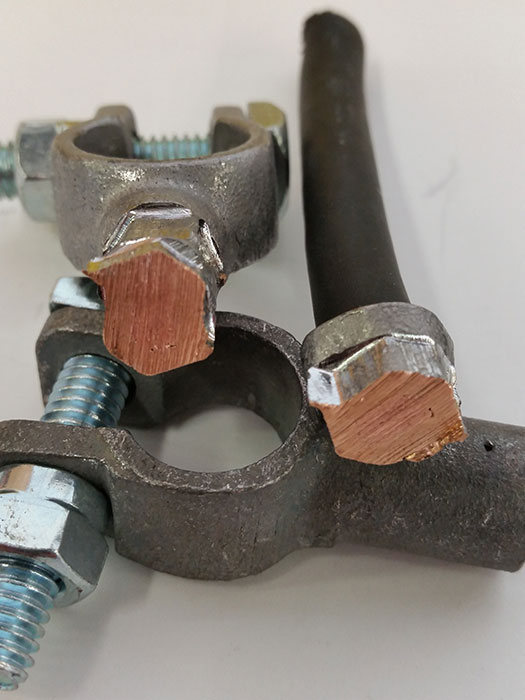
This, along with some double-wall shrink tubing, resulted in a permanent, reliable repair.
This article was contributed by Mike Greer, who has been with Certified Transmission since 1996 and been in the industry since 1987. He is an ASE master technician and has served as a master builder for the company in the past.