R&R Tech
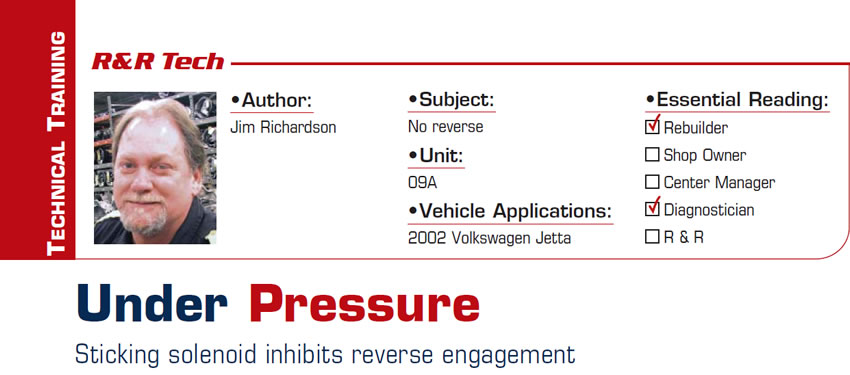
- Subject: No reverse
- Unit: 09A
- Vehicle Application: 2002 Volkswagen Jetta
- Essential Reading: Rebuilder, Diagnostician
- Author: Jim Richardson
With the quantity and price of solenoids becoming a substantial additional investment in the price of a transmission reman, testing and reclaiming the solenoids has become mandatory.
Every once in a while you run across a scenario that has you scratching your head. This was one of those units.
Our warranty department received a call from one of our retail locations that had a 2002 Volkswagen Jetta with the 09A transaxle. The unit had been out about 300 miles and came back because of a no-reverse complaint. All the external conditions that could potentially inhibit reverse were investigated, and everything was working properly. It was determined the unit would have to come out for further evaluation.
We received the unit back at the plant and ran it on the dyno. Sure enough, when reverse was selected you could feel a partial engagement, then a neutral. The drive engagement was fine. After air-checking the unit I started with the valve body, taking it apart. Everything looked good – all the valves were free, and the casting surfaces, separator plate and gaskets all looked good – no problem found.
I had all the solenoids retested, and they checked out fine.
OK, it was time to go into the unit, checking all components on the way out. Nothing was stripped or broken, and the unit was assembled correctly. The unit was reassembled and was run on the dyno; still no reverse engagement and no low/reverse-clutch pressure. Something is inhibiting reverse, somehow, somewhere.
Forget about looking at an oil schematic; Volkswagen does not publish them. We pulled the unit off the dyno and removed and tested all the solenoids again, and they retested good. I replaced the full set of solenoids as a starting point and put the unit back on the dyno. It had a good reverse now. The issue was resolved; now, it was time to figure out why.

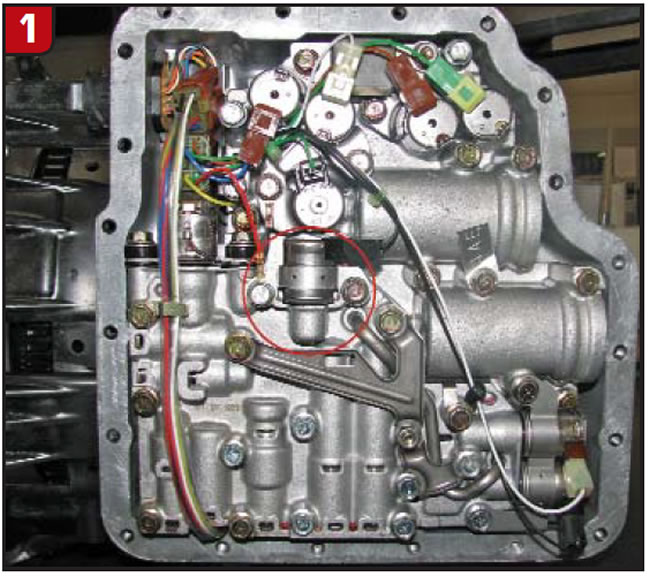
With all the solenoids in hand, it was off to the solenoid department. All the solenoids were retested, and all passed again. We lowered our control pressure on the solenoid dyno from our standard 80 psi to 50 psi, and all passed except one solenoid; the low-clutch timing solenoid (Figure 1) stuck on. We increased the control pressure to 75 psi and it would work properly.
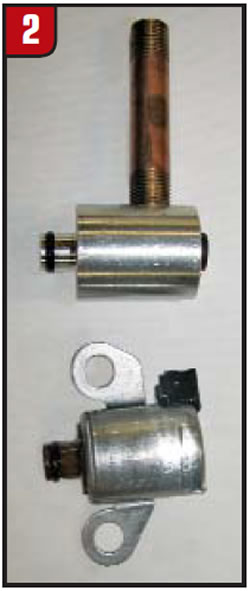
Now it was time to duplicate the actual operating pressure of the solenoid in the vehicle. To do this required some creative engineering. Our machine shop fabricated a “test” solenoid with a pressure port (Figure 2).
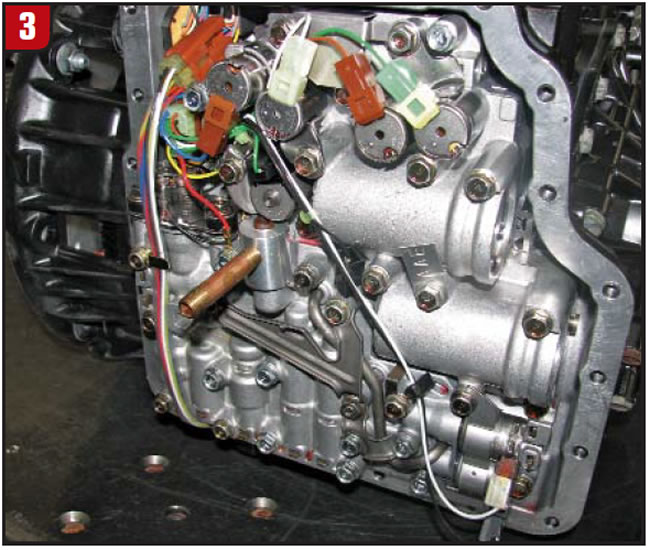
We installed the test solenoid in the unit (Figure 3) and installed the pan (Figure 4).

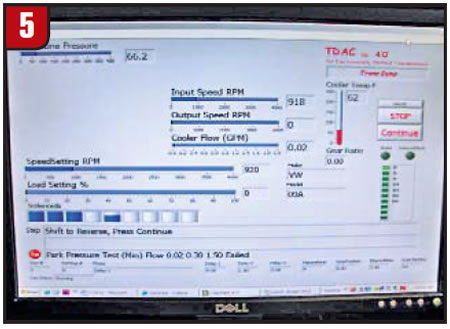
Then the vehicle was started, and the actual solenoid operating pressure was about 66 psi (Figure 5). It was amazing that only a 9-psi difference of control pressure would influence whether the solenoid worked properly or failed (stuck). Now that we had determined when the solenoid would fail we had to find out what was going on inside it.
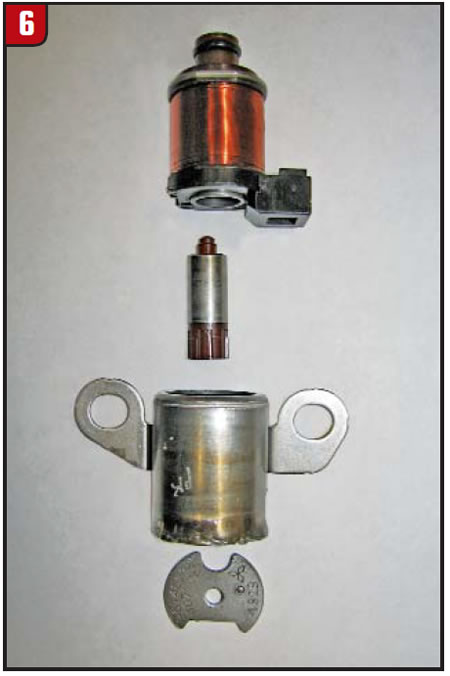
The solenoid was disassembled and inspected (Figure 6). There was nothing obvious with the pintle or solenoid body.
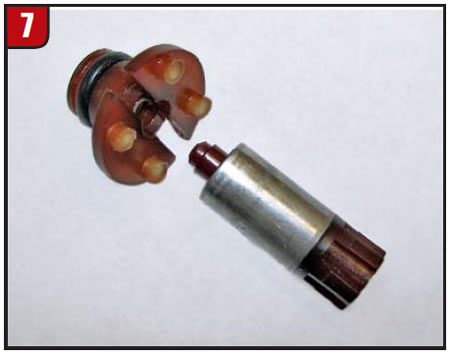
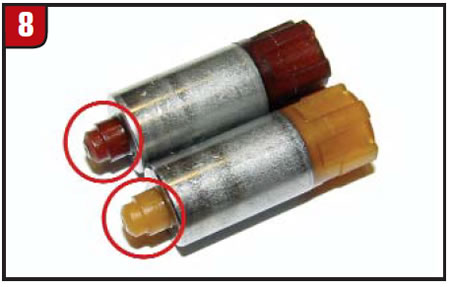
After studying the pieces to see how the solenoid operated mechanically, I noticed that the small plastic snout of the pintle would seal in the corresponding pocket in the plastic snout of the solenoid to shut off the flow of oil. What was happening was that the tip of the pintle would wear just enough that it was sticking in the sealing pocket of the solenoid snout (figures 7 and 8).
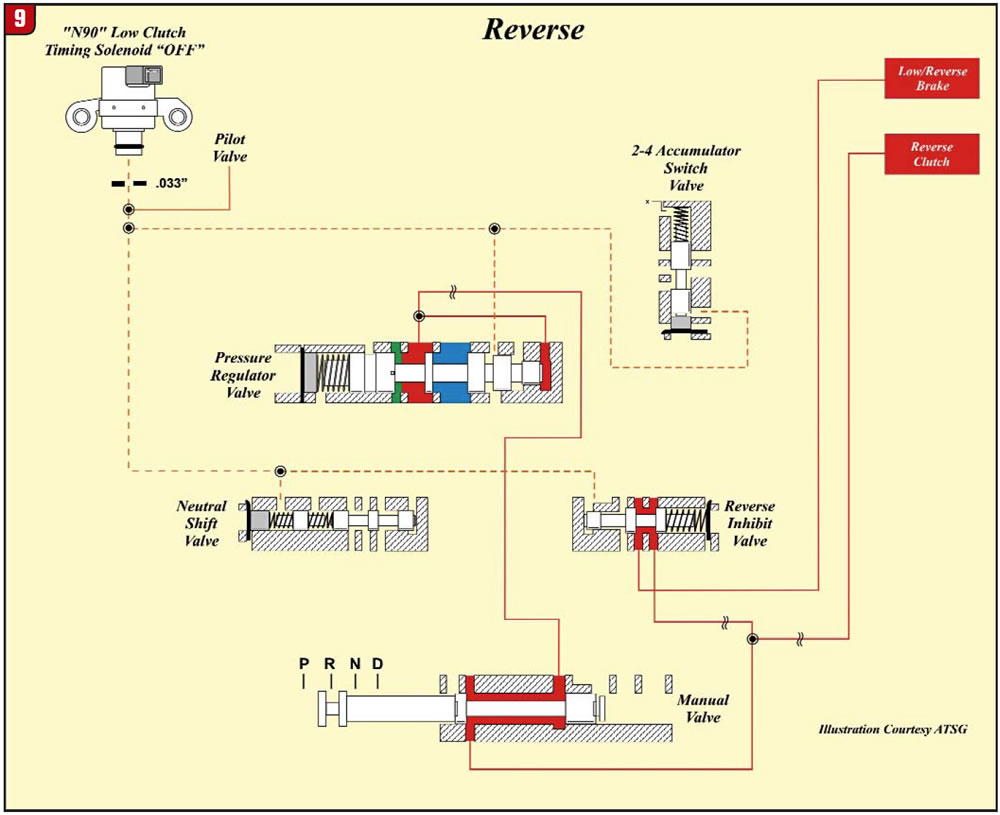
Now we knew when and how the solenoid was failing. It was time to see why the unit had no reverse as a result of the issue. This is a normally off solenoid, so oil is flowing through the solenoid and exhausting out the back. Figure 9 shows the circuit working properly.
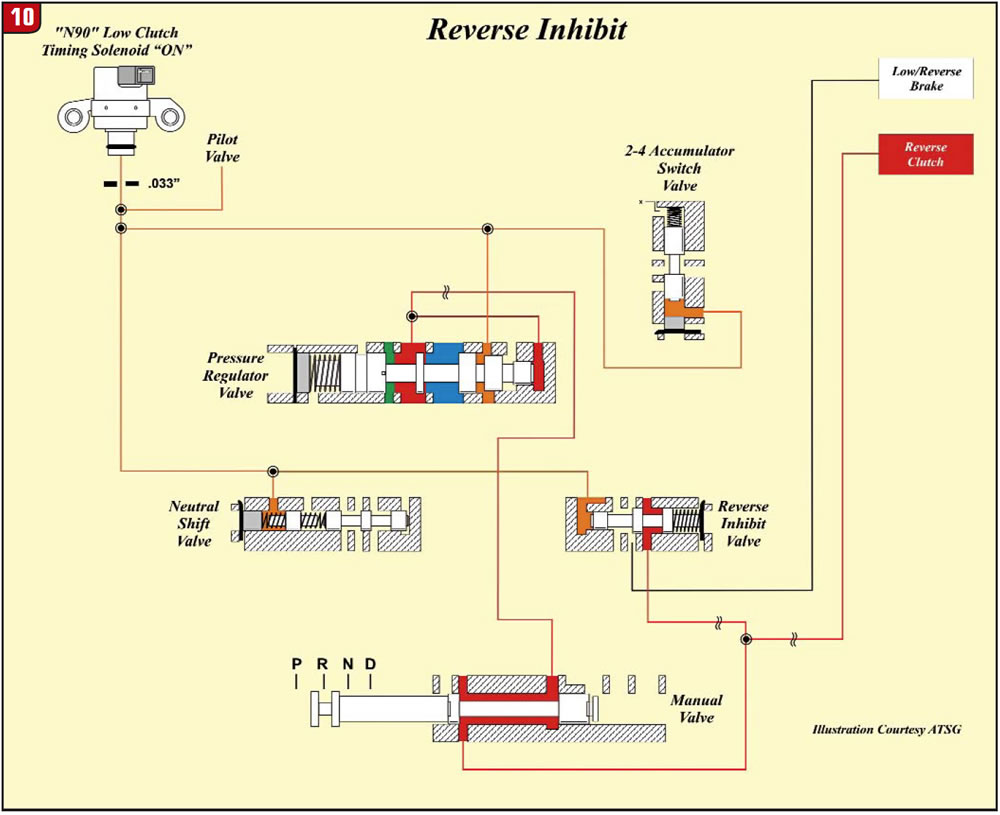
Now enter the solenoid with the sticking pintle. With the solenoid mechanically stuck on, the circuit became live. This caused the reverse-inhibit valve to stroke. With this valve in the stroked position the feed oil to the low/reverse brake is cut off, causing no reverse or inhibited reverse (Figure 10). I was amazed at how small a difference in operating pressure made such a huge difference in the solenoid operation.
After working with the other solenoids in this unit we are finding that the 09A solenoids are prone to being “sticky,” and we are very picky about reclaiming these solenoids.
Thanks to Jim Dial of ATSG for providing the schematics on the reverse circuit for this unit. It makes understanding what is going on that much easier.
Jim Richardson has been with Certified more than 20 years and is one of the company’s 10 technical directors.