R&R Tech
- Subject: No third gear
- Unit: 4T80-E
- Essential Reading: Rebuilder, Diagnostician, R & R
- Author: Jim Griswa
This story involves a complaint of no third gear on a 4T80-E transaxle. However, the lesson to be learned can be applied to almost all root-cause diagnosis and troubleshooting tasks.
The material for this article involves a unit that was built for our stock inventory and, at the dyno, had no third gear. This would normally lead me to believe that it had a stuck 2-3 shift valve or bad 2-3 shift solenoid. Simply pull the lower pan, swap out the solenoid and the problem should be fixed – or that was my first thought.
Well, you guessed it; not so simple. I still had the same issue. Now I had to tear the unit back down and go after the 2-3 shift valve. After pulling the lower pan and removing the lower valve body, I decided to check all the valves, gaskets and checkballs to make sure nothing was left loose or out and to verify the solenoid wiring.
Everything checked out, so I thought it must be in the 2-3 valve circuit. It must be a hidden cross leak or stuck valve. I knew it was not in the clutch-drum circuit itself because that was verified with an air check during the assembly process. So it was back to the valve body. After all, it’s always the valve body’s fault, right? Let’s just replace it and get this tranny fixed.
I replaced the valve body, and to my surprise the unit still had no third gear. I took the unit back to the bench and now I was thinking that it had to be in the accumulator circuit. Maybe the accumulator seal was cut or the piston itself was causing the issue. Of course, all these items are on the side, so I removed the side cover and the valve body to verify again that all the valves and checkballs were in the correct locations and that the gaskets and the accumulators were correct. Everything checked out perfect.

What now? I remembered that the driven-sprocket support was redesigned and needed the redesigned gasket. Could I have some mismatched parts? Nope, again everything verified correctly. Back to square one.
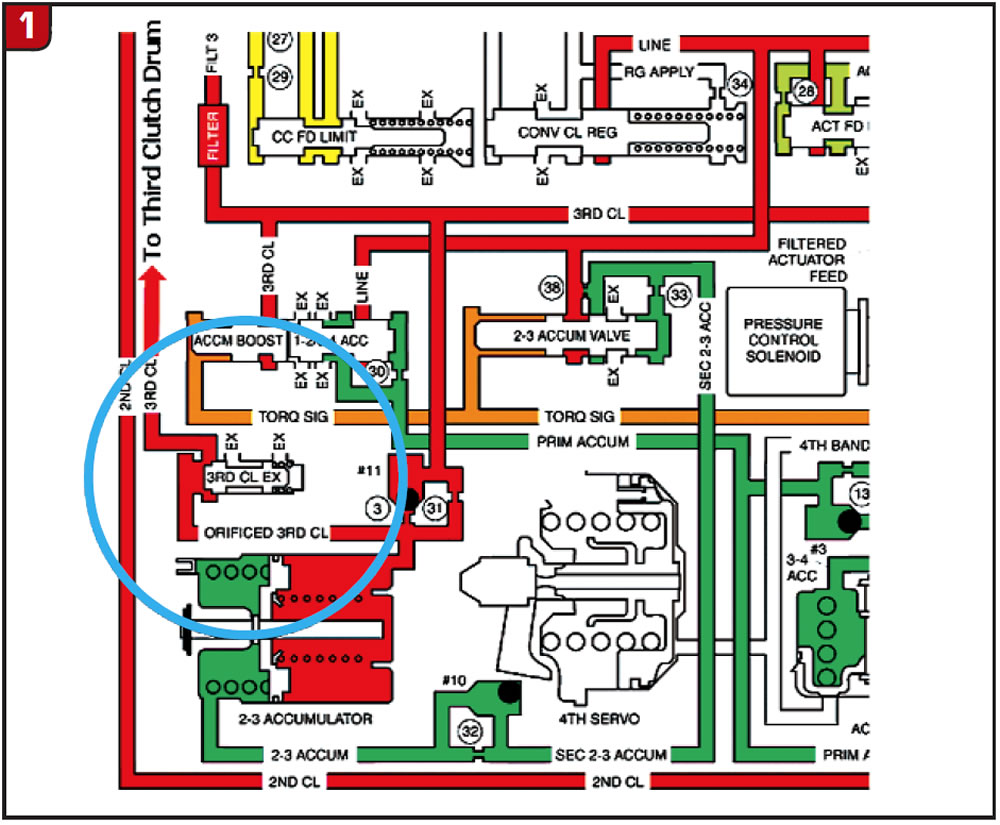
Well, it was time to pull out the oil-flow schematic. I am as guilty as everyone else when it comes to looking at these things. Who really wants to waste time looking at these when we all know how the transmission works, and with all the different directions, colors and pieces – well, just thinking about it makes my head hurt. I had tried everything else so it was time to consult the Hydra-matic book. I thumbed it open to the third-gear section and started following the map, searching out where the oil was flowing from start to finish. I noticed that right before this oil enters the drum it passes through the third-clutch exhaust valve (Figure 1). Just as I thought, nothing I didn’t already know. I had already checked all the valves so this couldn’t be the issue.
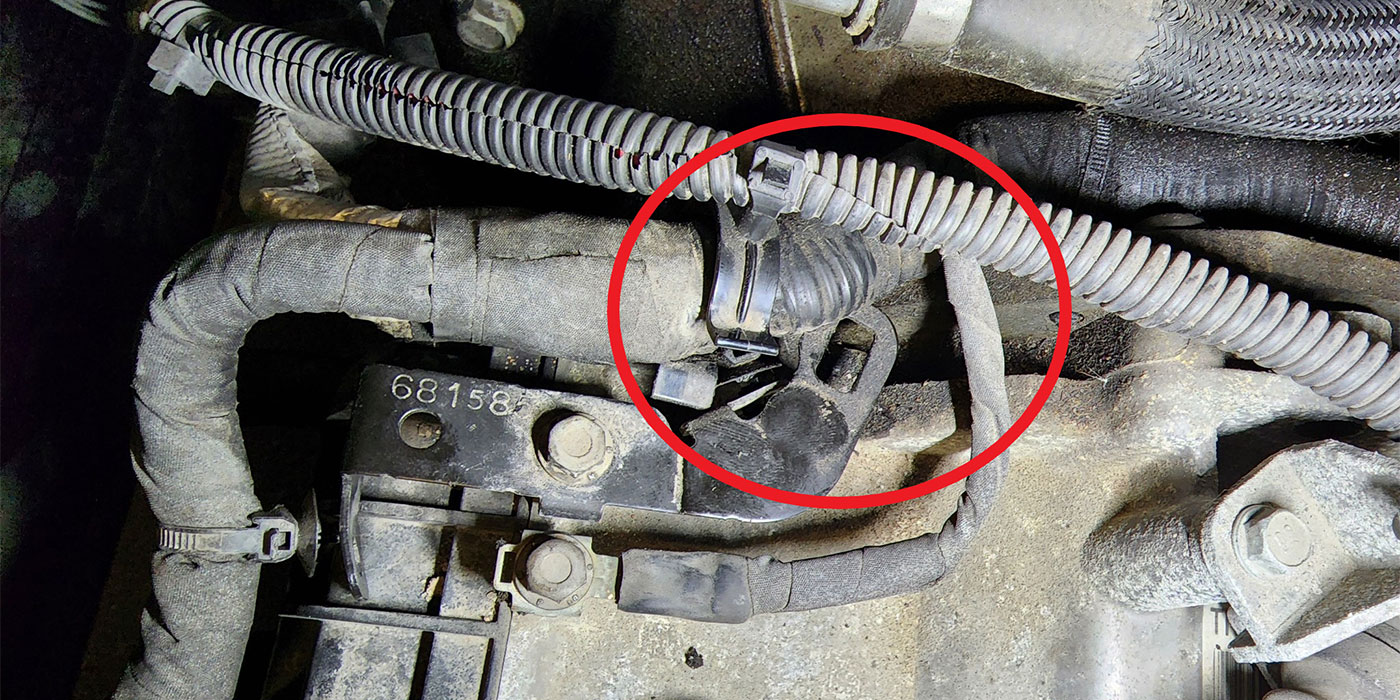
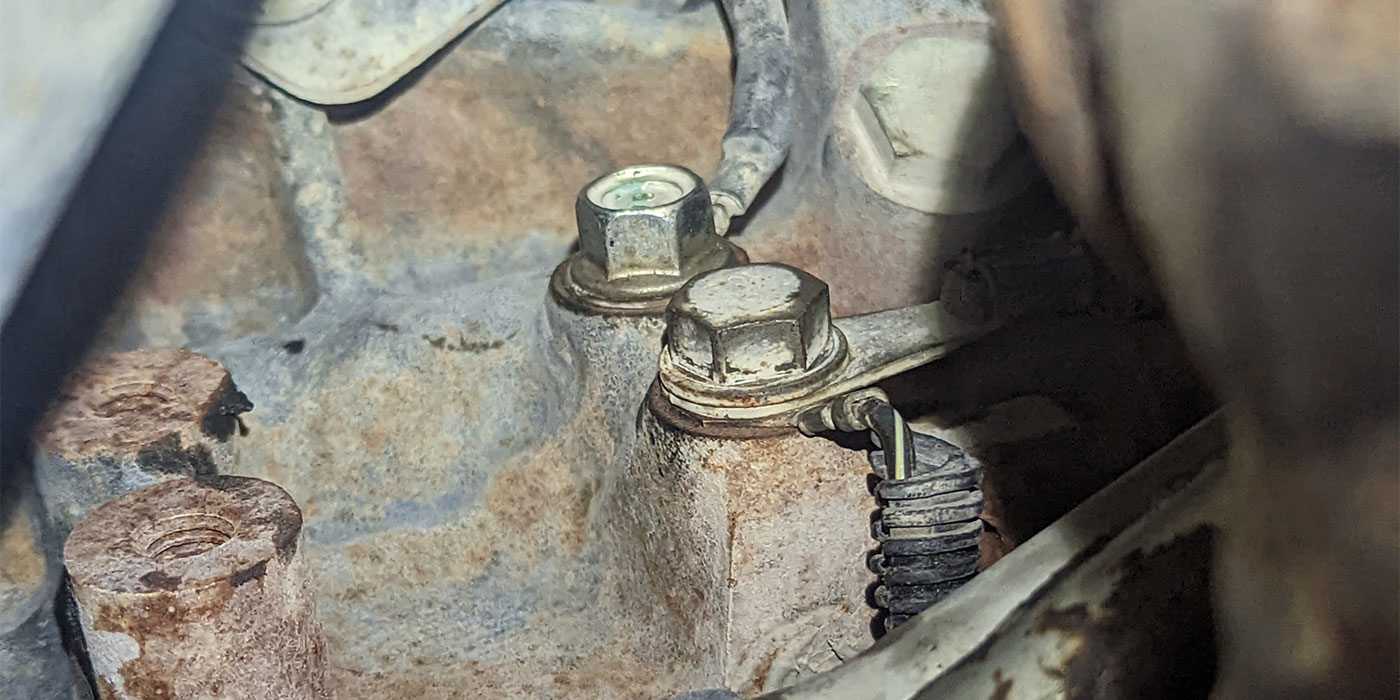
Then I looked at where this valve is, which is in the driven-sprocket support, not the valve body (Figure 2). Well, believe it or not, this valve was not sticking but was worn egg-shaped on the side.
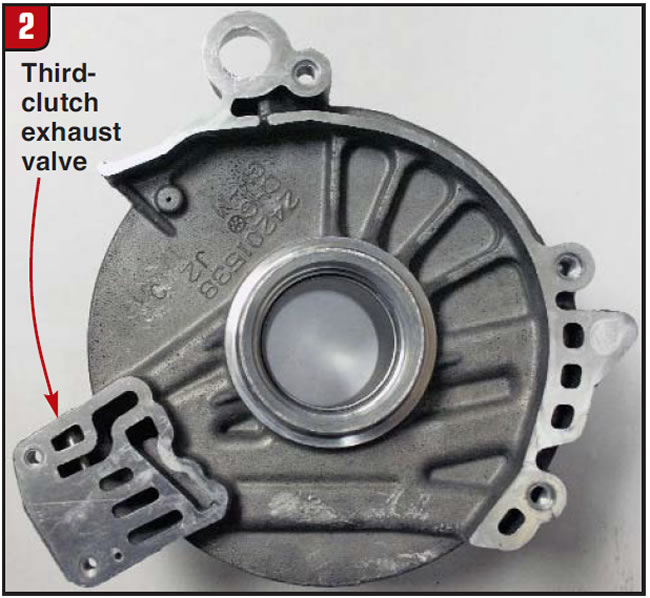
The oil has to apply this valve to reach the clutch drum. Its main purpose is to quickly exhaust the third-clutch fluid. I replaced the sprocket support and finally had a good working unit.
This was one of those rare “once-in-a-lifetime” failures, as I have checked many since then and have not seen another one. But this will occur again, and if you see one now you know what to look for first.
We all focus on the valves in the main valve bodies but often forget the few units that use remote valves in other locations. The moral of the story is that no matter how intimidating or painstaking the oil schematics can be, and even if you think you are 99.99% sure of the function, spend the first few minutes of your diagnosis reviewing the oil-flow charts. It can only make us better, and the time savings is priceless.
Jim Griswa has been with Certified since1988. He has extensive experience as a transmission rebuilder and has been a member of the technical department for more than 10 years.