Tech to Tech
- Author: Brian Manley
- Subject Matter: Diagnosis
- Vehicle Applications: Nissan Sentra; Jeep Wrangler X
- Issue: Blown fuse; soft brake pedal
Inner Sherlock Holmes finally solves the mystery
How often have you accepted a repair knowing that others have been involved? How often are you required to channel your inner Sherlock Holmes? Two recent repair jobs led me to unusual conclusions.
One of my customers brought in a Nissan Sentra that had a habit of blowing its interior-lamp fuse. She would replace the fuse, and then it could fail within hours, or it could take days before it popped.
Most of the time when I see blown fuses, there is a direct connection to either rubbed factory harnesses that aren’t routed with enough free play – sometimes accompanied by a TSB – or it is due to the intervention of human hands during a repair or modification, such as an aftermarket installation.
My initial investigation did not reveal excess current flowing through this circuit, and all my coaxing could not cause my readings to change. Of course, driving the car to lunch caused excess current flow and a blown fuse! My frustration – and we have all been there – was that it was so intermittent that I couldn’t disconnect parts of the circuit and immediately see which branch contained the short circuit.
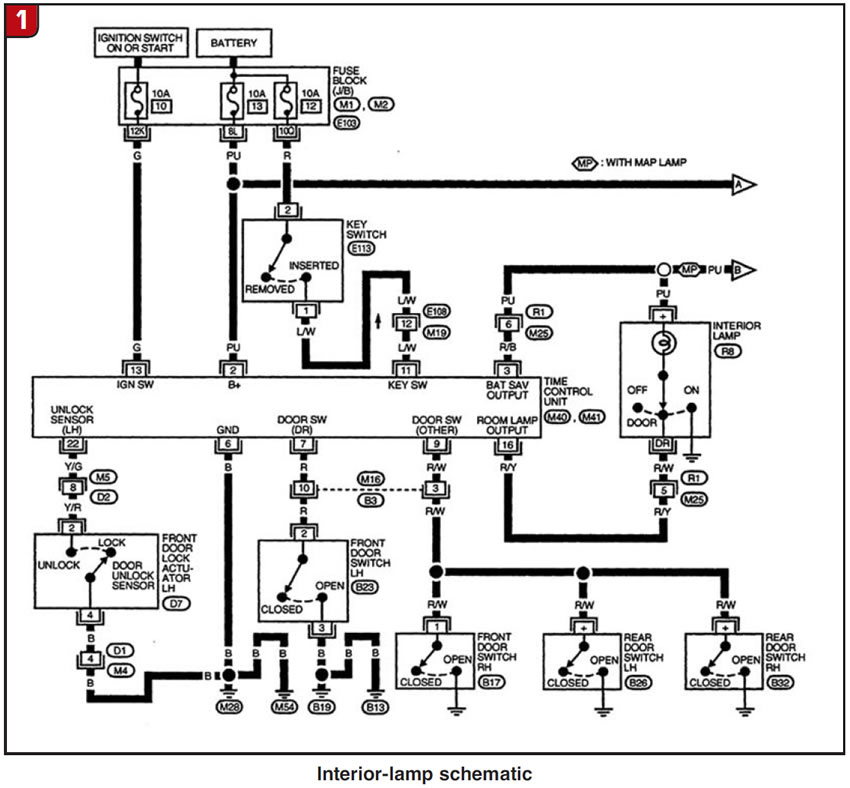
The first move I made was to carefully scrutinize the “room lamp” at the center of the car – just to see whether some of the moving parts had come loose – and when I saw nothing shorting, I removed the entire lamp assembly for inspection. I did not find what I had hoped. So, after studying the schematic (Figure 1), I decided to disconnect the map-light branch, install a new fuse and test-drive. Since it did not pop the fuse, I sent the vehicle home with my customer for a longer test, and the fuse failed the next day.
I was becoming pretty familiar with this Nissan, so I had my customer drive in for a fresh fuse and a new disconnect; this time I unplugged the time-control unit.

Several days later my customer came back in, and I verified that the fuse was intact, but I would only be guessing to blame the time-control unit – and it was hard to find and a wee bit expensive – so I plugged the unit back in and disconnected the room-lamp wire near the left kick panel. Several days later: no blown fuse!
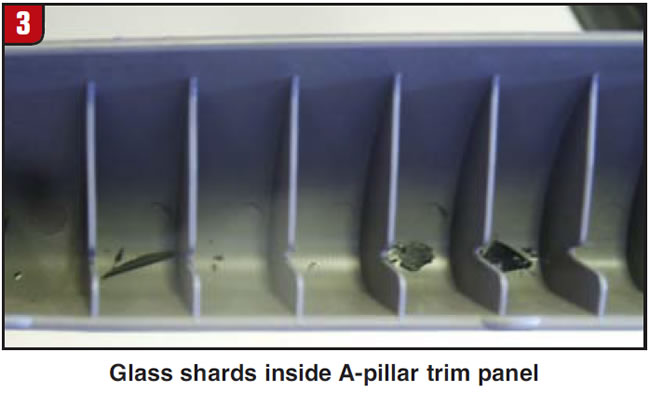
Finally, I felt confident that I had narrowed down one branch as the root cause! Since I had ruled out the overhead switch/lamp assembly as a culprit, I began to disassemble trim panels: The left kick panel all the way up the inside of the “A” pillar, and what I saw in figures 2 and 3 surprised me! Figure 2 shows a twisted and mangled wire in a location that had no screws or moving parts. I could see where the B+ wire was intermittently rubbing against the ground.
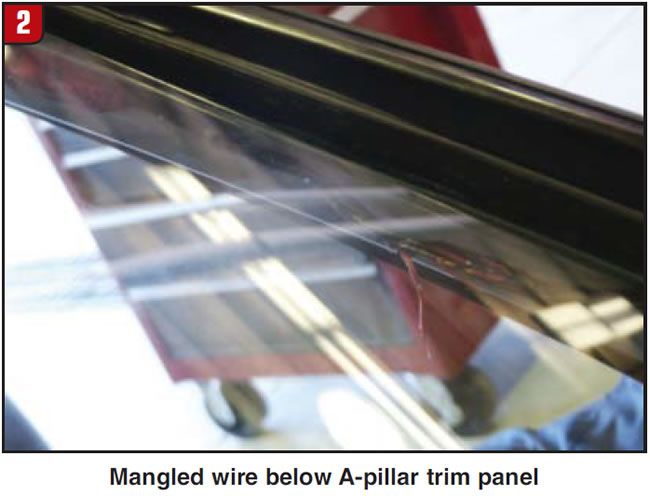
What could have caused such damage? Inside the A-pillar trim piece held the clue: There were shards of glass and a few strands of copper. I called my customer, who verified that she had a windshield replaced “a while back” and that she did not connect the two events because they occurred so far apart. I guess those windshield-removal tools can slip under trim panels and cause damage that goes unnoticed.
My second customer had a late-model Jeep Wrangler X with a complaint of a low, spongy brake pedal. He confirmed the fact that he had recently performed the brake job himself but felt confident in the quality of the parts and the care of his installation. I told him we would find out what was causing his low and spongy pedal.
The first thing I did was drive his Jeep, and the pedal felt as if there were air in the system. It was odd: I could “stab” the brake pedal and get the Jeep to stop very quickly, even from 40 mph, but the excess pedal travel and spongy feel were disconcerting. It finally “grabbed” about halfway down, which was lower than I am used to with these four-wheel-disc systems.
I perused my information system to confirm that this Jeep didn’t require any special procedures after pad and rotor replacement. It was a straightforward system with anti-lock and four-wheel disc. We pulled the wheels for inspection and found nothing out of the ordinary: My customer had replaced front and rear sets of pads and had his rotors machined, which we verified as being still within specification. With no obvious parts or installation issues, we decided to bleed the brake system.
At this point, I truly felt confident that a bleeding would cure the symptoms and we’d have a nice, firm, tall brake pedal. Of course, there was no change in the pedal feel or the operation of the brakes.
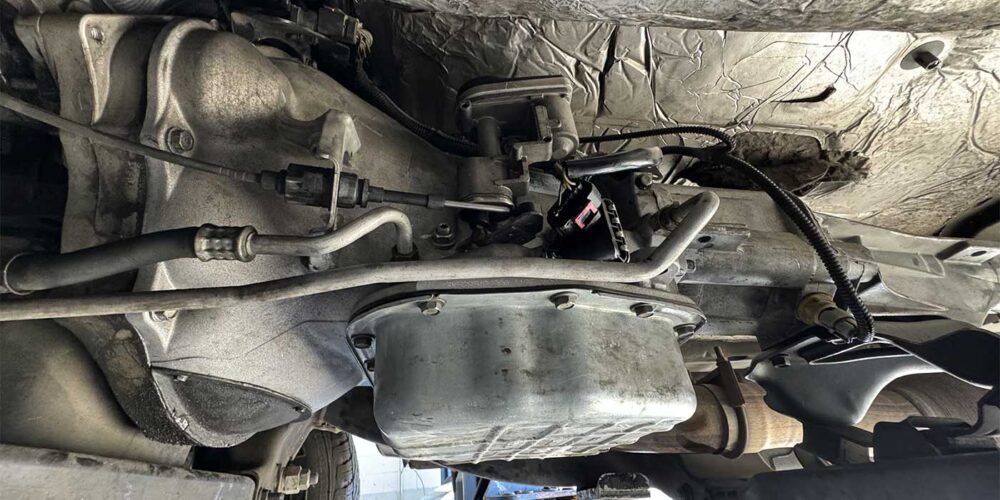
Next, I decided on a complete disassembly of ALL components that my customer had his hands on, and that’s where we found what you see in Figure 4: A bent inboard brake pad! In fact, both inboard rear pads were bent in the same place. Now we were onto something!
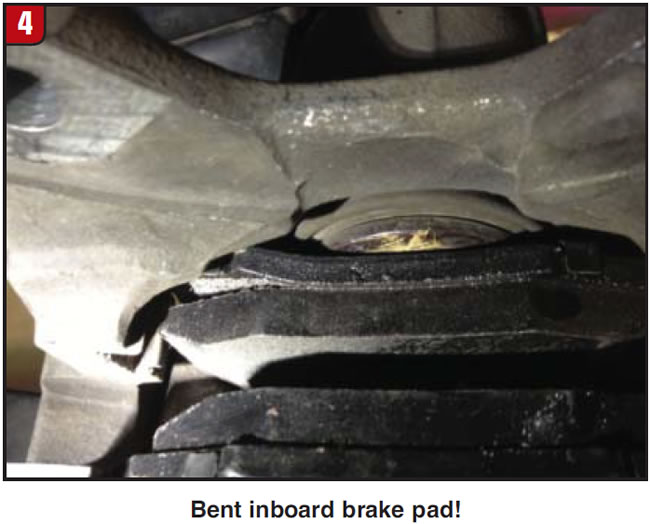
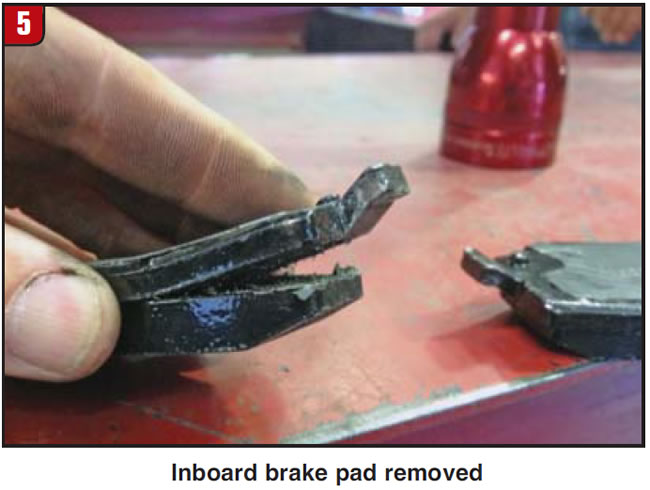
After disassembling components, I could easily see the bend (Figure 5) and could see where the new pad was catching in the caliper because of a manufacturing flaw or an installation error.
I surmised that the bend in both pads caused a spring-like action, preventing immediate application of those pads but allowing full brake action once the hydraulic pressure overcame the unintentional “spring.” This is what caused the spongy feel and low pedal but the ultimate “good” braking once the pedal was applied hard enough. Kind of an interesting root cause!
Just as the fictional character in Sir Arthur Conan Doyle’s books, Sherlock Holmes, would say: “When you have eliminated the impossible, whatever remains, however improbable, must be the truth!”
The truth in both of these repairs came after I had definitely eliminated all the anticipated root causes. These conclusions were two that I had just flat-out never seen before. I had not anticipated the wire damage from a windshield repair, but it certainly supports my theory that many short circuits are due to human intervention after the vehicle leaves its production line. This bent pad was tough to see with the calipers installed; it just didn’t jump right out at me. But since this brake system was such a basic design, the probable list of root causes quickly vanished, leaving me with a fairly improbable root cause. However improbable, the truth in both cases fixed both vehicles.
Brian Manley is a vocational automotive instructor for the Cherry Creek school district in Aurora, Colo. He is an ASE master certified automobile technician and a former member of the National Automotive Technicians Education Foundation (NATEF) board of trustees. You can reach him at [email protected].
This copyrighted article is reprinted with the permission of AutoInc., the official publication of the Automotive Service Association (ASA). To learn more about ASA and its commitment to independent automotive-service and repair professionals, visit www.ASAshop.org or call 800-272-7467.