Torque Converter Tech Tips
- Subject: Aligning TCC linings when bonding into covers
- Unit: Chrysler 11-inch converters
- Essential Reading: Rebuilder
- Author: Rick Morris
Torque-converter manufacturers have their own arguable reasons for the location of the clutch lining. For many years, torque-converter lockup-clutch linings were bonded onto the converter-clutch and/or converter-damper assemblies. In recent years we have seen the clutch linings bonded into the front covers. Rebuilders are now faced with the choice of bonding the replacement friction material to the cover like the OE or to the piston as in the earlier-model converters.
Many rebuilders have bonded the replacement linings onto the converter-clutch or damper assemblies during the rebuild process with great success. This option is the choice of many rebuilders for a couple of simple reasons. Bonding to the clutch assembly allows the builder to true up the piston and have a prepared surface for bonding. At the same time, while bonding to the piston, the builder must machine the old lining out of the cover and convert the bonding surface (90-120 RA) to a reaction surface (20 or finer RA). This can be achieved during the machining process when the cover is being trued up.
The surfaces of some of the newer TCC pistons have a hardness of 65 Rockwell or harder, making it difficult for some shops to machine these pistons. In these instances, many shops have opted to bond the replacement lining into the cover. Some of these covers are quite deep, and centering the new lining into the cover before bonding can be challenging. Rebuilders have different techniques for holding the lining in place while loading the cover into the bonder. Examples are pre-tack adhesive or a bonding aid, which most of the clutch-lining suppliers have available.

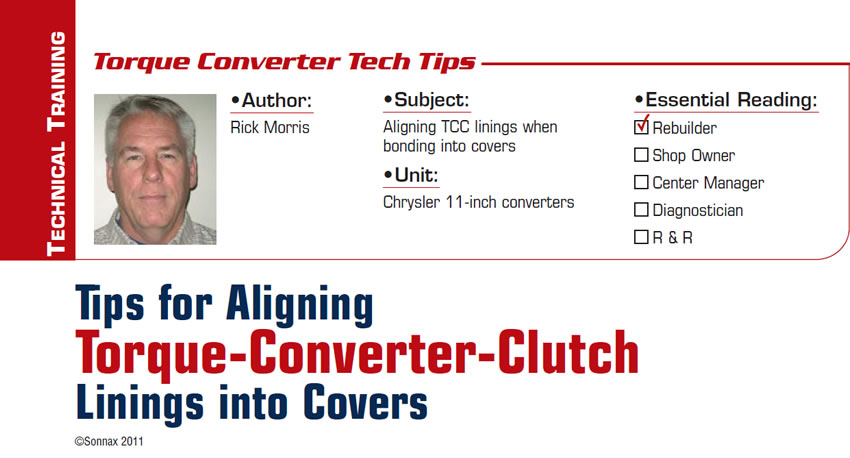
One cover that is especially problematic is that of the Chrysler 11-inch converter. In Figure 1 you can see a converter-clutch-plate damper assembly and turbine from this converter.
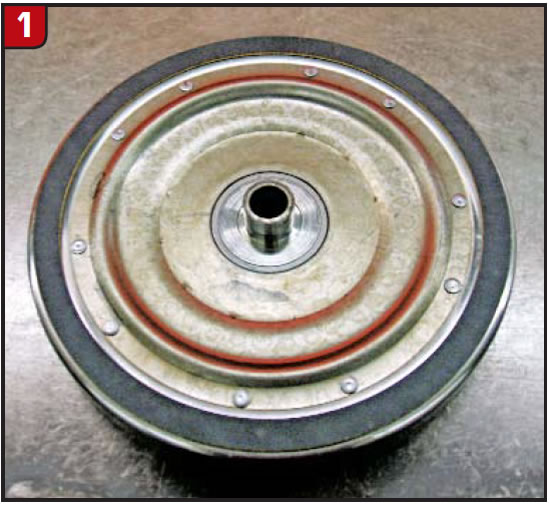
Align the new clutch lining on the clutch plate with the pre-glued side up. To prepare the front cover, machine the old lining out, clean the cover and use the pre-tack adhesive or bonding aid of your choice. Once this is set, simply place the cover over the clutch-damper and turbine assembly. The centering is perfect because the bushing in the cover pilots the turbine (Figure 2).
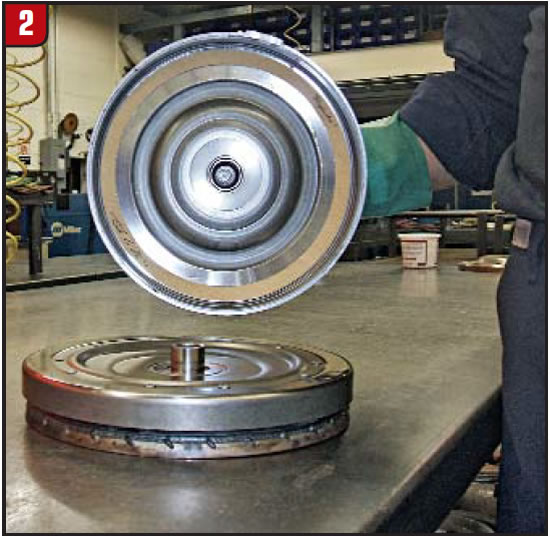
When bonding to the cover, you must be certain that there is no interference where the bonder die contacts the cover. Almost all converter front covers have manufacturers’ bar-code stickers. These stickers (Figure 3) need to be removed, since they are directly under the clutch lining and the bonding die will be in contact with the cover at this location. If not removed, these stickers will cause buildup on your dies and an uneven bonding surface.
Several bonding dies have very little clearance between the outside diameter of the die and the inside diameter of the cover. A quick check of the upper and lower dies of your bonder is simple and essential, as you can see in Figure 4.
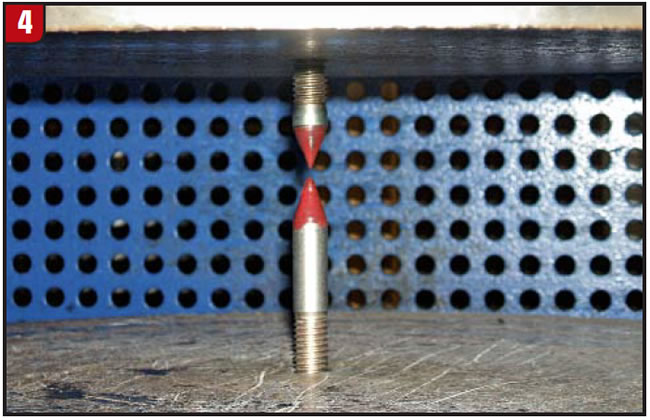
Machine a point on a couple of cut-off bolts or short lengths of threaded rod, and screw them into the center bolt hole of your upper and lower dies. This will help to check the alignment of your dies. If your upper and lower dies are not aligned, adjust as necessary. This will help your upper die go down into your recessed cover without interference. This suggestion can be used for several applications but works the best with turbines that are piloted in the front cover.
One of the pitfalls of bonding to the cover is the difficulty in heating the mass of the cover to obtain the proper bond-line temperature. Adjusting your upper temperature-control setting to 450°F and your lower control setting to 525°F and using a 15-minute bond cycle seems to work well for the 11-inch Chrysler covers. You should check each cover with a 400°F temperature stick at the end of the bond cycle to be certain that the desired bond-line temperature was achieved.
Rick Morris is co-owner of Professional Transmission & Converter Corp. in Marcy, N.Y., and an active Torque Converter Rebuilders Association board member. Sonnax supports the Torque Converter Rebuilders Association. Learn more about the group at www.tcraonline.com.
©Sonnax2011


