Paul Loch from Certified Transmission wrote a very good and detailed article for Transmission Digest in the March 2022 issue entitled “A Needle in a Haystack – Finding and Diagnosing Intermittent Problems.” The vehicle used for this article was a 2013 Ram 3500 6.7L equipped with a 68RFE transmission. Well worth the read.
ATSG encountered a similar story recently, when ATSG technician Bob Bloomquist worked with Matt at Matt’s Transmission, who went looking for a needling problem with a 2011 GMC Sierra 2500 HD with the 6.6L diesel powering a LCT 1000 transmission. It originally came in with both slip and electrical codes. After inspection it was apparent that the transmission needed to be replaced. They ordered a Jasper reman transmission and installed it. Once in, one code remained: code P0962 for low voltage with the Main Modulation/Line Pressure Control Solenoid.
With a completely different transmission, they carefully inspected the solenoid harness connector first. With no signs of any problems there, the technicians pulled a wiring diagram like the one shown in Figure 1.
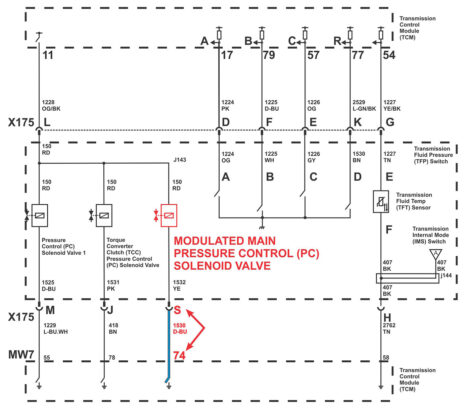
The wire in question is the dark blue wire that runs from terminal S at the transmission harness X175 connector to the 80 pin MW7 Transmission Control Module connector.
Note that the TCM is in the front engine compartment near the fan shroud. Due to aftermarket serpentine belts causing a significant amount of electrostatic charge on their surface, the TCM may have been relocated to the top of the UBEC cover. The same thing happens if it is equipped with an upfitter package and extended belts causing them to be closer to the TCM.
Due to the location of the TCM, the wiring harness to the transmission is routed through the driver’s side fender. To find where this wire in compromised is like finding a needle in a haystack. The only upside is knowing that the needle is dark blue in color.
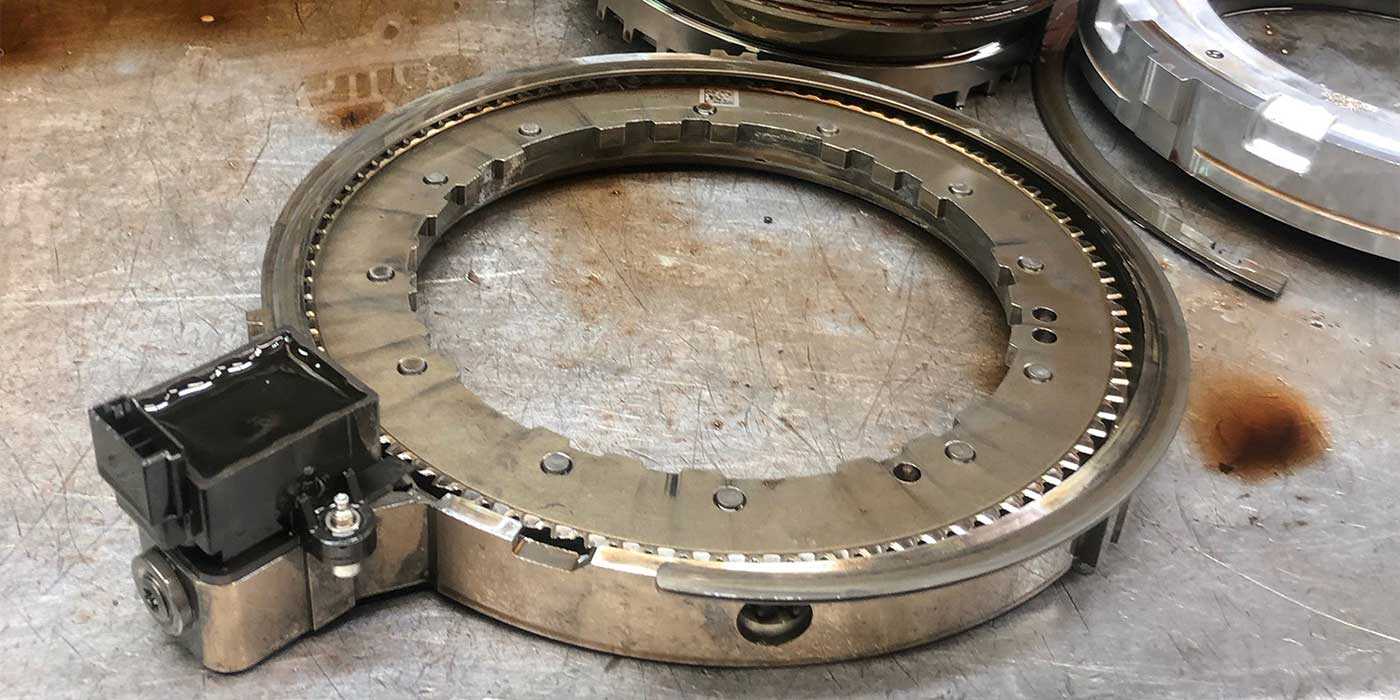
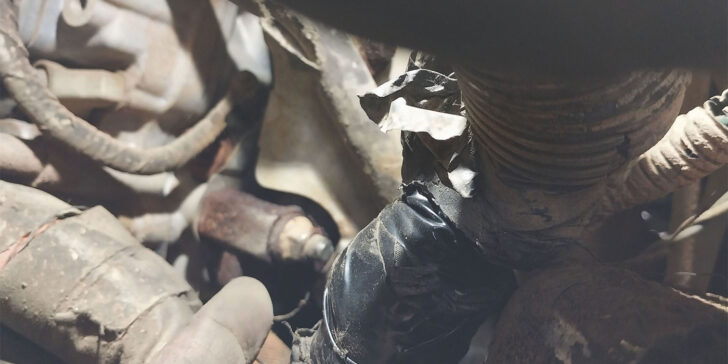
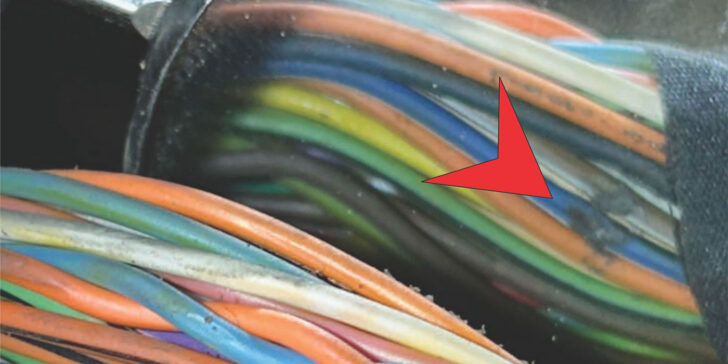
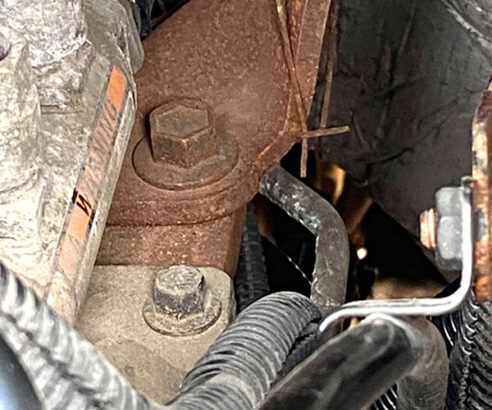
Matt chose to locate where this wire was shorted or deteriorated rather than running a new wire bypassing the problem. This required removing the inner fender to get a better look at the harness. In doing so, he noticed that the harness looked as if it has been rubbing in the area of the upper control arm as seen in Figures 2 and 3.

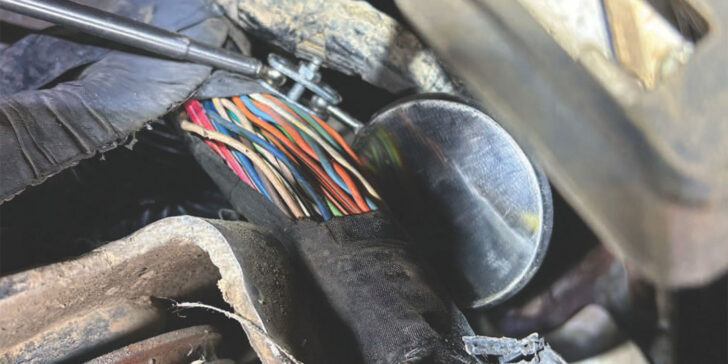
After unraveling some tape to expose the area where the rub took place, he used a mirror to examine the wire (see Figure 4).
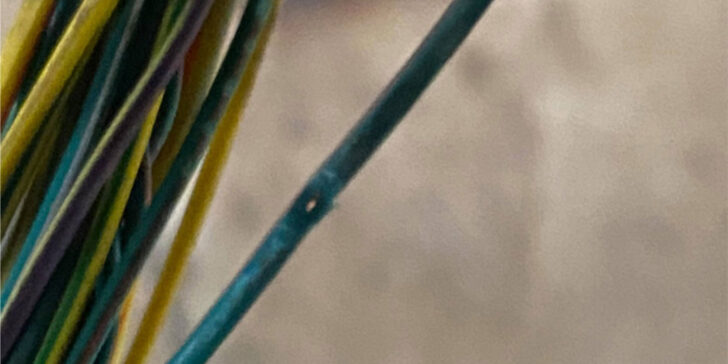
After much time and tedious effort, there it was: a dark blue wire which was rubbed into and shorting out (Figure 5). Matt found the needle in the haystack.
In ATSG’s 2023 seminar, one of the subjects we cover is a 2007 Dodge 2500 with a 68RFE transmission that intermittently sets a P0871 Overdrive Pressure Switch Code. My intro slide says: “Looking for a Needle in the Haystack.” The hold-down bracket for the harness (Figure 6) had rubbed into this wire and would intermittently short it to ground, setting the code.
As you can see in Figure 7, it was a very small rub through, making it difficult for Chris Harmon to find it; but he did. And so, I use this example in the seminar to provide a few pointers of where to look for this needle in the haystack.
If you encounter this problem then, as Matt and Chris did, you should look for areas where the harness could be rubbing. These include hold-down brackets, suspension components, body seams, bolts, screws, flashing, etc.
Another area to look for is where the harness can be affected by heat, such as exhaust leaks blowing hot exhaust onto the harness, or that the harness has dropped too close to the manifold or catalytic converter. Look for battery acid or water compromising connectors. When checking for power and grounds at a connector, oftentimes we back probe. Don’t forget to check the face side of the connector as well. I have seen situations where there was good power supply to a TCM connector on the back side, yet on the face side there was a sever voltage drop causing the computer to malfunction. Connectors can be compromised internally.
Another thing to look for is where the wires go into the back side of the transmission connector. When they fatigue due to heat, after unplugging the connector to remove the transmission, they break in this area. Sometimes if you peel away the conduit, you may also find that the wire insulation has deteriorated and now bare wires are exposed and touching each other.
These are just a few tips to help relieve you from a needle that can poke you, making for an irritable day.
Read more stories from our Technically Speaking column series here.