Tech to Tech
- Subject: Tracing and repairing wiring problems
- Essential Reading: Diagnostician
- Author: Jeff Bach
Simplifying a complex wiring problem
“Wiring problems,” “shorts” and drains are words that act like a double-edged sword for me. They seem to be the place where otherwise competent technicians tend to draw the line when it comes to problems they enjoy working on. I understand why a lot of techs feel that way after seeing some of the weird problems I’ve encountered.
It’s also the point on the diagnostic trail that seems to result in a dead end when they reach it. I have to give credit to many of them for knowing where to draw the line. Most technicians will stop when it gets to the point where they know that spending any more of a customer’s money trying parts would be redundant.
I have always considered myself lucky that I enjoy the challenge of picking up the trail where others have gotten lost. When you do enough of the kind of work that most shops think of as “weird,” it tends to become the new “normal.”
Sometimes these cars have a tendency to get pushed to the back burner after they have done their share of burning time and becoming a money pit. Sometimes they get rejected by the shop and sent back home to the bare spot in the owner’s yard where they sit until the decision is made to get the car either fixed or disposed of altogether. These days of high metal prices, it seems more cost effective sometimes to scrap a car than to put any more money into it. That is, unless you’re already upside down in the thing.
That’s how I got the car we’ll be talking about. This car had an engine installed because of the coolant leaking into the oil. The engine had been installed and running fine for about three months, then just quit one day at a red light. The owner had it towed home and began the usual do-it-yourself diagnostic routine of “shotgunning” a barrage of parts at it with no success. He had completed the checklist of possibilities that he had read about on the Internet, with the most expensive being the powertrain control module (PCM) on the bottom, right below the coil pack.
I could hear his frustration level from talking with him. He was a lesser man now than when he began trying to figure this car out. He’s not alone, though. The last shop that had the car spent a lot of time on it and tried a lot of parts before coming to the conclusion that he had “a wiring problem.”
Now, the unique thing about this shop is that the guy has a novel idea about diagnostics. This guy rounded up another GM car with the same drivetrain platform and was substituting parts off of a “known good vehicle.” Clever, huh? This guy is the one who figured out that the car had the wiring problem. The funny thing to me is he didn’t charge the customer for anything because he didn’t have to buy any parts. And he didn’t fix it. At least he knows what his time is worth.
A few basic quick checks will tell you a lot about where your diagnostic route should take you.

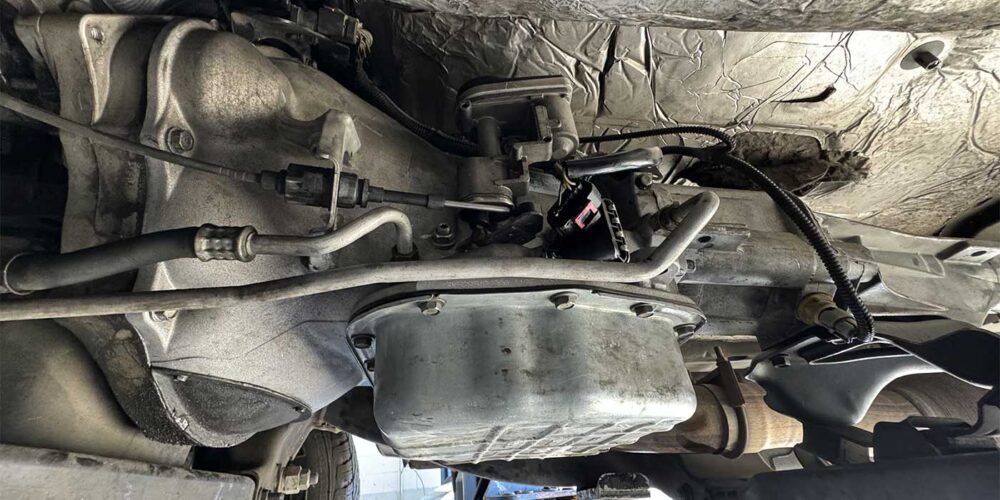
When you get a “no start,” check for codes. In our case we got “no data.” That is a clue – a big clue. When a car shows “no data” when you scan for codes, look into that a little bit. The first thing I think of when “no data” shows on the scan tool is “check power and grounds.” A good quick check to see whether the computer has power is to look for a 5-volt reference. That’s not a “tell all” but if you don’t have a 5-volt reference, say at the throttle position sensor (TPS), don’t try a crank sensor next because it’s cheap. In our case, TPS reference … (Figure 1).
Now that could possibly be due to a bad computer. But if the computer is bad and the power and grounds are good, check the circuits the computer drives to be sure you don’t fry the next computer. In our case, we had power on the constant 12-volt circuits and 12 volts on one of the ignition circuits, but pin 19 pink wire (a 12-volt ignition source) showed 0 volts. The diagram shows that the circuit is fed from the ignition switch through the fuse in the power-distribution center under the hood to the PCM.
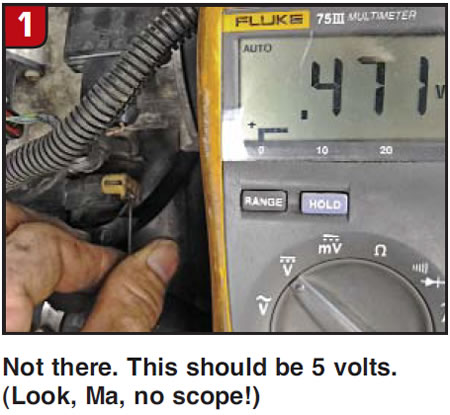
The voltage at the fuse was good, so the switch is no longer a suspect (these cars are known for ignition-switch problems). That brings me to the conclusion that there is a break in the wiring between the power-distribution center and the PCM; the routing is simple and a quick eyeball sweep brings my suspicion to a spot in the harness just above the cooling fan (Figure 2).
I noticed that the harness wasn’t touching, which is why it wasn’t making noise before the car quit. Probably rubbing while driving on “not so smooth” roads. I rolled the harness up where I could see it (Figure 3) and my suspicion grew slightly.

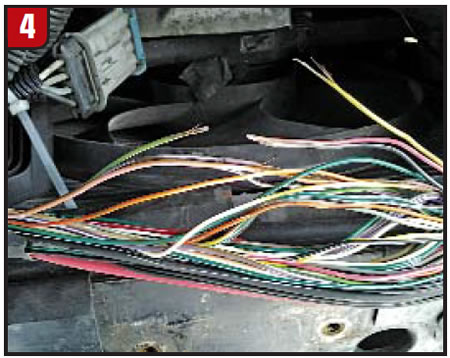
I opened the harness to expose the damage and there, among the cut and frayed wires, was our pink PCM feed wire (Figure 4).
When I see this kind of harness repair, I like to put patch wire in rather than pull the harness together and reconnect it. This keeps the stress off the repair spot.
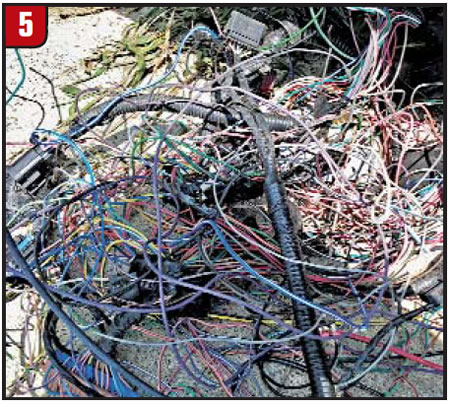
When doing this kind of repair, I like to have an old harness to cut bypass wires from, which means I have a few rat nests like this in the back of the shop (Figure 5).
This ensures that I can choose the right-gauge wire to patch with. That’s more important than patching with the right color. The next thing is choosing the right connection method. I like to solder and heat-shrink with sealer in this environment (Figure 6).
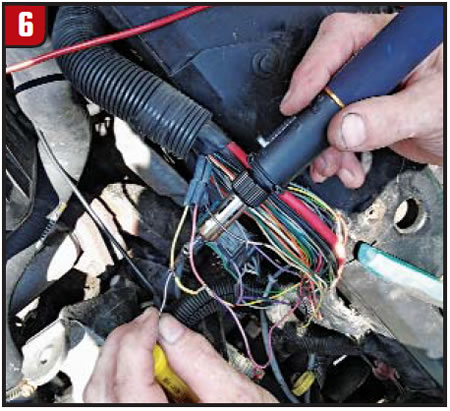
When soldering these old wires, it can be tough to get the solder to stick. A few tips – iron under the wire, touch the tip of the iron with small-diameter 63/47 rosin-core solder. Just get enough melted to make a good heat transfer, then move the solder back to the farthest point away from the iron until you get good flow, and let the rosin clean the oxidation from the copper. Once the solder cools, put the heat shrink on and seal the connection.
I like to spray liquid electrical tape on the connections and anywhere I have poked a wire, just to keep out the atmosphere and prolong the life of the circuit. Tape it up with a good vinyl electrical tape and put it “in” the harness holder and you’re good to go (Figure 7).

Tracing and repairing wiring problems are really not that difficult.
When going “hunting,” know what your prey is, use the right gun, and don’t shoot unless you can see what you’re aiming for.
If you are lost and heading nowhere, take the short path; it will save time – and then go somewhere.
Jeff Bach is the owner of CRT Auto Electronics, an ASA-member shop in Batavia, Ohio. For more information on this topic, contact Bach at 515-732-3965. His e-mail address is [email protected], and his website is www.currentprobe.com.
This copyrighted article is reprinted with the permission of AutoInc., the official publication of the Automotive Service Association (ASA). To learn more about ASA and its commitment to independent automotive-service and repair professionals, visit www.asashop.org or call 800-272-7467.