Tech to Tech
- Subject: Diagnosing a no-start condition
- Vehicle Application: 1979 Volkswagen Super Beetle
- Essential Reading: Diagnostician
- Author: Jeff Bach
Wife insists it could be the ground
“Hmmmmm …” I hear myself saying as I walk beside the latest diagnostic challenge.
I catch a whiff of one of the most-unforgettable fragrances I have ever encountered. “Eau de musty mouse pee” or “Diagnostic delight” I call it, as I steer the 1979 Volkswagen Super Beetle into my bay.
“Work on many of these?” my wife, Angel, asks. “Uncharted territory for me,” I reply as I dig through my information sources looking for a schematic of the fuel-injection system.
I finally find a one-page black-and-white wiring diagram that’s close in one of my information services’ archives section. I start this “project” with expectations of finding the usual extra problems created by the well-meaning “wannabe” technicians through whose hands this car has passed since its demise some four years ago, according to its registration. It’s also had two different owners since it last ran on its own systems. I find an overfull crankcase with the smell of stale fuel, carboned-up spark plugs and a sensor connector terminal with “baby bird mouth” syndrome.
“Carboned-up spark plugs,” I say to Angel, “result when too rich of a fuel mixture in the cylinder burns, leaving a conductive carbon coating on the spark plug’s electrode insulator that allows the coil energy to leak off through the carbon rather than jump the gap and fire the mixture.”
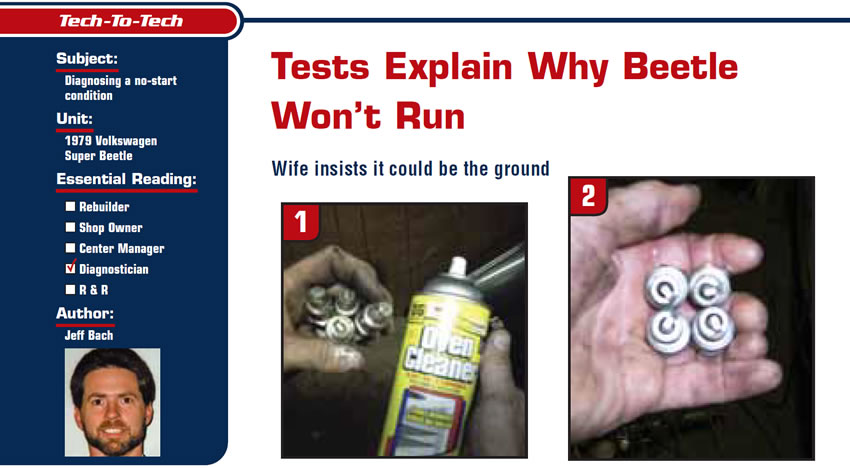
I continue on to say how difficult it is to get plugs clean again once they’ve carboned up. I warn her that she might want to step away for a bit while I spray this battery with different types of carb and brake cleaners, all of which have skull-and-crossbones warnings on their labels that begin with DANGER.
“Try this,” Angel says as she returns, handing me a can of oven cleaner she got from the local dollar store. I squirt some cleaner into the plugs … it starts foaming … the carbon starts coming off like magic (Figure 1).
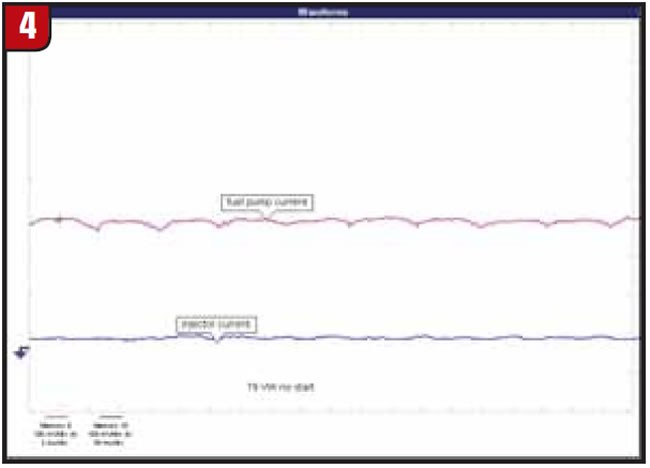
I work it in a little with a toothpick rinsed with water and blow them dry. They look like new again. “Cleanest I’ve ever seen fouled plugs get short of sand-blasting them,” I say (Figure 2).
“Nice,” Angel says.
Dollar General oven cleaner has now earned a spot in my cleaning-chemicals cabinet.
After solving these issues I’m now ready to start down a diagnostic path. I like to divide the systems first into fuel, spark, compression and timing. This helps me to choose a direction. The current probe shows me the most info in the least time. So I use it to look at fuel-pump current and injector pulse width on the lab scope while watching for secondary ignition with a spark gap tester.
The spark has plenty of energy to jump the gap, but both of the scope channels stay flat-lined. Because the injection system appears to be the focus, I next try to divide the problem into either a power/ground issue or electronic-control-module (ECM)/logic issue. According to the diagram in Figure 3, the ECM, fuel pump and injectors all receive power from the “double relay.”

I ask for Angel’s assistance in operating the ignition switch while I monitor each of the terminals on the relay with a test light. I have battery power on the red wire terminal, key on hot (as it should be) at the black, and just as I touch the brown ground terminal, the relay clicks, indicating the problem, but before I can say “Voila!” Angel asks from the front, “Did you check the ground?” I trace the brown wire to an open near the battery and repair the broken terminal. Both the fuel pump and injectors now have power but still no current on either during cranking.
My next test takes me under the car to the fuel-pump terminals, where I find power to both. “Check the ground,” I hear Angel say again from inside the car just before I have the chance to say I think I’ve found the problem. I think I’m going to have to start thinking more quietly.
I trace the ground side of the fuel-pump circuit to a spade terminal disconnected in the trunk compartment. Once that’s repaired, I now have fuel-pump current but the injectors are still flat-lined (Figure 4).
The schematic for this fuel-injection system reminds me of the old analog Bosch injection system Cadillac used in the ’70s. It needs only engine-temp, air-temp, air-flow, crank and rpm inputs to control fuel mixture through the injectors. It also has a throttle-position sensor (TPS) but it just sends switch signals for idle and wide-open-throttle (WOT) conditions. Because I’m getting the proper power and ground signals to the electronic control unit (ECU) and I have fuel pressure, my reasoning says that I’m down to either a bad ECU (which I would hate to see, since I told Angel from the start that it’s almost never the computer) or else it’s not pulsing the injectors due to an input issue. I again ask for Angel’s assistance in cranking the engine and working the throttle while I check for a wide-open-throttle (WOT) signal change.
“It feels stiff,” she says.
A closer look at the throttle body reveals that the shaft is rusty and the plate looks corroded (Figure 5).

I end up removing the throttle body, attempting to free it up using everything I have – including my first choice of the Dollar General oven cleaner – none of which seems to penetrate the corrosion and rust from the steel shaft to the aluminum housing.
“Try this,” Angel says again as she hands me another bottle (Figure 6). “It says it removes rust,” she says.

I read the ingredients: “Hydrogen Chloride 20 percent, inert ingredients 80 percent.”
“So, toilet-bowl cleaner is just hydrochloric acid and water, no fragrance, no color; kills germs too,” I say as I dump the stuff on the throttle shaft and begin pecking again on the ends with a brass hammer. Within a minute the shaft begins to slide back and forth.
Once I’ve removed it from the throttle body, I finish cleaning it with a rag and some more hydrochloric acid. The rust dissolves and the shaft slides easily through the throttle body. “Nice,” I say, smiling.
With it back together and on track again, I see that the WOT throttle switch is working normally and so I move on to my next signal – rpm.
The only signal I can see that would allow the ECU to monitor the rpm input is at the top of the diagram marked “To coil.” This signal shows battery voltage at key on and doesn’t change during cranking. I take a look at the coil and can see the wire number that corresponds to the ECU’s input. It’s a “push-on” terminal connected to the coil’s positive terminal. I keep my mouth shut for a minute while I switch the terminal to the tach side of the coil, where it should be, so the ECU can see rpms.
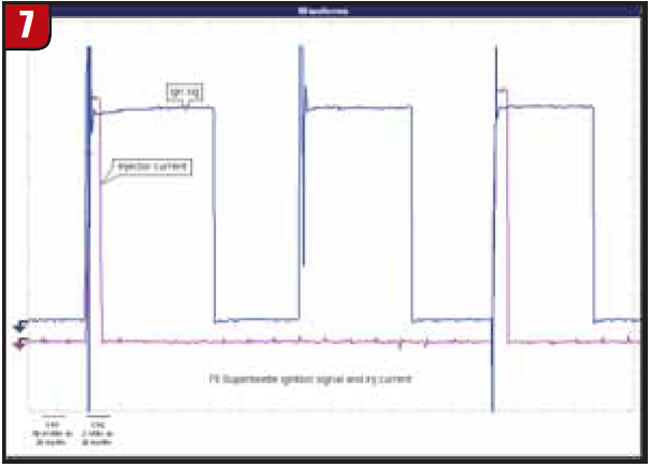
“Try cranking it again,” I say to Angel. This time the engine cranks and starts chugging like it wants to run as the scope shows me the first sign of life in the injector-current waveform on one channel; the other scope channel shows the rpm signal from the coil (Figure 7).
“Nice,” Angel says. “Was it the ground?” she asks.
“Actually,” I say defiantly, “someone had the rpm signal wire hooked to the coil’s positive terminal instead of the negative terminal where it belongs.”
“So it was the ground,” she says.
“Yeah, you could say that,” I reply.
“Nice,” we say together, and laugh.

Jeff Bach is the owner of CRT Auto Electronics, an ASA-member shop in Batavia, Ohio. For more information on this topic, contact Bach at 515-732-3965. His e-mail address is [email protected].
This copyrighted article is reprinted with the permission of AutoInc., the official publication of the Automotive Service Association (ASA). To learn more about ASA and its commitment to independent automotive-service and repair professionals, visit www.ASAshop.org or call 800-272-7467.