
Shift Pointers
- Subject: Delayed engagement in reverse, neutralizing during deceleration
- Unit: 5R110W TorqShift
- Vehicle Application: 2007 Ford F-450 with 6.0 diesel
- Essential Reading: Shop Owner, Center Manager, Rebuilder, Diagnostician, R&R
- Author: Jesse Zacarias and Roy Delfran
One of our accounts brought in a 2007 Ford F-450 with a 6.0 diesel engine and a 5R110W TorqShift transmission, complaining of a delayed engagement in reverse. The driver also complained that if he decided to accelerate hard just before coming to a stop, the transmission would neutralize and then engage harshly.
When we road-tested the vehicle we felt the delay in reverse and in drive, but not the neutralization. We checked for codes but none was present, so we dropped the transmission oil pan and removed the inline filter to inspect for abnormal wear, but neither of the magnets showed excessive metal material for a vehicle with only 48,000 miles.
After servicing the transmission and replacing both the transmission and inline filter, we checked the transmission mainline oil pressure. The pressures in all gears seemed within factory specs but a little on the low side (50 psi in park/neutral).
The next step was a stall test, so we brought the engine speed up to 1,500 rpm in reverse and noticed that PC-A amperage was steady at 0.48 but mainline pressure oscillated from 300 to 125 psi (Figure 1). We wanted to know whether the PCM was commanding this, so we installed our scan tool, which allows us to see data and the pressure gauge at the same time. The data showed that the PCM was not commanding the oil-pressure oscillation, and since we noticed that both the desired pressure and the PC-A amperage were steady at the time of the pressure oscillation, this led us to suspect a sticking PC-A solenoid.
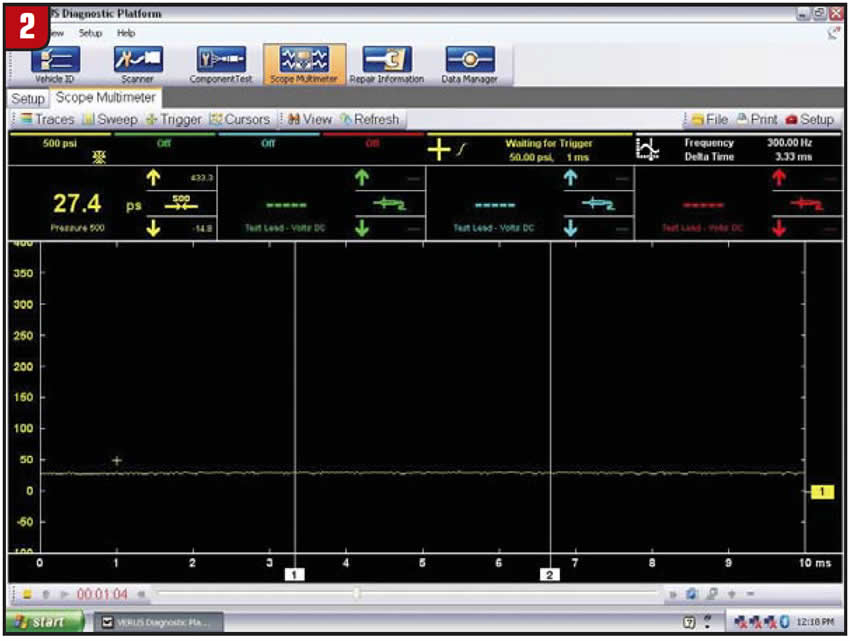
We did the same stall test in drive, and the same problem was evident. With the scope’s Channel 1 set on 500 psi we revved the engine in neutral and Park and noticed that when the engine speed started to come down the mainline pressure would drop to as low as 27 psi (Figure 2). This was more likely the cause of the neutralization feeling, since the mainline pressure dropped too low when the vehicle decelerated to a stop. So we removed the valve body and replaced the PC-A solenoid. The new pressure readings showed the problem to be corrected.
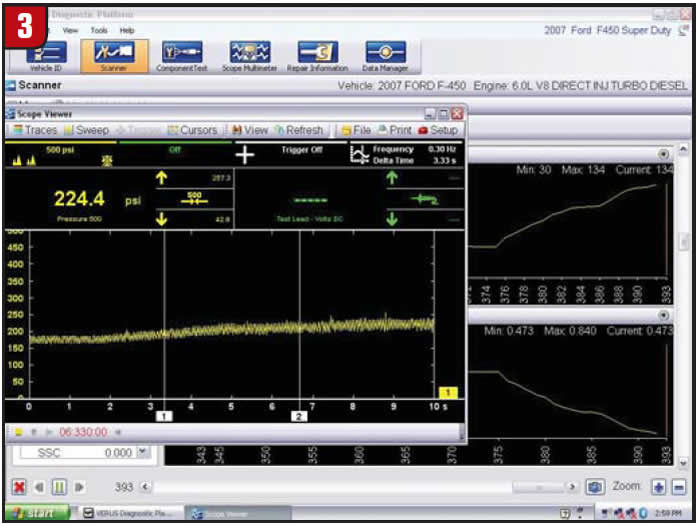
After replacing the PC-A solenoid we saw a steady pressure of about 225 psi and PC-A amperage around 0.47 in reverse at 1,500 rpm (Figure 3).
We noticed that the mainline pressure was now about 90 psi in drive instead of 50 and that when we revved the engine the pressure increased in proportion to engine speed, it was not oscillating and never dropped below 85 psi (Figure 4).

According to a Ford technician whom we know, Ford has been having problems with the PC-A solenoid, and he has replaced quite a few.
This would have been a great ending if that’s all we had decided to do, but during the initial diagnosis of the pressure problem we had gone to the Ford Web site and checked under its OASIS (Online Automotive Service Information System) program to see whether there were any recalls or bulletins associated with the pressure problem.
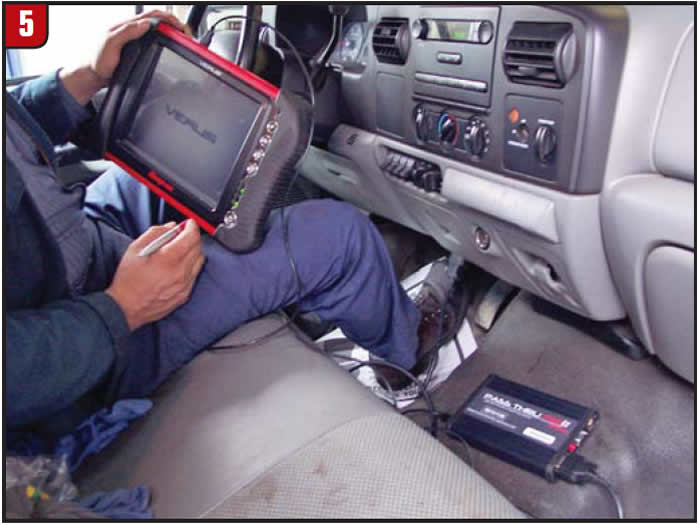
Although we found none, there was a re-flash for a possible erratic speedometer above 50 mph (TSB-07-14-8). When we mentioned this to our customer, they wanted the PCM updated. Figure 5 shows the technician preparing to reprogram the PCM with the J2534.
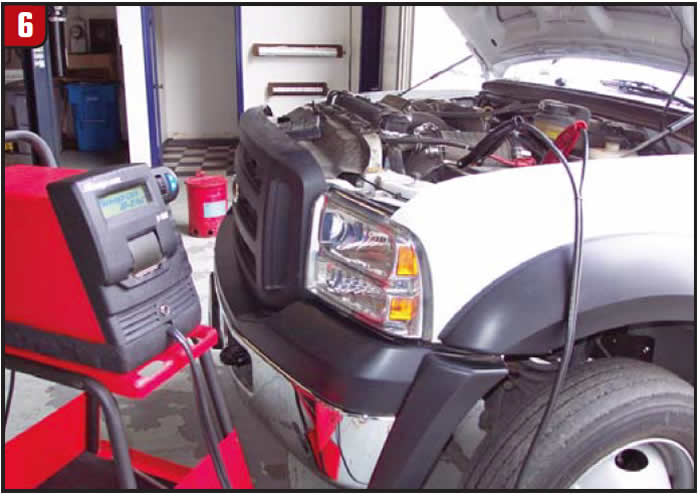
We made sure that the battery was fully charged (Figure 6), since you should do a re-flash only with a fully charged battery; besides, you will be asked to check battery voltage during the process.
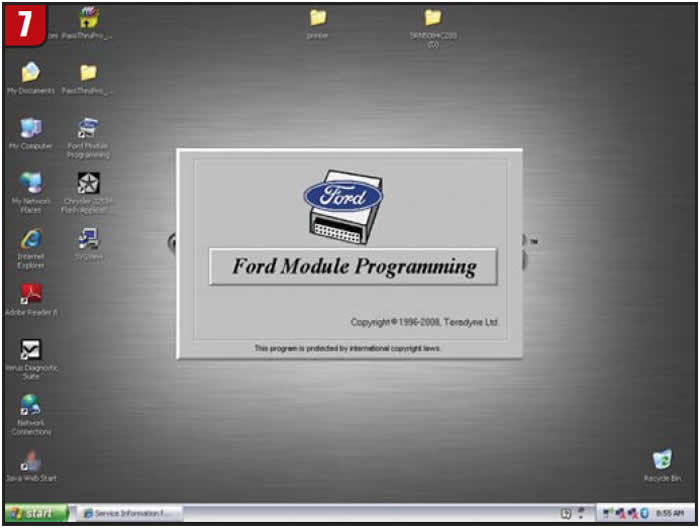
Next, we went into the Ford Module Programming (subscription) section of the Web site that allows you to do the re-flash on a Ford PCM using a pass-through and the J2534 (Figure 7).
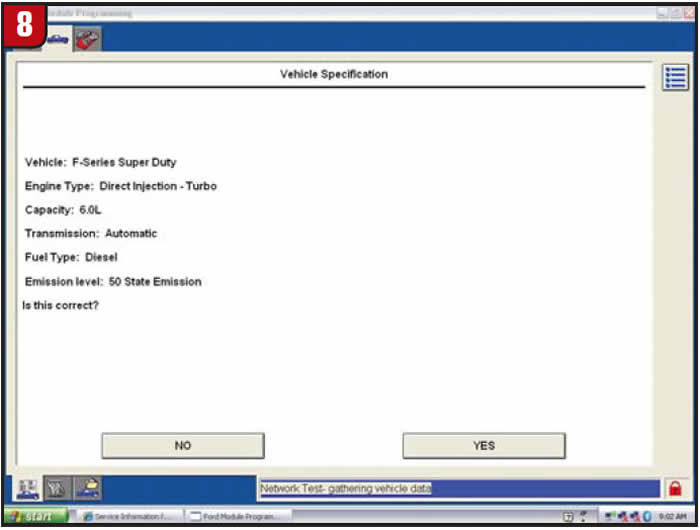
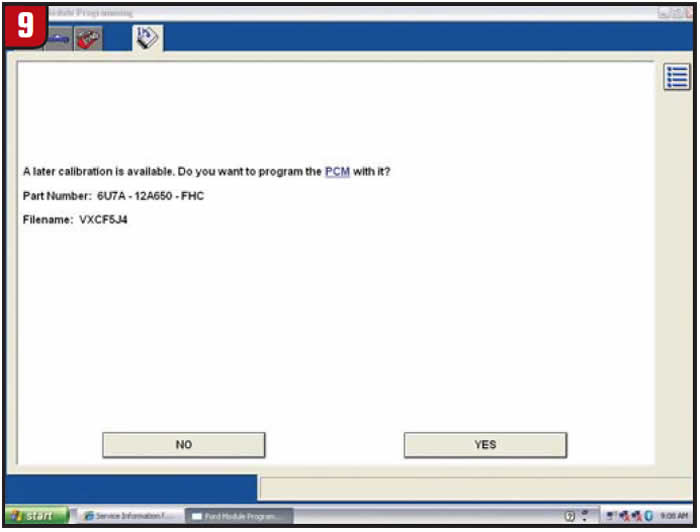
After you answer the questions in the program, the vehicle and PCM will be identified, along with any new PCM software updates if they are available (figures 8 and 9).
When doing a re-flash on a 6.0 diesel engine you will be asked to remove the fuel-injection control module (FICM) relay, so you should have already identified its location (Figure 10)

We were now ready to do the re-flash. This is where our problem began.
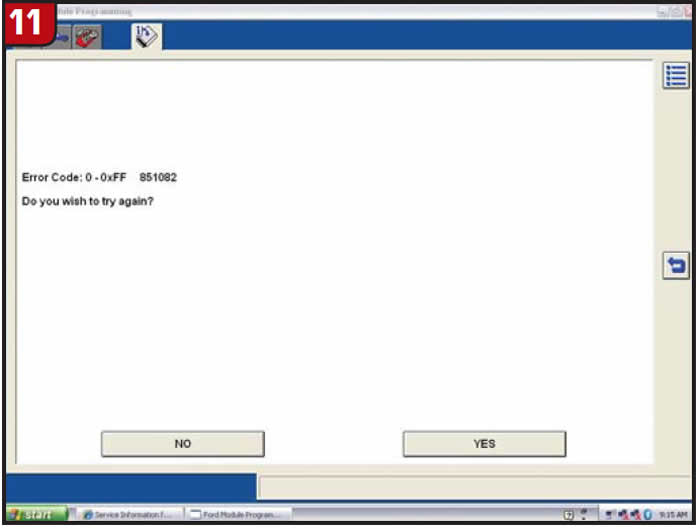
Ford is very user friendly when it come to reprogramming, and if something goes wrong you can always recover the PCM by using the “As Built” portion of the reprogramming software. So we were not too alarmed when we saw the message in Figure 11.
We tried again, and this time a different error message appeared, so we decided to abort the process and move the vehicle for another time, but as you probably guessed the vehicle wouldn’t start and the scan tool would not communicate with the PCM.
Here we had this huge, heavy vehicle in the middle of our main entrance to the shop and unable to start (lesson learned here).
We were not able to recover the PCM even by trying to initialize the PCM with the “As Built” part of the re-programming, because there was no communication with the PCM.
We had to replace the PCM, so we bought a new one ($600 – ouch) and installed it. Fortunately, a nearby dealer had it in stock (gee, I wonder why).
When you replace the PCM you have to initialize it to the vehicle in which it is being installed. That is why you will normally get the ABS light on and a communication code U0300 or U2050 and P1639 (vehicle ID not programmed), but the vehicle did start so that we were able to move it.
Now we had to initialize the PCM to the vehicle. There are two ways to do it; Ford calls them “Programmable Module Installation” (PMI) when the original module is available, and PMI when the original module is not available.
We had to use the last one, because our original PCM was corrupt and unable to communicate.
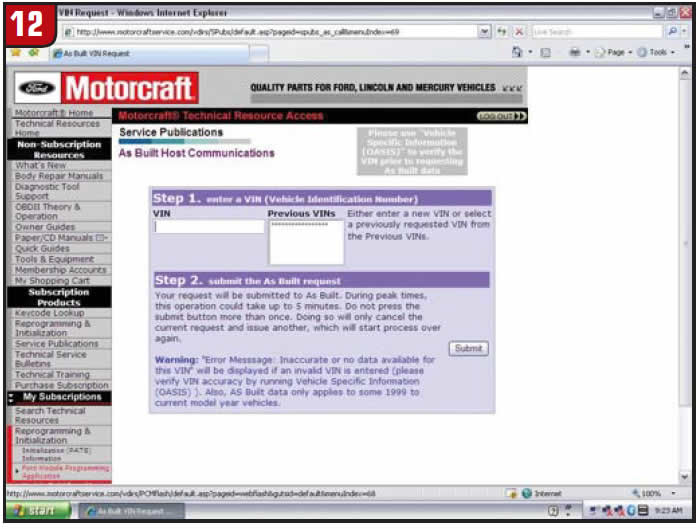
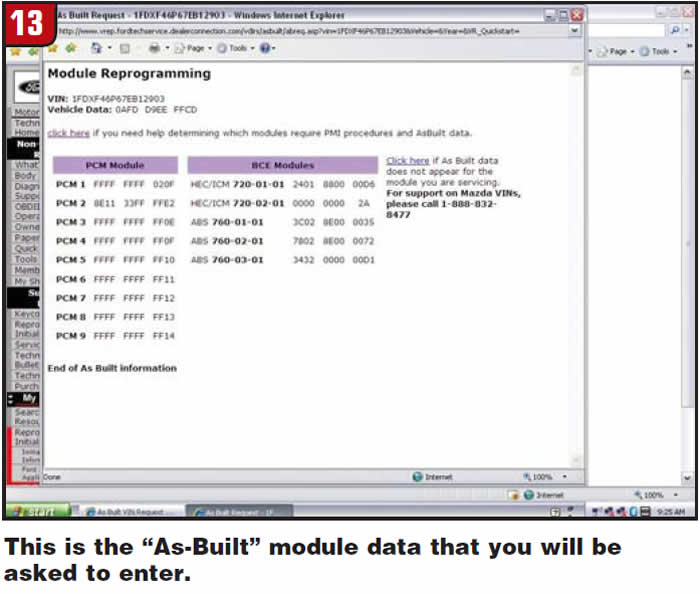
This process requires 11 steps, and after doing it a few times you do them without thinking. At step 8 you will be asked for the “As-Built Data,” so it’s better to have it at hand (figures 12 and 13). This information is a available on Ford’s Web site.
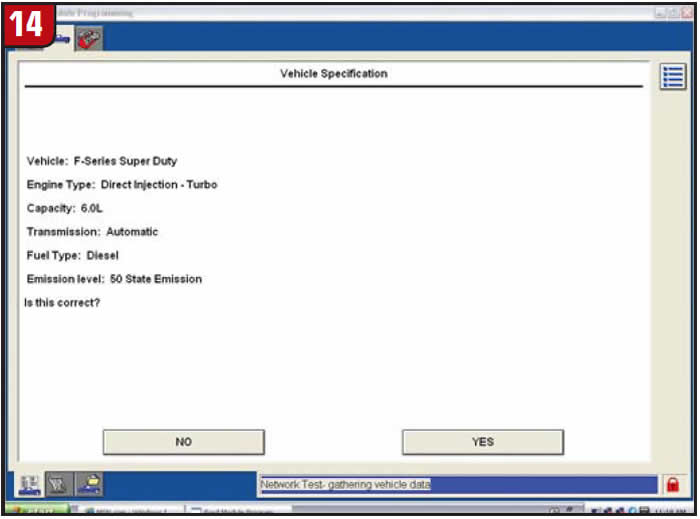
We had the information on hand so we identified the vehicle in the FMP program (Figure 14).
After selecting PMI on step 4 and identifying the module replaced (PCM) in step 5 and pressing the check mark to go to step 6, we got the old error message and the vehicle now would not start.
At this point we had the truck towed to the local Ford dealer to have the PCM programmed to the vehicle. They mentioned that at first they had problems communicating with the new PCM so they had to identify the vehicle manually with the “Tear Tag” number (at the PCM), which is the same thing we did, but after that it went well and they were able to reprogram the PCM successfully.
What went wrong? After doing some research we found out that Ford has had some problems with its FMP program and that it was damaging the PCM on the 6.0 diesel. Ford had even stopped its dealers from reprogramming 6.0 diesels for a while. The company claimed to have addressed this issue on version 59 (at this time it was not out yet), but we have not confirmed that it has been done.
The FMP programs for the J2534 and the factory equipment are not the same. That is why Ford was able to reprogram the new PCM but we were not able to with the J2534. These are just some of the obstacles that we have to face with re-programming nowadays, but that does not mean we should shy away from it. When we started to rebuild transmissions we also faced some problems as we learned, but that didn’t stop us then, so why should we shy away from reprogramming now? There are a number of transmission-related problems, like the one mentioned here, that can be corrected only with a re-flash, so we have to get started sooner or later.
Oh, well, just add another grade to our school of hard knocks.

Jesse Zacarias is the owner of Elec-Tran Diagnostics in Gilroy, Calif. Roy Delfran is with Snap-on Diagnostics’ Ask A Tech Community Web Forums (http://askatech.snapon.com).


