Torque Converter Tech Tips
- Author: Ed Lee
Many of the early torque-converter rebuilders learned the importance of paying attention to details the hard way. Machining the clutch surface on the early rear-wheel-drive Chryslers was a good example of a tough lesson. Little attention was paid at first to the perfect 90˚ angle that the factory had machined where the clutch surface and the side of the cover meet. Failing to pay attention to this detail would come back to haunt many of those rebuilders.
That’s because any radius that remained after the resurfacing process would nibble away at the edge of the floater clutch when it applied over this radius. Eventually rebuilders did learn to pay attention to this detail, and since they learned how to machine that perfect 90˚ angle the hard way, it became a standard practice that has been carried on through the years. Nowadays it is not necessary to have the 90˚ angle machined on most covers, except to ensure proper clearance, and the habit that was learned to prevent one problem now is creating another.
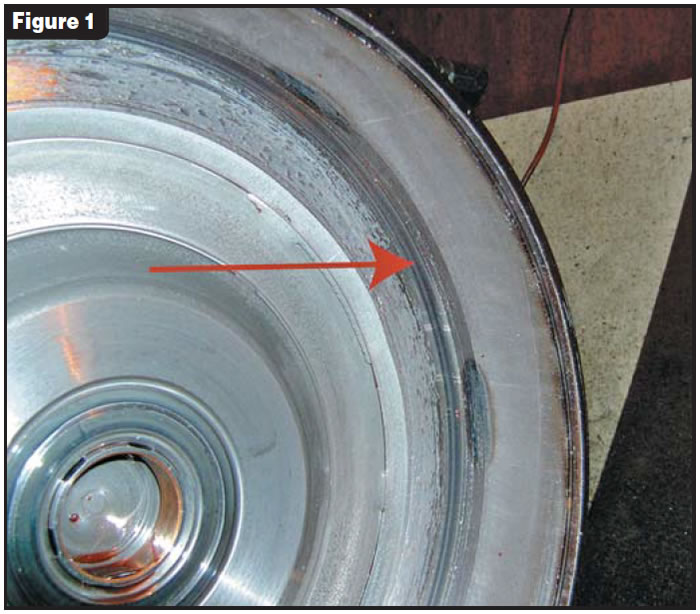
Our industry is reporting an increasing number of converter leaks that are coming from this area. The normal stresses that are being exerted on the converter during acceleration – plus the extra stress of lockup apply – are causing the converter to flex. And the culprit is the sharp angle at the edge of the lockup surface (see Figure 1), which creates a flex point for a crack to start.
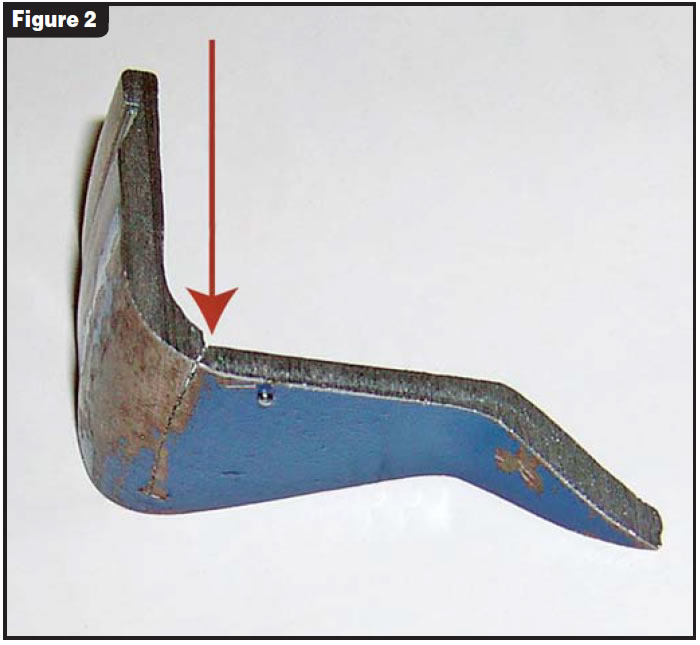
The crack in Figure 2 is on an A4LD converter. From the cutaway you can see why the cover is cracked. The cover was machined to about half its original thickness at the point of the crack. This problem is also common on the E4OD and 4R100 converters. When the clutch surface of any cover needs remachining, consider the machining that has to be done for the clutch that you are using. Check the surface area of the cover against which the friction material applies. This area needs to have an apply finish of 10-20 RA.
Now set the piston onto the cover and check to see which areas have to be machined for proper clearance. Keep in mind that the piston is closer to the cover by the amount that you just machined off the cover. Check closely for interference between the piston and cover, both inside and outside the clutch-apply surface. Remember that any material that you are removing is weakening the cover, so do not remove any more than necessary for clearance.
In the past, the outer edge of the apply surface was machined to reduce wear on the floater clutch, but now it is done mostly out of habit. Changing this habit will help to prevent some future leaks.

Ed Lee is a Sonnax technical specialist who concentrates on issues of interest to torque-converter rebuilders. ©Sonnax Industries Inc. 2006