Shift Pointers
- Subject: Incorrect placement of shift solenoids
- Unit: Toyota U150/250
- Essential Reading: Rebuilder, Diagnostician
- Author: Wayne Colonna, ATSG, Transmission Digest Technical Editor
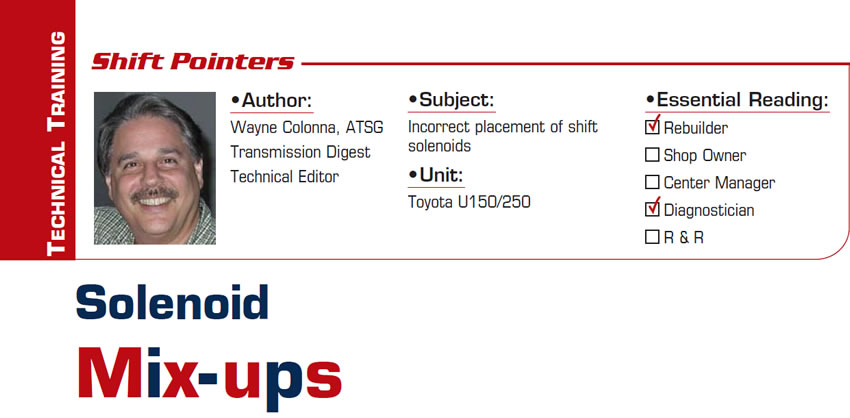
The SLT and SL1, 2 and 3 solenoids used in the U150/250 transmission (Figure 1) can easily be positioned incorrectly, causing a variety of malfunctions such as wrong-gear starts, no shifts and bind-ups, to name a few.
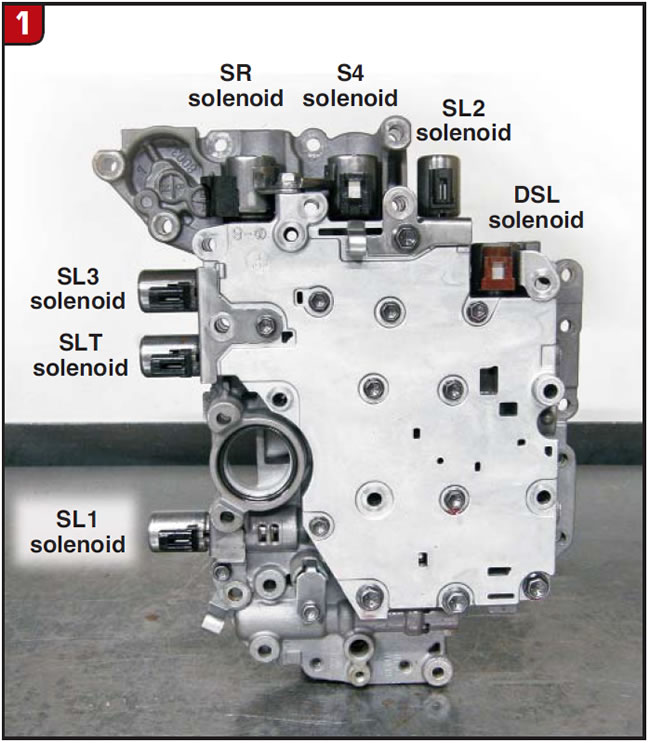
In Figure 2, these solenoids are laid alongside each other for a visual look at their configuration. Solenoids SL2 and 3 are configured the same, whereas the SLT and SL1 are significantly different. If attention to their proper location is overlooked, the SLT and SL2 could accidentally be swapped, as well as the SL3 and the SL1, and you for sure have a mess on your hands.
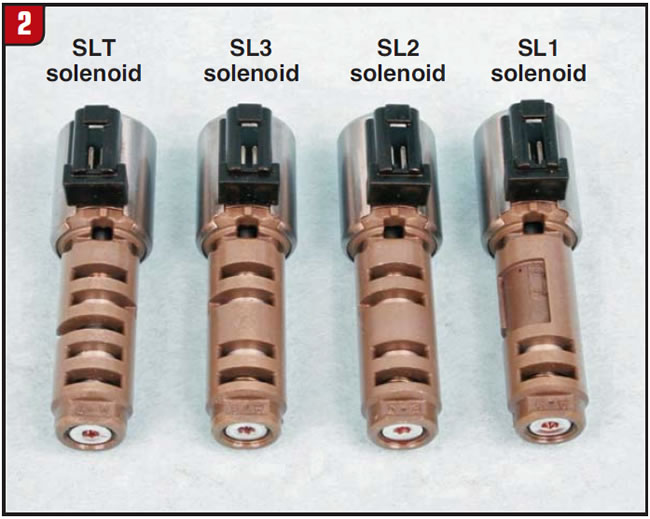
The proper location for the SL1 solenoid is just below the suction port on the valve body. Figure 3 shows the SL1 solenoid, but placed alongside of it is an SL2 or 3 solenoid. Immediately, one should notice that the exhaust ports of both styles of solenoids would line up with the casting slots in the valve-body housing. This prevents a visual from this side of the valve body to indicate incorrect solenoid placement.
Can you tell which solenoid I put into this location by looking at Figure 4?
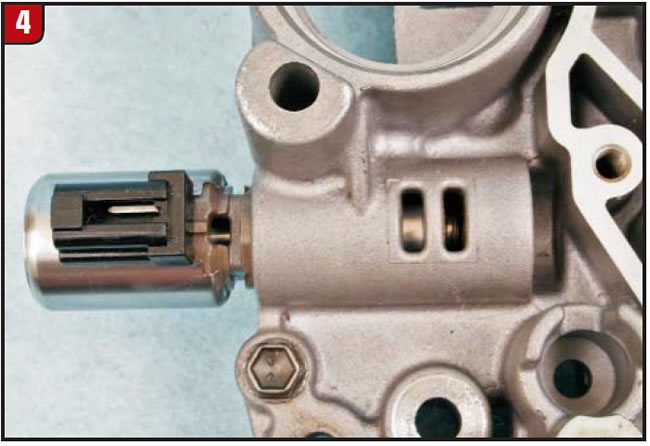
Figure 5 shows the SLT and SL3 solenoids in their proper positions.

Figure 6 shows them switched.
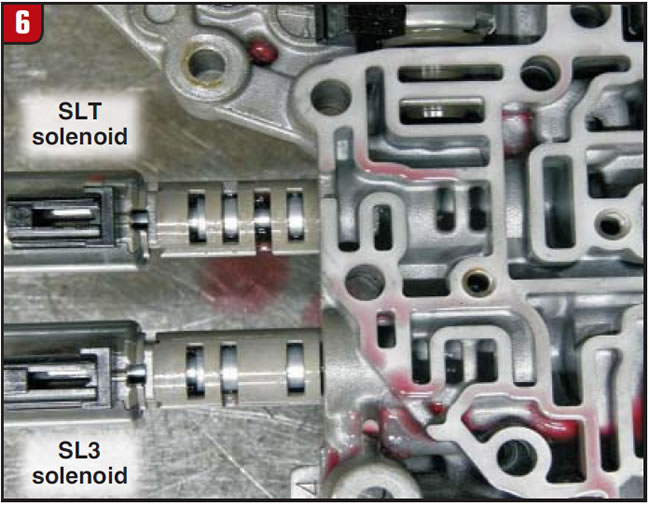
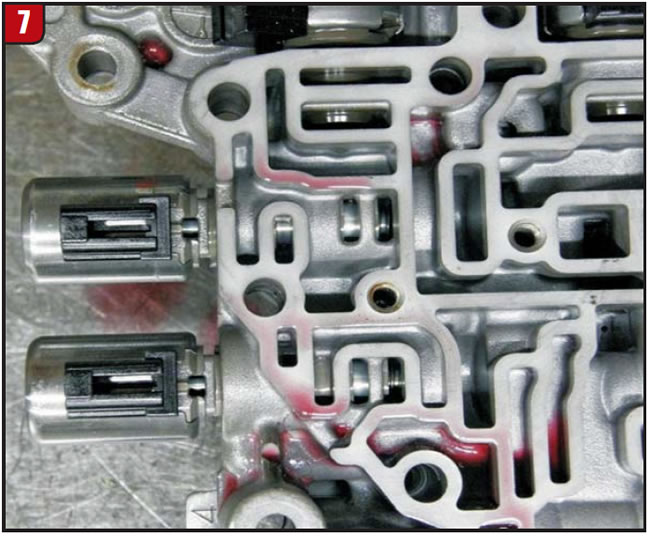
Figure 7 shows them positioned into the valve-body casting the way the brackets would secure them in place. With a very careful observation, you could notice that one of the ports in the SLT position is blocked, indicating an improperly placed solenoid.
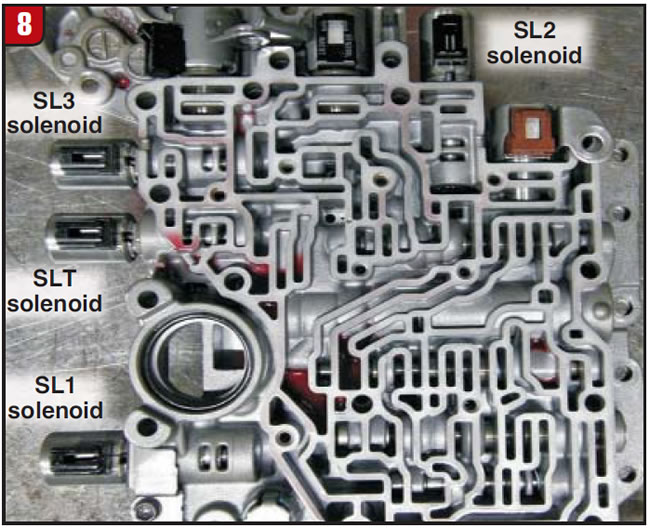
But the difference is so subtle it often goes unnoticed – especially since the solenoids are not normally installed into their locations with the side plate removed (Figure 8).
Using Figure 2 for solenoid identification along with Figure 1 for solenoid location will prevent this easily made error from taking place in your shop.


