
Shift Pointers
- Subject: Diagnosis of codes 41, 42 and 21
- Unit: 41TE
- Vehicle Application: 1995 Chrysler Cirrus
- Essential Reading: Rebuilder, Diagnostician
- Authors: Jesse Zacarias and Roy Delfran
In doing electrical repairs you sometimes deal with some strange things. Some even make you doubt what you already know – or think you know.
We recently did a repair on a family friend’s car (first mistake); it was a simple problem. Her 1995 Chrysler Cirrus with a 41TE transaxle had codes 41 (L/R-solenoid-circuit error), 42 (2/4-solenoid-circuit error) and 21 (OD-pressure-switch circuit). The vehicle had only 81,000 miles, and she did not have very much money (same old story). The solenoid body failed the resistance test, so we replaced it. The solenoid-body connector was not making good contact with the solenoid body (common problem); it was replaced and the wire connections were soldered, not crimped.
The condition of the battery was checked along with the charging system. Voltage drops were checked both on the battery cables and at the TCM grounds, and everything seemed to be fine.
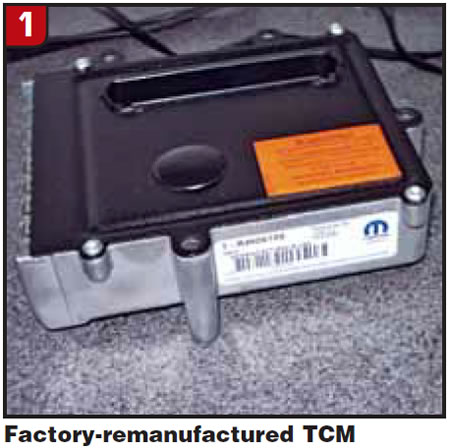
We released the vehicle, and within the month of the repair the vehicle came back with code 41. On the basis of the last diagnosis and the parts replaced, we decided to replace the TCM (Figure 1).
Two weeks later it came back with a code 41. We checked the harness connector at the TCM for a good contact by checking pin tension using a #53 drill bit (0.059) (Figure 2), and even though it passed we still decided to replace the #19 (2-4 solenoid) and #20 (L/R solenoid) wires at the TCM, soldering the wire connections rather than crimping them.
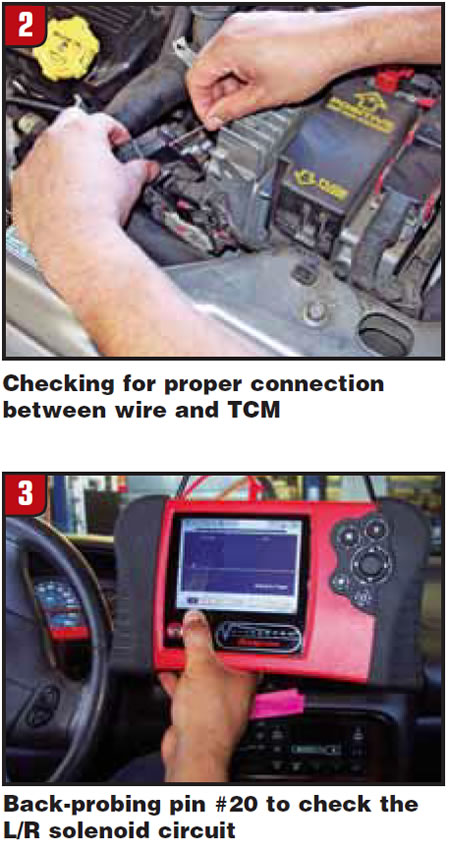
Two weeks later it came back with a code 41. This time we hooked up the scope, back-probing pin #20 (Figure 3).
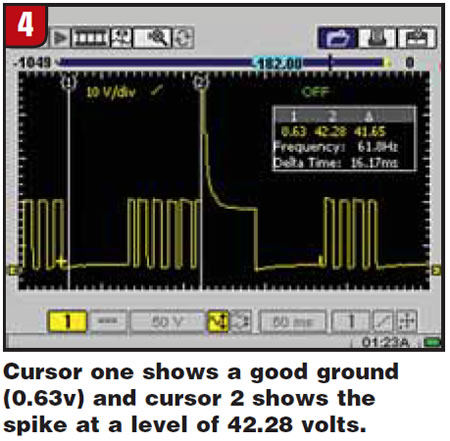
The problem was intermittent, so we had to drive the car for a while. The waveform showed a good voltage and ground (Figure 4). The TCM does a periodic solenoid-circuit resistance test. It does this by momentarily turning off the solenoid if it is on or turning it on momentarily if it is off, thus producing a voltage spike that has to fall between certain voltage levels. We could see the inductive spike present at a level we have known to be OK.
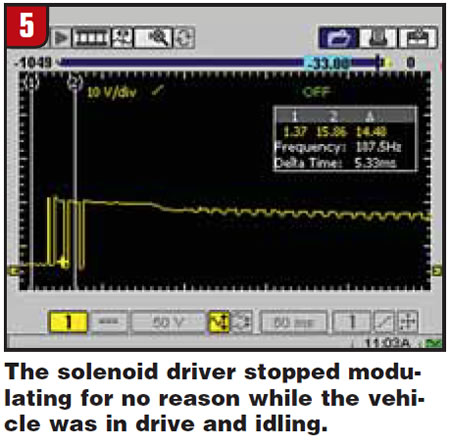
We were able to catch the problem as it happened (Figure 5), and we concluded that the TCM was the problem even though it had been replaced.
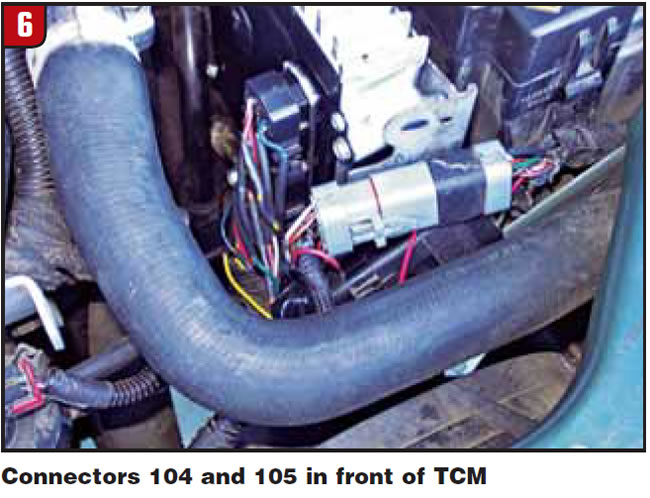
The dealer was nice enough to send us another one, so we installed it, and you guessed it: Within a couple of weeks it came back, this time with codes 42 and 43. By looking at the factory wiring diagrams we noticed that the wiring harness from the solenoid body passes through connectors 104 and 105 before reaching the TCM (Figure 6).
To eliminate all possibilities (paranoia sets in) we bypassed connectors 104 and 105 by installing a new solenoid-body connector and a new TCM connector and wires. To eliminate any false connections we soldered all the wire connections and did not use butt connectors (Figure 7).
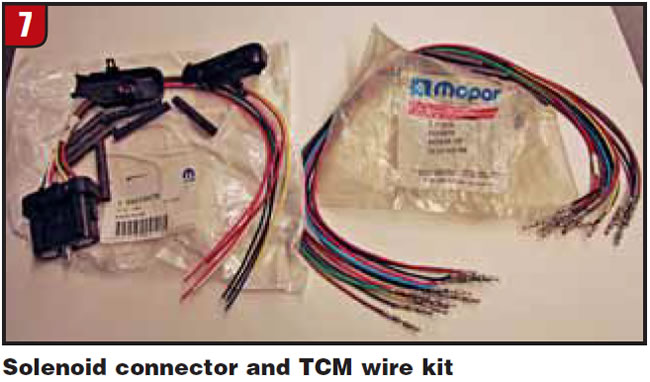
We now had new connectors at the TCM and solenoid body with new wires and had the solenoid body connected directly to the TCM, bypassing connectors 104 and 105.
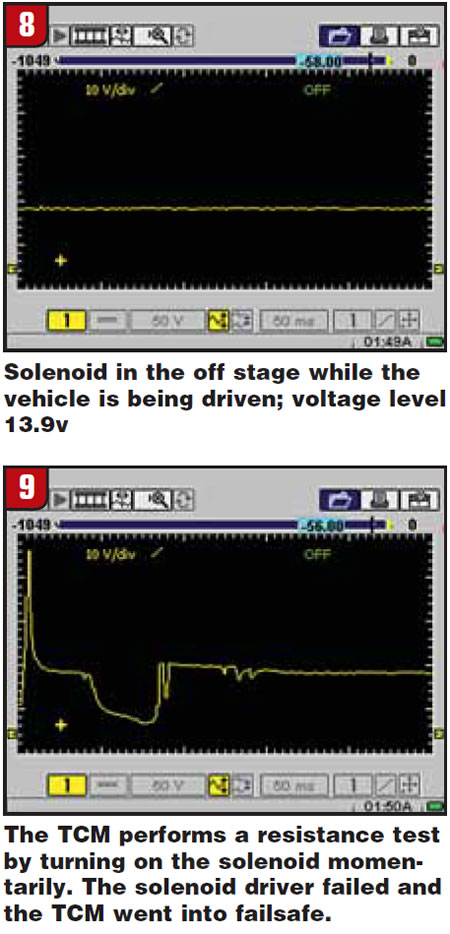
Within the week after we released the vehicle, it came back with code 42. We reconnected the scope, and again we could see a good voltage and ground and a good waveform. While driving the vehicle we were able to see the problem as it happened with the scope connected. This time while the solenoid was off, it failed the resistance test (figures 8 and 9).
On the basis of the waveforms that we had seen right before the failure, all evidence pointed to a bad TCM. We called the dealer and were surprised to see that he was very cooperative and did not question us; he just sent another TCM (strange – no gauntlet?).
When we installed the third TCM the vehicle did not even pass the road test. This time it had codes 43 and 33, and the transaxle slipped in third gear, a problem that was not there before.
We hooked up the scope and it showed a bad TCM. Enough is enough, so we ordered the fourth TCM from an aftermarket source, installed it, and the problem was solved.
Lesson learned: Just because you’ve replaced the TCM with a remanufactured one does not mean it’s not the problem. We could have saved a lot of time by not replacing wires and harnesses if we had not ruled out the TCM just because we had replaced it and had not doubted our scope even though it showed a good ground and voltage (Figure 4).
By the way, after we informed the parts-counter guy why we decided to buy an aftermarket TCM, he said: “I’m not surprised. I have been having problems with my remanufactured TCMs.” That explains the willingness to send two TCMs without questioning us. It sure would have been nice to know that at the beginning.
Sometimes you just have to sing the blues.

Jesse Zacarias is the owner of Elec-Tran Diagnostics in Gilroy, Calif. Roy Delfran is with Snap-on Diagnostics’ Ask A Tech Community Web Forums (http://askatech.snapon.com).


