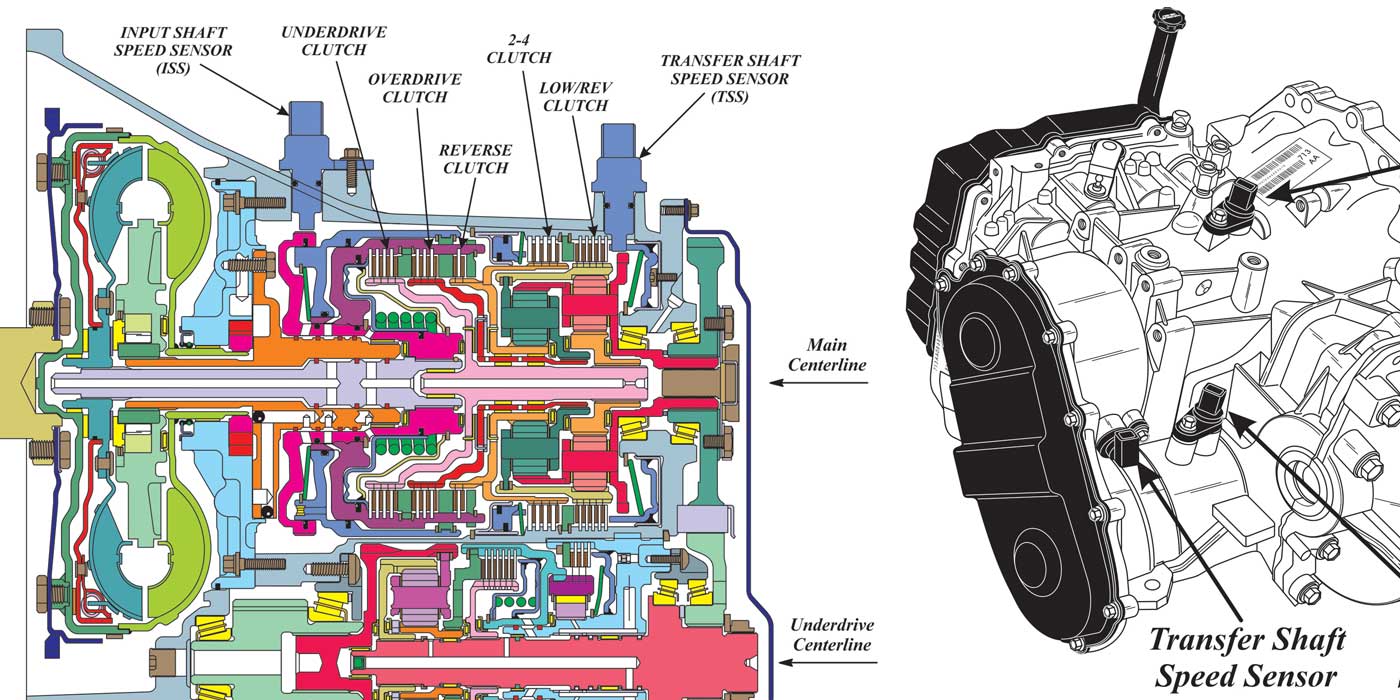
Shift Pointers
- Subject: Diagnosing noises
- Unit: Ford 5R55S/W
- Essential Reading: Rebuilder, Diagnostician
- Author: Mike Souza, ATSG
One of the toughest things in the transmission industry for any technician to diagnose is a noise problem. It’s even tougher to diagnose over the phone, and at times near impossible. In some instances, as with the 5R55S/W transmission, there can be several different things that can have you chasing a noise ’til you’re about to pull hair from your head.
In my case, I have severe hearing loss due to heredity (along with turning 50) and with plenty of help from 25 years of blowing off parts along with screaming air tools. I can’t warn enough the younger generation who are coming up in this industry to wear ear protection so that they don’t end up with the ringing effect you will get in your ears that doesn’t go away and has no cure. Although my hearing aids do help disguise the ringing noise, they do not relieve it in any way.
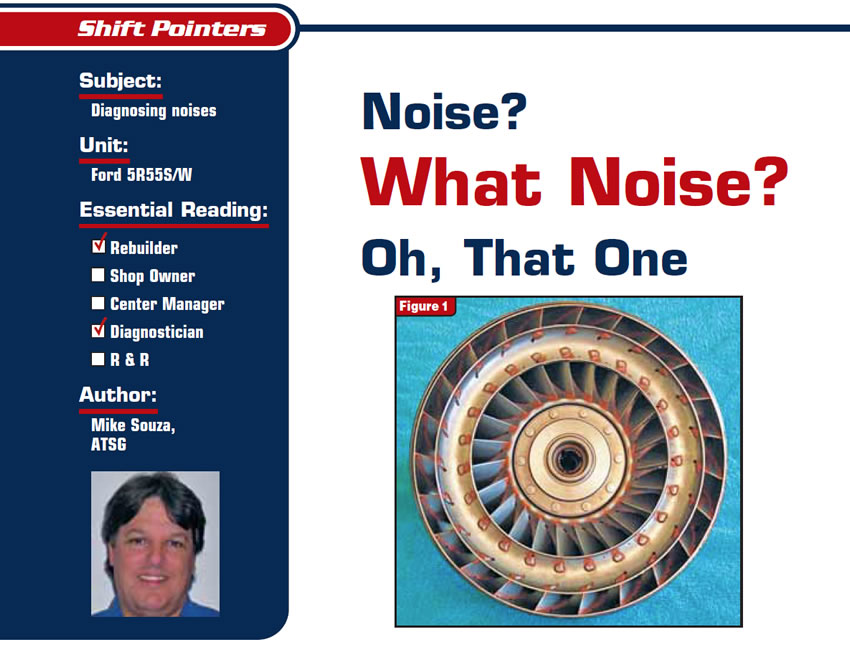
Now, let’s get back to this noise issue. Recently it seems there have been several complaints of converter noise on this particular unit – kind of a ticking or rattling noise, more noticeable in park or neutral, and it goes away during lockup apply. I was lucky to run into my friend Milt Frese from Precision converter of Iowa, who happened to have a cutaway of a 5R55S/W converter on display at an ATSG seminar at which I was speaking in Omaha. He showed me several different places inside this converter that can cause this type of noise, and I’ll share these with you.
First, in Figure 1 is a view of the turbine. Once it is removed and turned over we can get to the area of the converter where one of the problems may occur (see Figure 2).
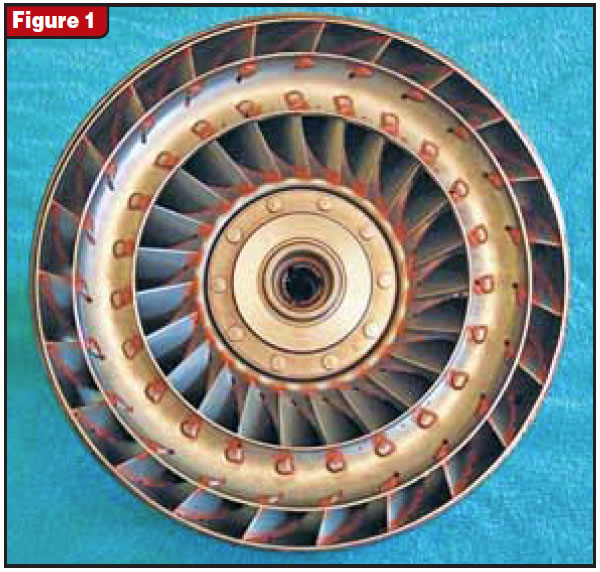
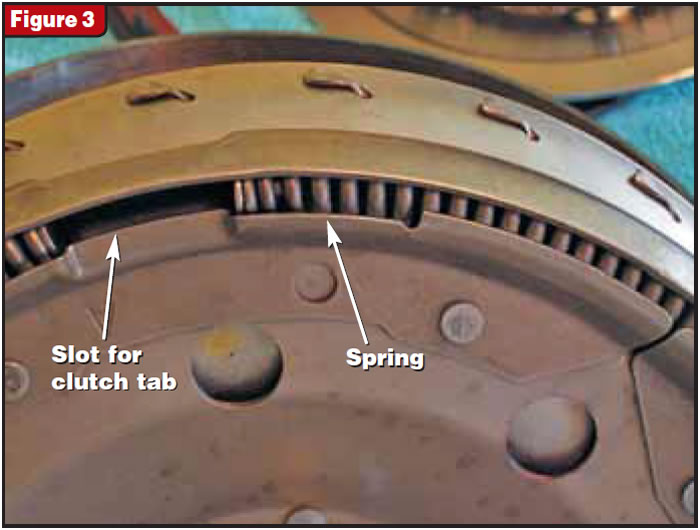
The damper spring, shown in Figure 3, weakens and becomes loose, which may cause the clutch tabs shown in Figure 4 to make noise – not to mention the usual noises caused by loose fins or rivets that can occur in any converter.
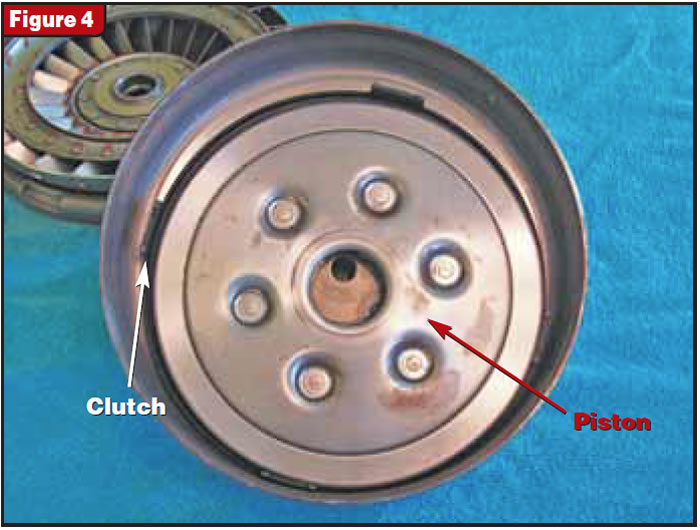
Now for the noise that is the major cause for most of the tech calls we receive at ATSG concerning this converter. The area of concern for this noise is on the back side of the apply piston. Figure 4 shows the front side of the apply piston; Figure 5 shows the piston removed and turned over. With a closer look in figures 6 and 7, you can see that the piston is held tight in the area where it splines into the cover with six tension springs. These springs become weak with time and heat, which is the most-prominent reason for this converter to make noise. This noise also may appear with a rebuilt factory replacement converter.
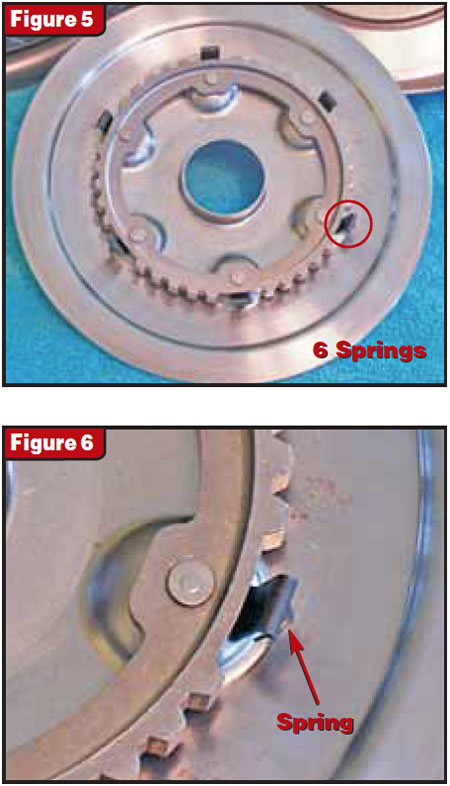
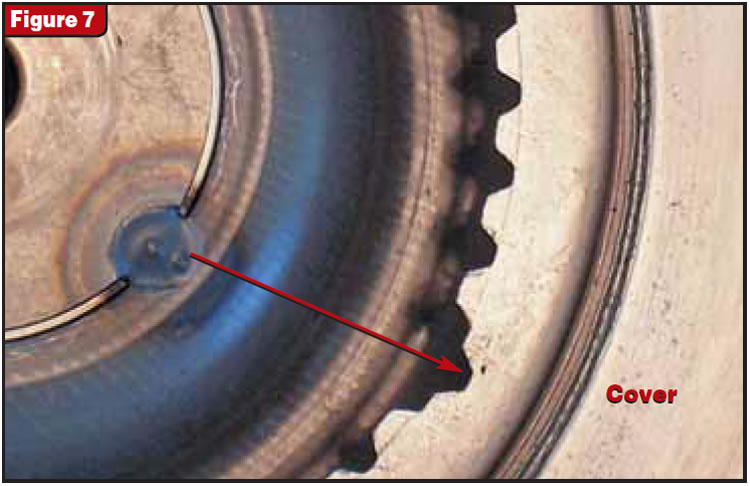
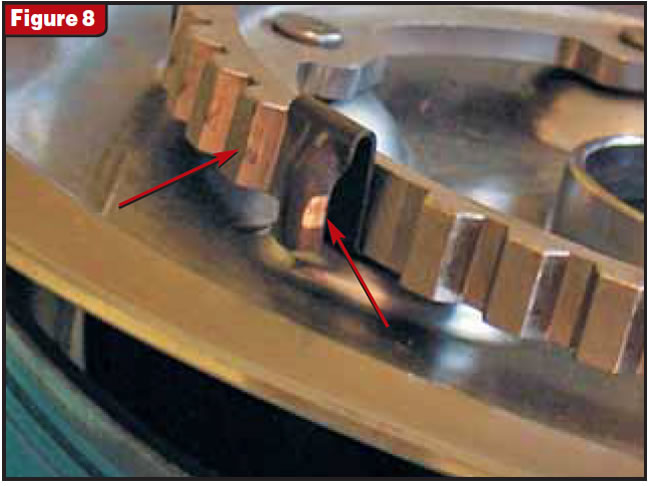
Figure 8 shows the wear pattern just starting to develop on the tension spring and the spline area of the piston. This problem was mentioned in an article by Ed Lee in Transmission Digest in October 2006. The article mentions that one aftermarket converter rebuilder fixed this problem by modifying a damper assembly from a three-tab AX4S/N, which allowed him to use the piston from that same converter to fit in place of this assembly. The article went into great detail on how much more clutch-apply area this type of assembly has, along with a completely different piston assembly that does not spline into the cover. This rebuilder has had great success for several months now using this modification.
Now let’s discuss some different areas of this transmission and the vehicles using this unit that have other noise issues. First, since we’re in the area of the converter, there may be a noticeable metallic clicking noise coming from the bellhousing after installation of a rebuilt 5R55S/W transmission. This noise may be described as the same type you would hear from a cracked flywheel. This is caused by the flywheel adapter plate not being properly aligned with the torque converter.
Figure 9 shows the adapter plate on the converter with the holes for the alignment tool identified. The alignment tool centers the adapter plate with the converter pilot as shown in Figure 10.
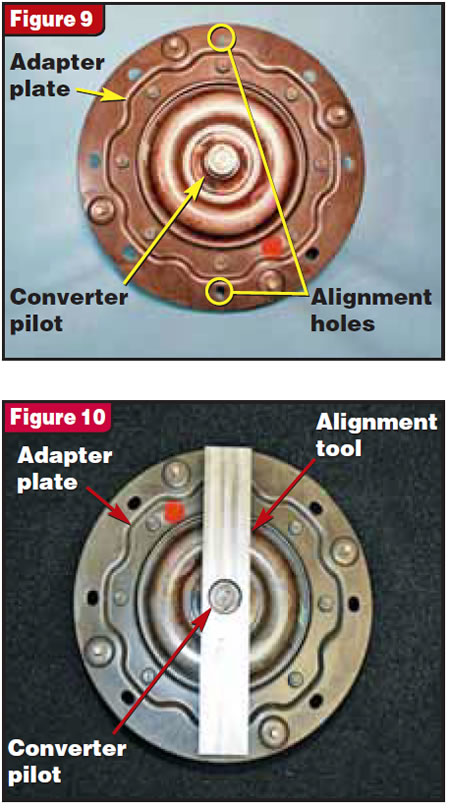
Once all the bolts are tightened to 33 lb.-ft., remove the tool and tighten the two remaining bolts under the alignment tool. The Ford Flex Plate Aligner tool number is #307-403. Aftermarket alignment tools also are available; check with your supplier.
Another point worth mentioning is the two paint dots on the converter and adapter plate. The orange dot on the adapter should align with the converter’s pink dot, which is at the heavier side of the converter. These paint dots must align close to each other as shown in Figure 10. Although misalignment of the paint dots may not cause a vibration problem, over time it may cause premature bushing wear.
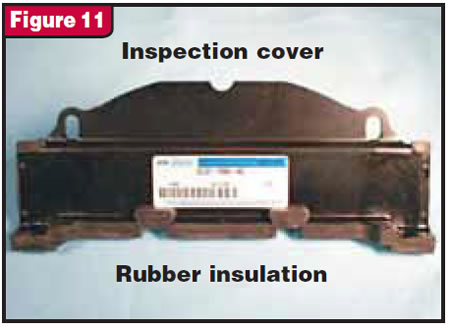
Another common ticking noise on this transmission also originates in the bellhousing area and may be similar to the sound of a cracked or loose flex plate. It’s caused by flexing of the separator plate between the engine block and the transmission, and the noise also changes with engine speed. Ford has an updated inspection cover with some foam insulation added to apply pressure to the plate when it’s installed and muffle the noise coming from it (see Figure 11). The Ford part number for the inspection plate is #2L2Z-7986-AC.
The last noise I’m going to share with you is on the vehicles such as 2002 and later Explorer or Mountaineer that use the 5R55S/W transmission. A buzzing or whining noise seems to be coming from the bellhousing area and sounds much like a torque-converter or pump whine. This noise is caused by a failing bearing in the camshaft-position-sensor/synchronizer assembly resulting from lack of lubrication, and it also gets louder as engine speed increases.
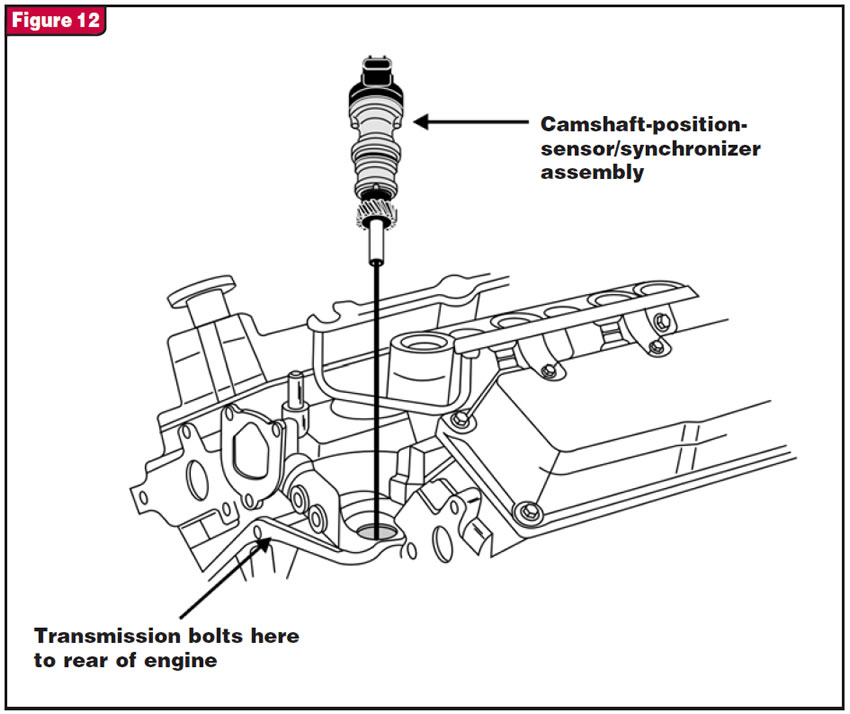
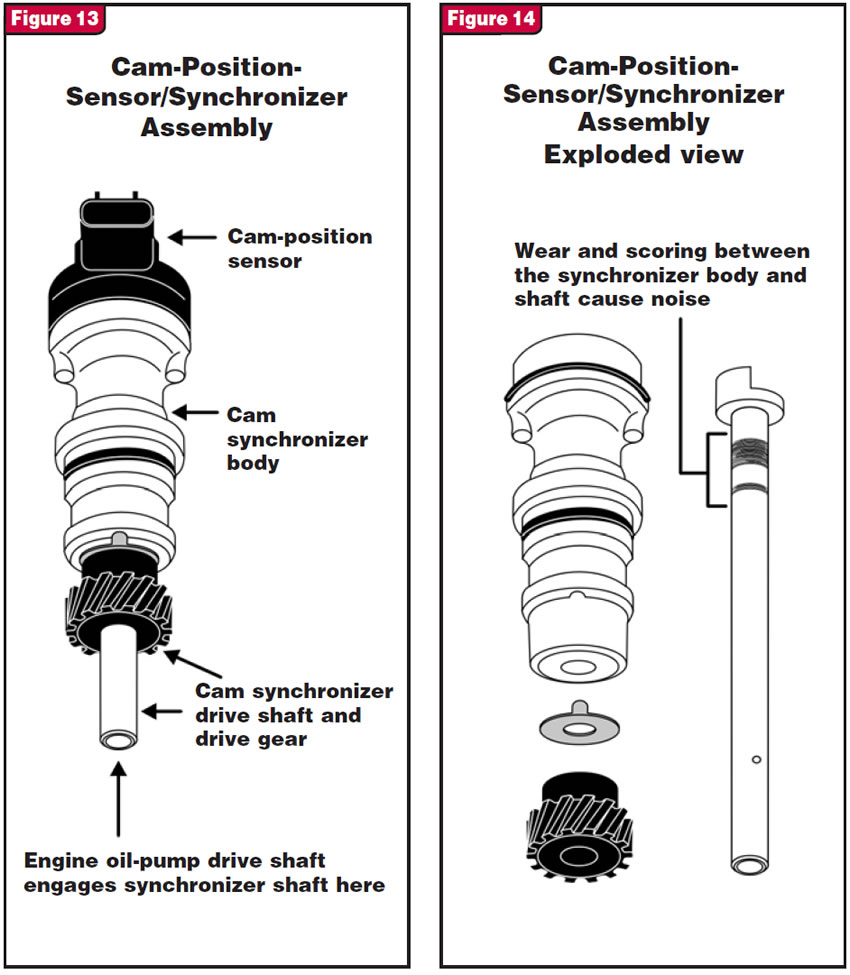
The synchronizer-assembly lube hole becomes clogged, cutting off oil to the area between the synchronizer body and shaft and causing it to run dry. The camshaft-position sensor is on top of the camshaft synchronizer in the back of the engine block, centered just in front the of the transmission bellhousing and held in by two bolts (see Figure 12).
The PCM uses this sensor to control fuel-injector timing. When this sensor begins to fail, it can cause a loud whining or buzzing noise that because of the location is commonly mistaken for a converter or pump whine. Figure 13 shows a description of the camshaft-position-sensor/synchronizer assembly. Figure 14 shows the area of wear and scoring between the synchronizer body and shaft that causes the noise.
This noise has caused countless hours of wasted shop time, from swapping converters to pump replacement, trying to fix the problem. The sensor/synchronizer assembly is much easier to R & R with the transmission removed. An alignment tool is available from Ford to align the replacement assembly. This repair can be done without the tool if you take special care to mark the alignment with paint before removal to help install the replacement assembly correctly. The cam synchronizer must be installed in the correct position, as it is timed to the engine much like a distributor; failure to do so will result in a poorly performing engine.
If you suspect that the sensor/synchronizer assembly is causing the noise, place your finger on top of the sensor with the engine running to feel for a vibration. You also can remove the sensor and check for rusting or debris in the synchronizer body. The base Ford part number for the camshaft-position sensor is 6B288, and for the camshaft-position synchronizer 12A362.
All these noises with this one transmission. Well, I hope this information is useful in preventing some technician from losing sleep over wasted hours of chasing noises on this unit. Remember, always wear proper ear protection when necessary now to make finding those noise problems easier later on in life.