

A 2003 Honda CRV was experiencing a transmission shifting issue. After diagnosis it was determined that the linear solenoid was defective. Because of a back-order situation, the vehicle remained on the lift for a couple of days.
The part finally arrived, and once the repair was made and the vehicle lowered to the ground it was apparent something did not look quite right. The CRV appeared to be sitting a bit high. In addition, it rode like a tank on the road test. The customer was contacted and told about the condition and stated that the ride seemed to have been getting worse recently.

After trying the bounce test, the technician determined that the passenger-side front strut was not collapsing correctly. The rest of the suspension appeared to be in good shape.

Both front struts were replaced due to the fact that the vehicle had 85,000 miles on it and neither strut had ever been changed.
An issue that seems to be increasing over the past few years has to do with strut failures. Instead of just the normal seal-leak issues or mount-bearing failures of the past, some struts today are wearing internally and creating a sticking problem. This condition is not limited to just Hondas. An article was submitted to the July issue of Transmission Tech/Talk concerning a 2007 GMC Acadia. In that instance, the vehicle came to the shop for a normal transmission repair, was on the lift for a few days and, when lowered back to the ground, looked like it had a lift kit installed. Unlike the CRV, nothing was out of sync before the repair. The Acadia bit the dust on the lift. Try to convince the customer of that!
As struts age they wear internally, and items like bushings and seals create certain problems. Other items like the rebound bumper or cushion wear and create debris that can cause the sticking issue.
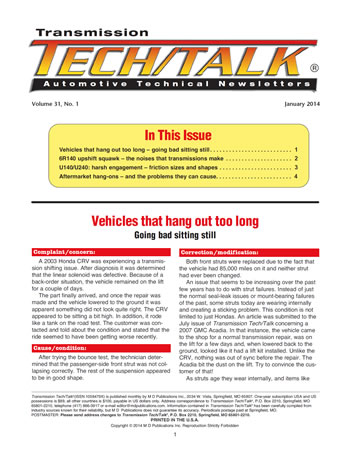
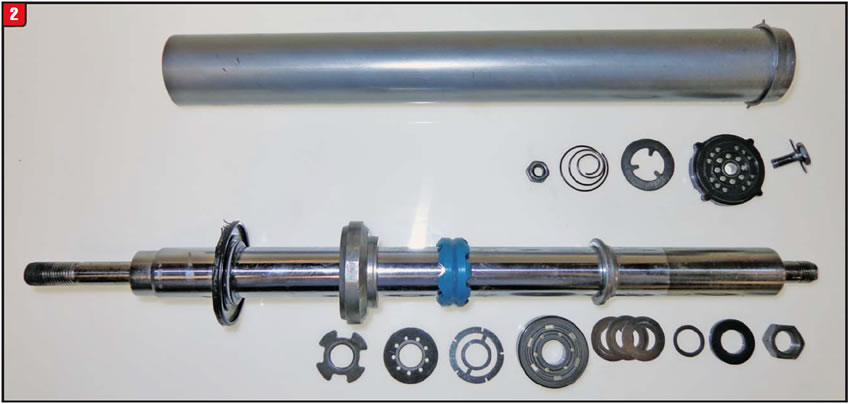
On the surface, a strut is pretty basic (Figure 1). It appears merely as a shock absorber with a coil spring wrapped around it. Internally, a strut is rather complex. At the end of the inner tube is a checkvalve assembly. The piston shaft itself has a seal at the end and is supported by a sleeve and bushing at that end.
At the other end is the piston and valve assembly, which is comprised of several components (Figure 2).
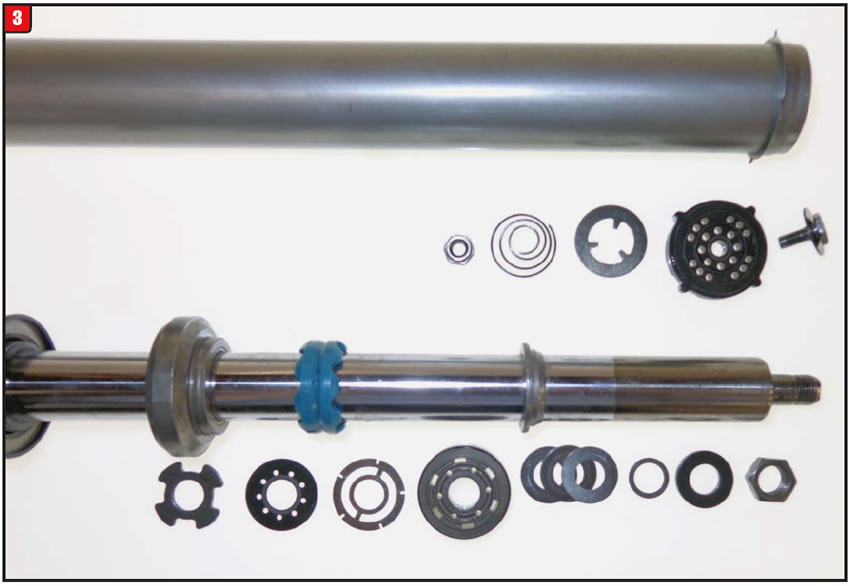
As the vehicle bounces up and down, oil inside the inner tube is transferred from one side of the piston/valve assembly to the other, at a given rate. That transfer rate is what provides the ride feel of the vehicle. As components deteriorate, particles (debris) start to clog the orifices in the control valves. The more debris, the more resistance to flow. Couple that with remaining on a lift for several days and the strut will remain in an extended position. It doesnʼt take that much wear to disable the valve (Figure 3).
In the case of the CRV, the customer was somewhat aware that a problem existed; therefore, it was not much of a push to charge for the strut replacements. In the case of the Acadia, the situation was a bit different, since there were no ride conditions before the transmission repair.
Struts are like tires; they are maintenance items and should be treated as such. After the mileage threshold is exceeded, the customer should be alerted and a strut job should be sold; otherwise, the shop may have to pick up the tab for a vehicle hanging out too long.


Before or after a Ford 6R140 is rebuilt, the transmission exhibits a squawking noise on the 3-4 upshift. The noise will vary with throttle opening, and in addition all other functions are OK.
The E-clutch frictions, which are applied in fourth, fifth and sixth gears, are not compatible with the transmission calibration during the 3-4 upshift. Fluid incompatibility is also a possibility in the event a service was done to the transmission prior to the noise, indicating the wrong fluid was added. The proper fluid for 6R140 models is Mercon LV.
The 6R140 is a big brother to the 6R60 family of transmissions. It was launched in 2010 for the bigger F-series trucks with 6.2L or 6.7L engines.
The layout of the 6R140, however, resembles that of the GM 6L80 more than the 6R60, especially at the direct/forward-clutch area. In the end, the 6R140 is definitely a home-grown Ford gearbox and is certainly a beefy transmission.
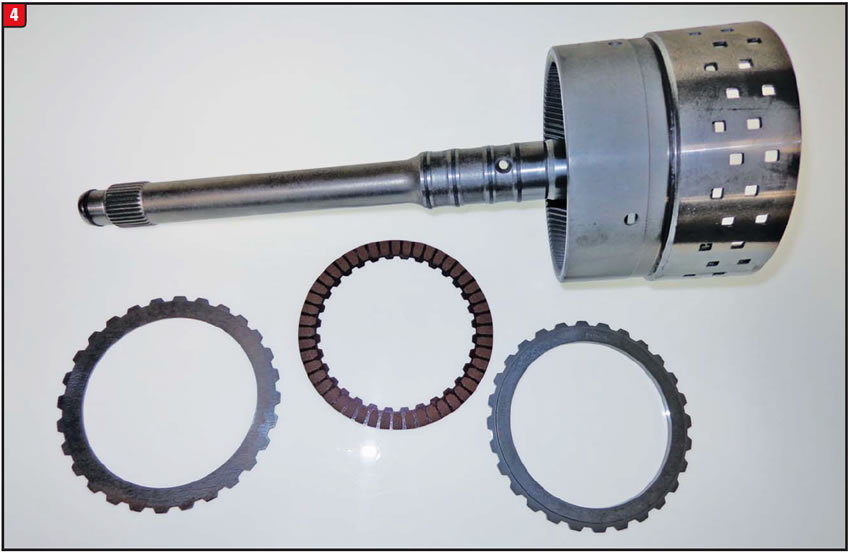
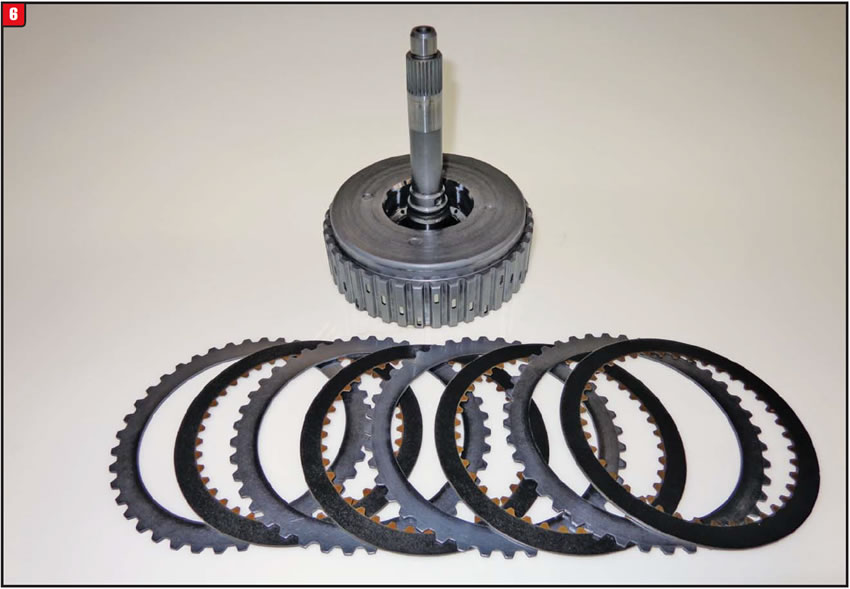
The E-clutch assembly has the input shaft made to it as well as the front ring gear (Figure 4). Construction and material are a little different from the E-clutch assembly on the 6R60. Both types function the same, however, and both models use a bonded piston and retainer (balance) for apply and release.
During the development process of the 6R140, Dynax, the OE supplier of frictions for the unit, went through several variations to achieve the best 3-4 upshift quality and durability. Arriving at the best possible friction material during design is no small thing in todayʼs environment. The focus on top-quality clutch-apply feel, durability and minimal drag (fuel economy) is unrelenting and involves several aspects such as fluid, friction material and design, steel microfinish, pressures and computer strategy. That mix must come together correctly to end with good results.
The E-clutch friction material that Dynax ended up using was the segmented (button) design. Segmented frictions were originally developed by Hondaʼs friction manufacturer, FCC. Initially, that process was done for cost-cutting purposes.
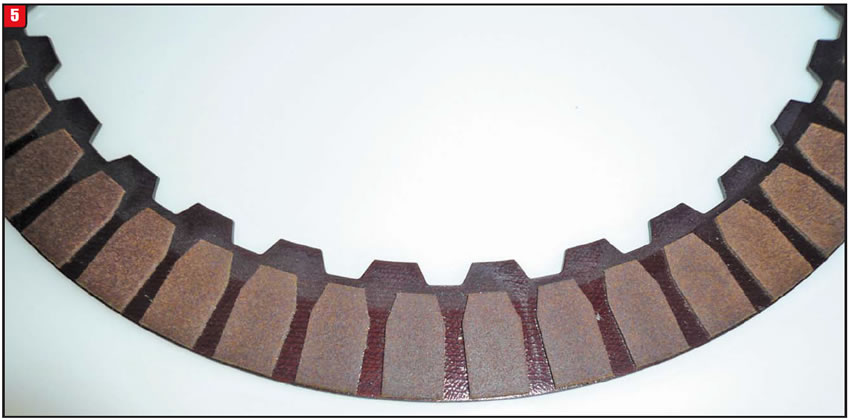
Traditionally, friction wafers were stamped out of a flat sheet of a special blend of paper, which started out as soup. Stamping round friction wafers out of the paper sheet meant that there were leftovers, such as the corners between the wafers and the centers (drops) from the waferʼs middle. Much of that material is waste. With segmented buttons being stamped out from the sheets, there is virtually no waste (Figure 5).
Another advantage of segmented frictions is the oil-grooving issue. Normally, either oil grooves are cut into the friction wafers after they are adhered to the steel core or the wafers undergo a hot-press procedure to press in the grooves. Both processes involve time and tooling. The segmented friction process merely drops the buttons onto the steel core in a specific arrangement to form the desired oil groove without the added cost.
The material composition of a friction is, however, the most-important aspect of the clutch plate. That material choice is what provides the best clutch-apply feel and durability of the clutch pack. The material that Dynax ended up choosing apparently got the job done.
In the end, using a friction plate that was not specifically designed for a particular clutch pack could end with noises that transmissions make, or worse.


After a Toyota U140E in a 2003 Camry was rebuilt, a somewhat harsh park/neutral-to-drive engagement was noticed. The vehicleʼs initial complaint was noise due to a bad differential bearing. The transmission had a normal park-to-drive, park-to-reverse apply prior to repair, and nothing “creative” was done to the transmission during repair. It was a basic “soft” overhaul.
All pressures were tested along with computer operation, and everything appeared to be within limits.
The forward frictions that were installed during rebuilding were not the same type as those installed at the OE factory. Apparently the transmission did not like the flavor of plates that were installed by the shop.
The transmission was removed and disassembled and a set of OE frictions were installed. Once the transmission was reassembled and installed into the vehicle, it was driven again. This time the drive engagement was acceptable. So what was different?
The first issue to address is flatness. The frictions that were originally installed were flat. The OE replacements had a slight wave in them. Could that be the problem?
Toyota and other OEMs have for years produced transmissions that would have a particular clutch pack designed to have waved frictions, only to switch to flat frictions on later models, or vice versa.
Much of the time, the only frictions available to the aftermarket were flat. BorgWarner did offer certain waved frictions for specific applications for a time but finally discontinued them.
Interchanging friction designs (flat to waved) affects “free” clutch-pack clearance, providing both types are the same thickness. A waved 0.070-inch-thick and a flat 0.070-inch-thick friction take up different space because the waved plate will also have 0.010 to 0.020 inch additional height due to the waves. Overall piston travel, though, will be the same. A five-plate clutch pack could then vary by 0.050 to 0.100 inch in free clearance between both types.
Transmissions like the AW55-50SN can change over the years on a given clutch pack. For instance, the C2 pack originally was equipped with 0.067-inch-thick frictions that were flat. Later on, the frictions were made with a wave in them, but the thickness was reduced to 0.059 inch so they could be installed into the same space. Piston clearance remained the same.
The primary purpose for using waved frictions or waved steels in a clutch pack is to limit parasitic drag once the clutch is released. The OEMs have much better ways to control clutch-apply feel on a given clutch pack than waving frictions, which is inconsistent. Friction material, steel microfinish, orificing, apply pressure, accumulator action and fluid type are all more consistent in controlling clutch-apply feel. Did the lack of waviness cause the harsh apply? Probably not.
Another issue is oil-groove design. Friction plates can have a smooth finish or a variety of different grooving patterns. Grooving helps to channel oil through the clutch pack during apply, which also contributes to shift feel.
Last, material and quantity are also big factors in the apply feel of a given clutch pack. Today, friction-plate manufacturers use an array of different friction materials based upon the calibration needs of the transmission as well as the fluid requirements.
All these factors go hand in hand to provide the best clutch-apply feel and durability of the transmission. If any of them get out of whack, problems can arise.
The Toyota U140E forward frictions, which were produced by Dynax, originally had a slight wave along with a smooth finish. The friction material was conducive to a static (not dynamic) clutch design (Figure 6).
The Toyota U150E, on the other hand, uses a forward friction that is flat and has oil grooves. Installing the U150E friction into a U140E transmission could result in an apply problem. Dimensionally, the two friction types are the same and can interchange, so buyer beware.
Today, there is much more sensitivity in transmission operation than ever before, and the little things that never mattered sure do now.
It remains to be seen how many more friction sizes and shapes will come to market, but itʼs a certainty that there will be more to choose from.

A 2000 Dodge Ram 2500 with a 5.9L diesel and 47RE transmission had been diagnosed with a lockup hunting condition several months ago. The cause of the problem was apparently electrical interference. From where, who knows? However, the problem was fixed by adding an electrical filter (noise suppressor).
Recently, the vehicle had returned with another transmission shifting problem. At times, the transmission would downshift from 4th gear to 3rd gear for no apparent reason. In addition, at times the engine would not shut off right away.
Some time ago, the truck had an aftermarket diesel improvement module installed on it and at times the module was interfering with normal engine and transmission operation. The question was, did the module cause just the most-recent problem of erratic down-shifting, or did it also cause the previous lockup hunting issue?
Both the transmission shifting problem and engine shut-down issue were remedied merely by unplugging the add-on module.
Customers, on a quest to make their vehicles perform better or to achieve improved fuel economy, will bolt on various aftermarket contraptions. Some add-ons are rather basic while others are much more complex. The aftermarket diesel module that was installed on the Ram 2500 was from Edge Products (Figure 7). This particular module is designed to enhance the factory parameters to not only improve performance but also provide several level settings.
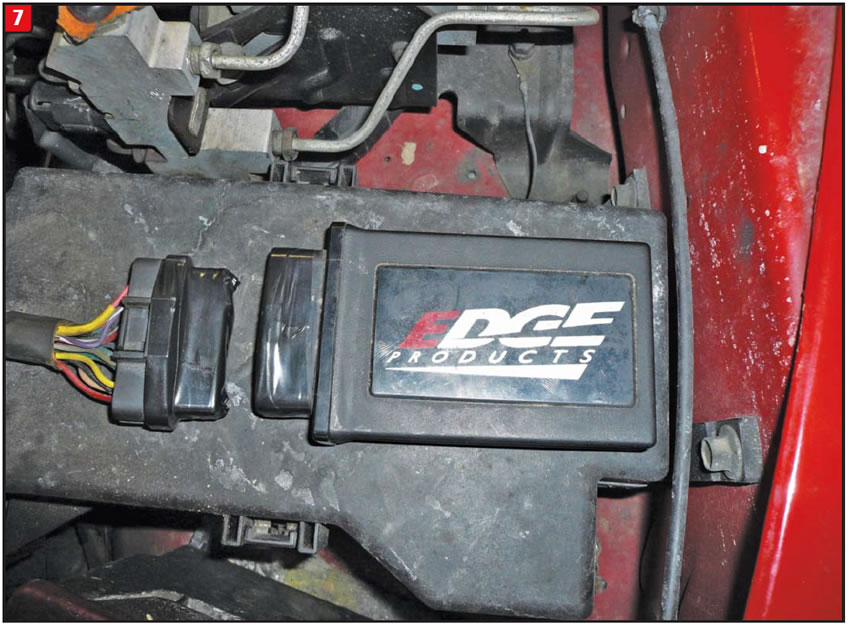
Transmission operation must be modified when an engine boost system is installed because of the increased torque that the engine generates. Without the modifications, a transmission could get smoked in no time. Therefore, engine and transmission strategies are all encompassed into the same module.
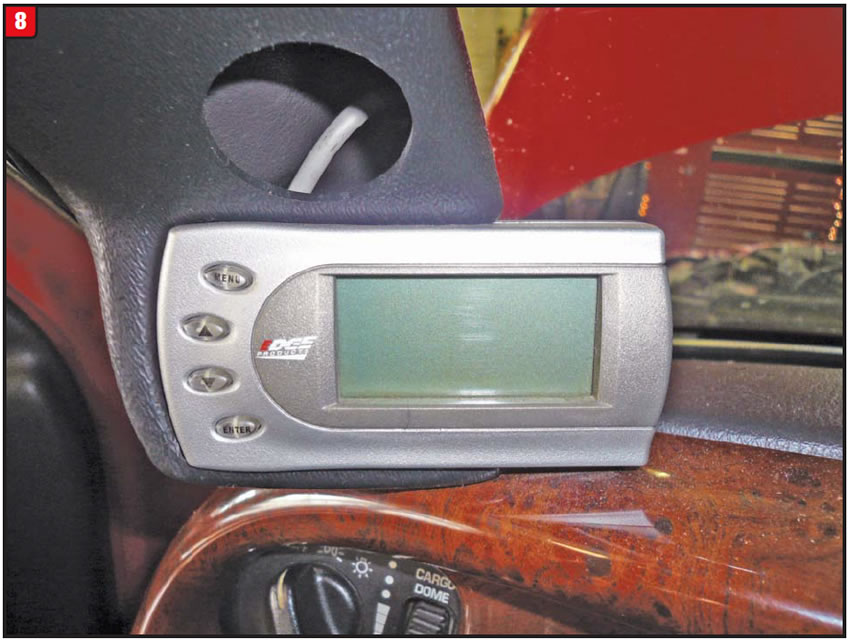
The module in Figure 7 is what goes under the hood and is wired into the engine componentry. The controller is mounted inside the passenger compartment somewhere on or around the dash (Figure 8). Performance levels are set by the controller, and the monitor displays the outputs so
that the customer can see whatʼs going on.
After running diagnostics on the system, it was determined that the boost pressure sensor was not receiving the proper voltage signal at times.
Diagnosing todayʼs vehicle to determine engine or transmission problems relating to factory-installed components is hard enough. Getting up to speed on aftermarket add-ons is more icing on the cake.
Fortunately, most vehicles on the road today are untouched by human hands – relating to add-ons, that is; however, certain high-performance vehicles or ground-pounding trucks may just have some kind of enhancements. Therefore, always ask the customer whether anything creative has been done to their ride and avoid the problems these modifications can cause.

January 2014 Issue
Volume 31, No. 1
- Vehicles that hang out too long – going bad sitting still
- 6R140 upshift squawk – the noises that transmissions make
- U140/U240: harsh engagement – friction sizes and shapes
- Aftermarket hang-ons – and the problems they can cause


