As transmission technicians, problem-solving is what we do. We see that box that says “customer states” and we already have an idea of what is wrong, and 99% of the time we’re right. After all, it’s the eighth 6L80 we have seen this month. But with an endless list of components and ever-evolving technologies it can be easy to miss the mark, especially when we get comfortable or run into an issue that we have never seen before.
It is not uncommon to encounter a symptom or a condition that you know is remedied with this repair. One example I encountered was a 2007 Tahoe 4×4 with a 5.3L engine and a 4L60E transmission.
The customer stated that there was a whining/grinding noise behind the driver’s seat when accelerating or decelerating, and that the noise was worse when the vehicle had warmed up or been driven a few miles. It had already been to another shop and diagnosed with a rear differential problem, and their recommendation was to replace the axle with a remanufactured assembly, so they installed a replacement unit.
The vehicle had oversized wheels and tires that were not quiet, and on the initial test drive there was a loud grinding noise in the rear that was worse when accelerating and decelerating. It sounded like an open and shut rear differential pinion bearing noise. The vehicle had a suspension lift. When I checked it, there was no discernible play in the pinion bearing. The vehicle was run on the lift and a stethoscope used on the differential housing. A loud grinding noise was heard there, so a recommendation was written up for a rear differential rebuild.
After I checked out a few more vehicles, I was still thinking about this Tahoe. Some things weren’t adding up. I did not know who the other shop was or where the differential was sourced from, nor the shop’s abilities. After all since it had just been replaced, why did the customer not go back to the shop that just did the work? Did I miss something?
Read more stories in our R&R Tech series here.
I pulled the paperwork back from the service advisor and told him I was going to take a second look at this one. I brought the Tahoe back into the shop and put it on the lift again. I had another tech ride up in vehicle so I could listen from below. Standing under truck, the noise was still the loudest at the rear of the vehicle just like it sounded when driving it. As I start moving the stethoscope around to different parts of the vehicle, I discovered that the noise was loudest at the back of the transmission.
Wow, I almost sold this guy a differential when it was not the issue he came in for. It turned out that the rear planetary was the component that had failed.
We recommended a remanufactured transmission, sold the work and installed our unit. The noise was gone. There were still questions I had, like whether this was the entire problem all along, or if this truck just had two components fail at almost the same time. Still, I am just glad I questioned myself and double-checked my work.
Sometimes a vehicle comes in that has you flustered or overconfident, and you skip the most basic steps that would have stopped you from wasting your time and costing you (and potentially, the customer) money. The following example illustrates this.
A remanufactured transmission was installed in a 2012 Volvo XC70 3.2 FWD with a TF-80SC transmission. About 5,000 miles and two months later it came back to the shop with a complaint of slamming into gear, harsh shifts and a check engine light. The vehicle performed normally on the ten-mile test drive of mixed city and highway driving. Codes were pulled and there were circuit codes for numerous solenoids, any of which could cause hard shifts or cause the vehicle to go into limp mode.
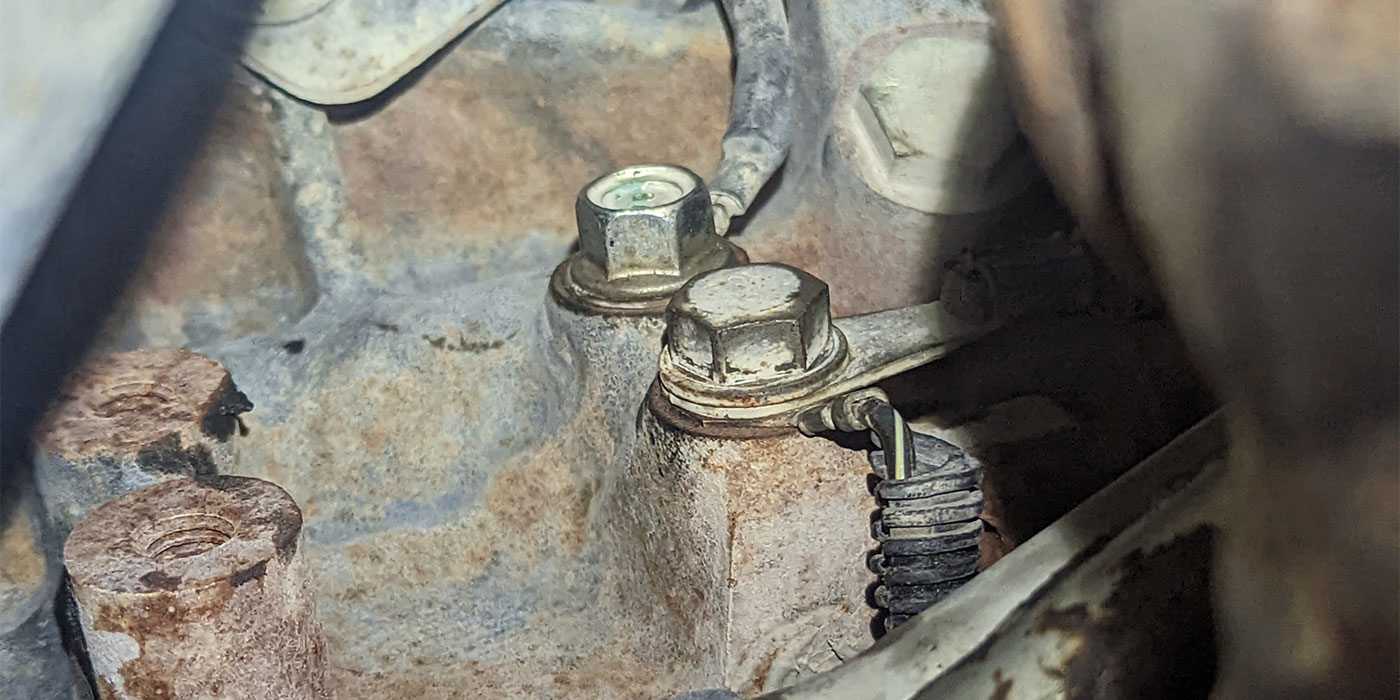
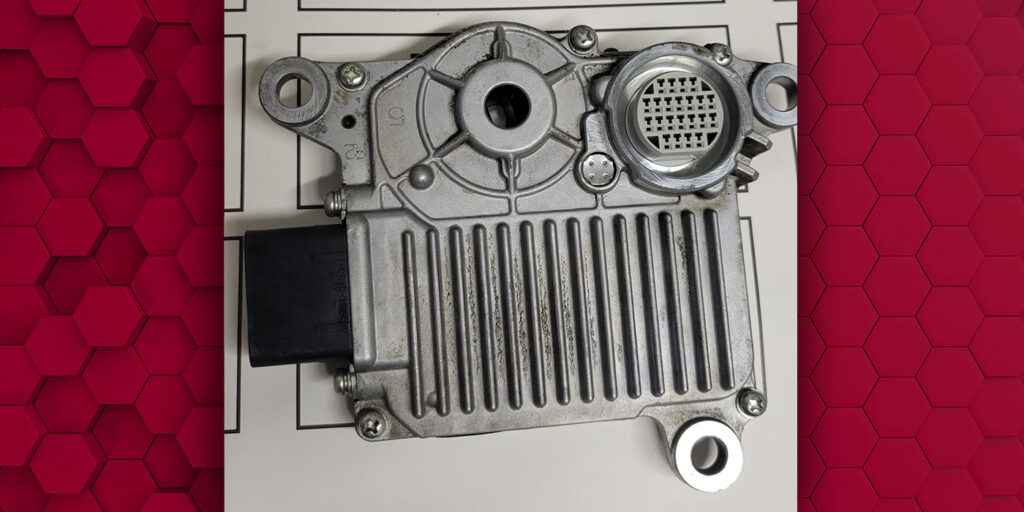
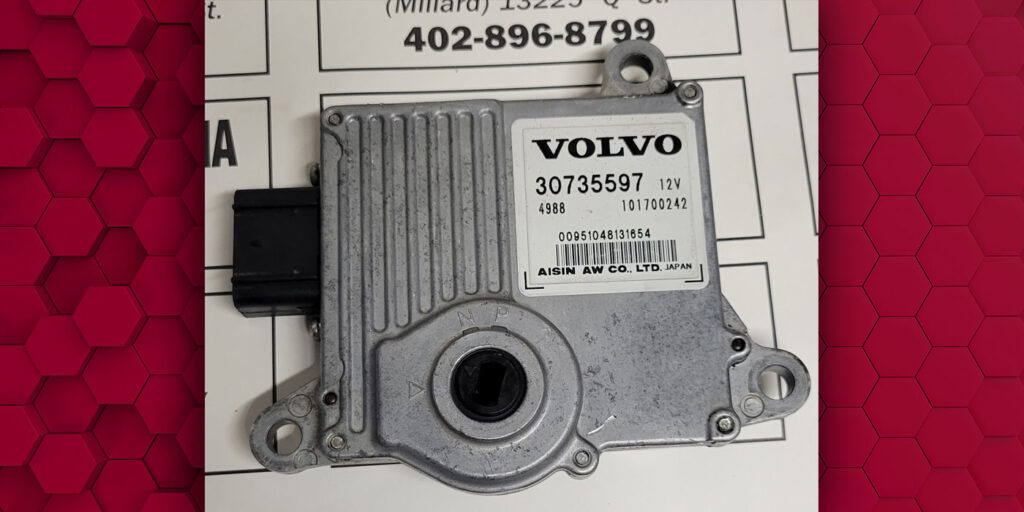
Setting up to test the transmission electrical circuits, I found the A/C compressor and serpentine belt mounted directly above the transmission, directly in the path of the area I needed to access. As if that wasn’t annoying enough, the transmission control module (TCM) on this vehicle plugs directly onto the case connector pass-through, and there is no way to “live” test solenoids or the harness without removing the front cover to access the supply/control sides of the PWM solenoids. That is a lot of work to test the solenoids, but no matter; I get to work. (Seen in Figures 1 and 2).
After a few hours I had tested the solenoids and connected the scope. Using the functional tests on the scan tool to operate each solenoid individually, I was looking for any odd pattern or intermittent dropouts and nothing showed up. Puzzled and annoyed, I stepped back and got back to the basics. I tested the battery, double-checked the installation, then performed a voltage-drop test on the grounds. All checked out and were cleared.
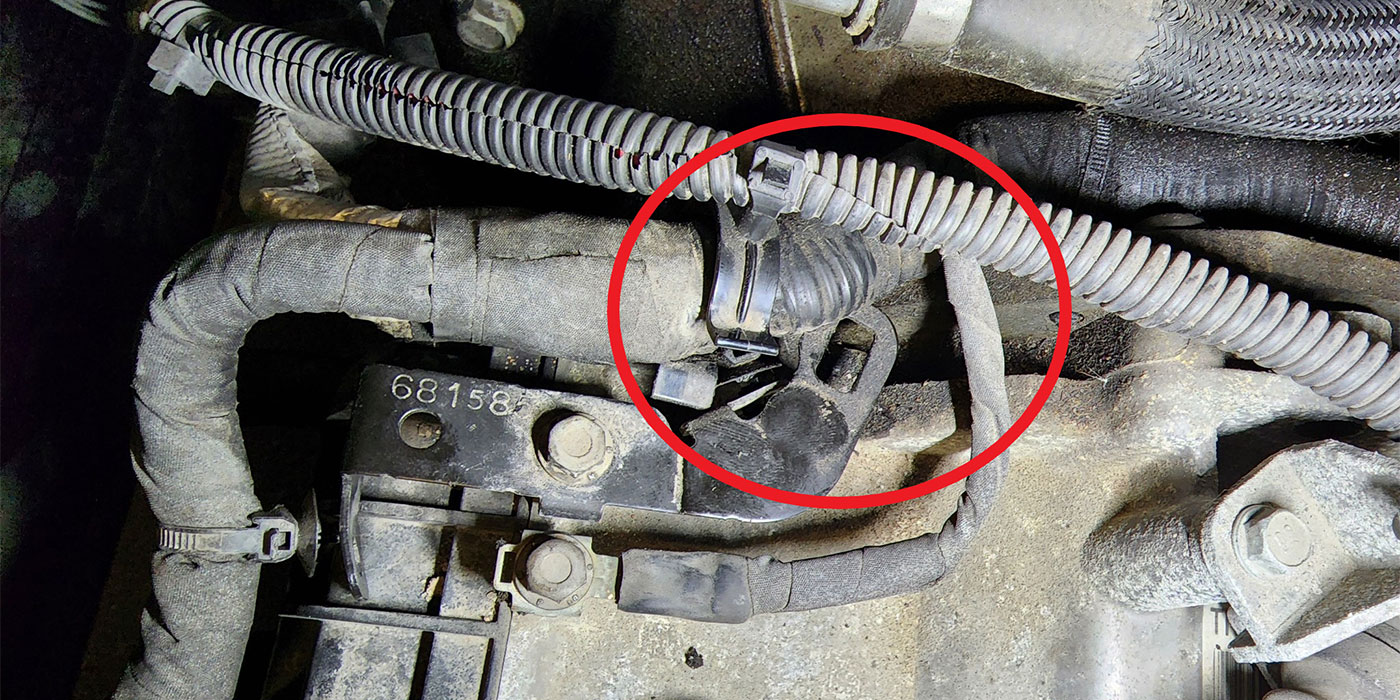
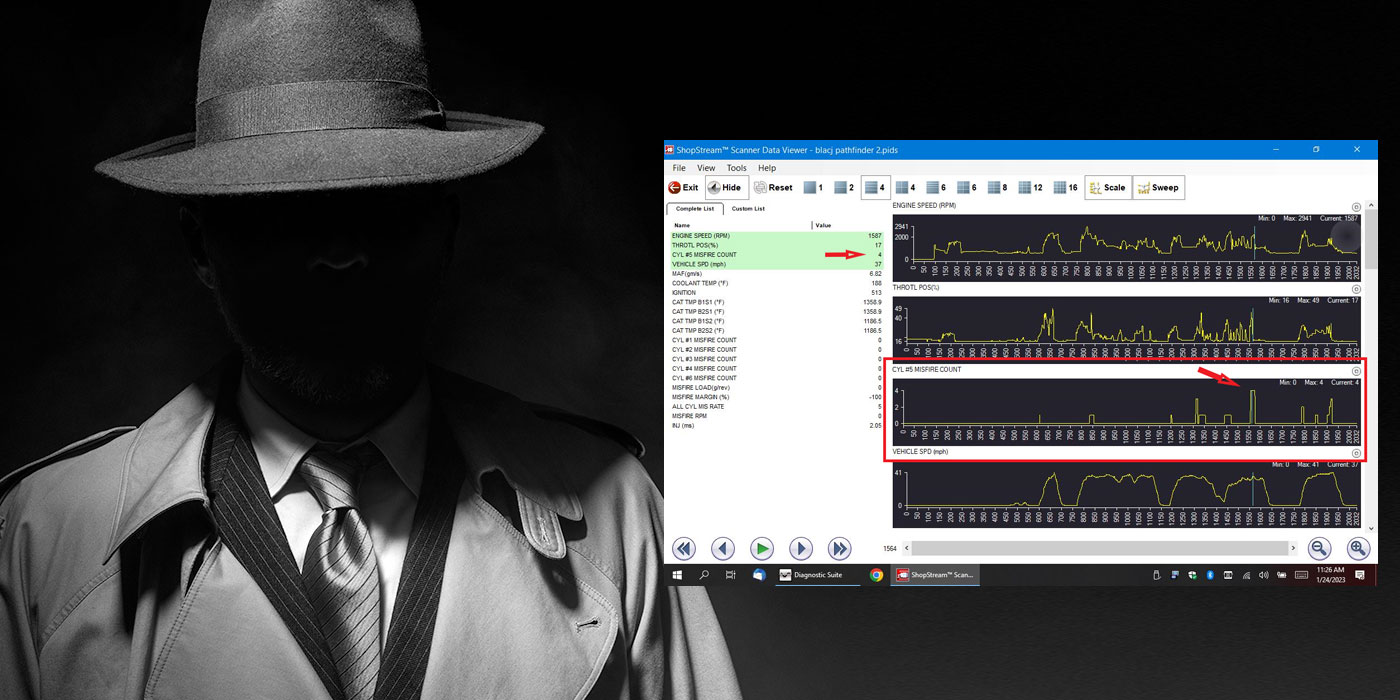
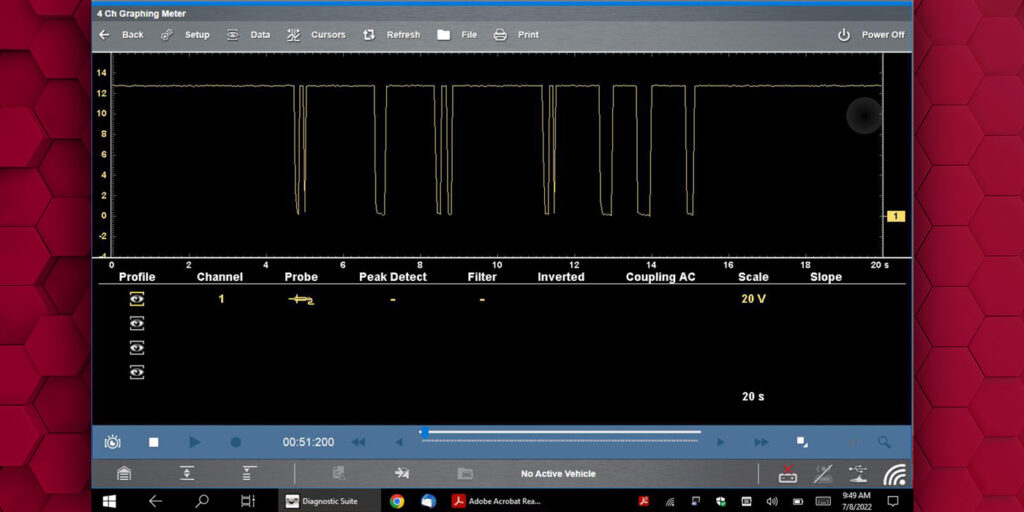
Next, I removed the TCM from the case and inspected the pins. There was no corrosion, and the pin fitment was tight. The TCM was re-installed, and that’s when I noticed that the vehicle harness side connector of the TCM did not click in nicely. I scoped the power and ground circuits to the TCM and found that when wiggling the connector, the power dropped out intermittently (Figure 3).
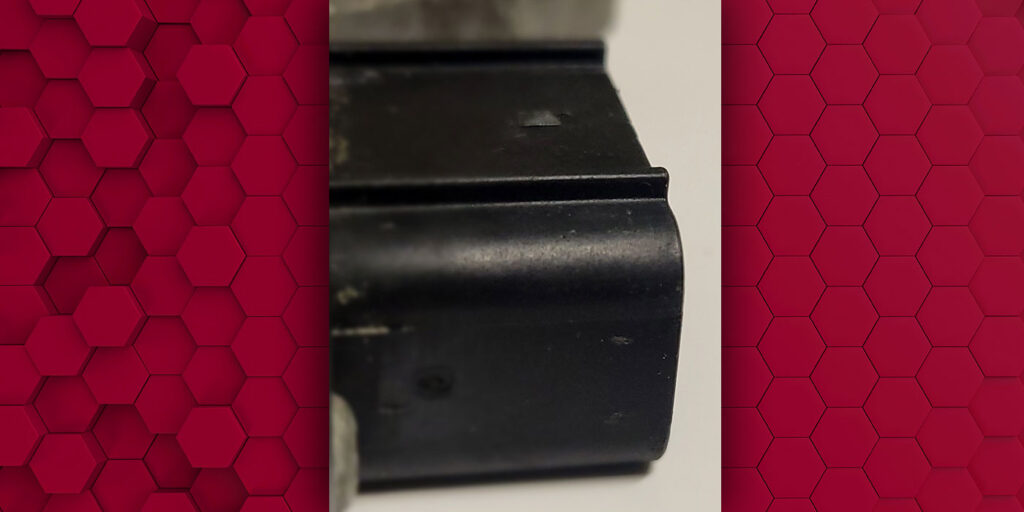
The little nub that connector clips onto to secure it had been damaged from age and being previously removed, and no longer maintained a secure connection to the harness connector. This was causing an intermittent loss of power to the TCM and putting the vehicle into limp mode. Five hours into diagnosis with a fair amount of embarrassment, I secured the connection and confirmed the repair on a test drive. After confirming the repair, I was able to get the vehicle back to the customer, now happy that their vehicle was functioning properly once again (Figure 4).
If handled improperly, these situations will hurt your pride and cost you time and money. It is a miserable feeling, but it won’t break you and you’ve potentially learned some valuable lessons. That is why it is important to stop, slow down and do the job right. No one wants egg on their face, and no one wants to waste time, lose money or upset a customer who has spent their hard-earned money putting their trust in you. Follow the process and don’t overlook the simple things. Get the job done right.
About the author: Zack Harkins is a diagnostician with Certified Transmission.