With Honda’s 10-speed front wheel drive transmission (see Figure 1, above) going into its fifth year on the roads, it’s feasible that one may show up in your shop for service.
(One note: this transmission does not have a typical name; it’s simply known as “the Honda 10-speed automatic transmission” in all OEM materials.)
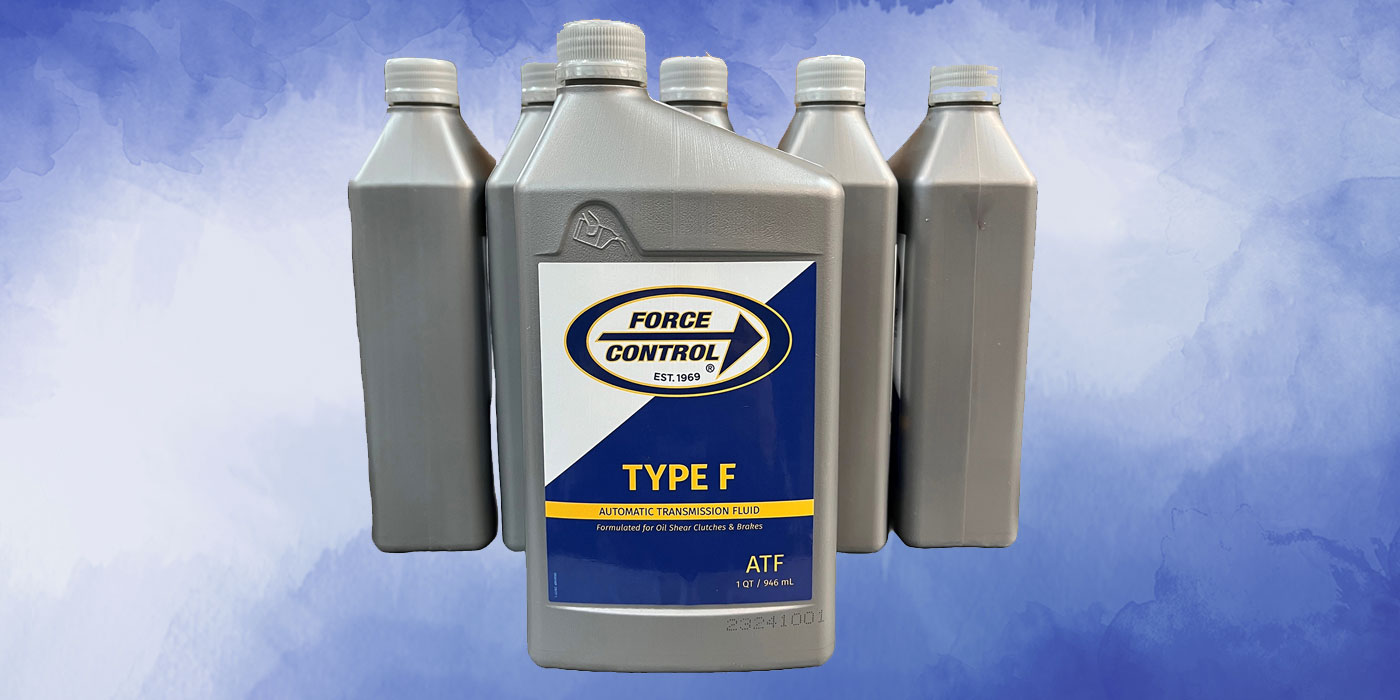
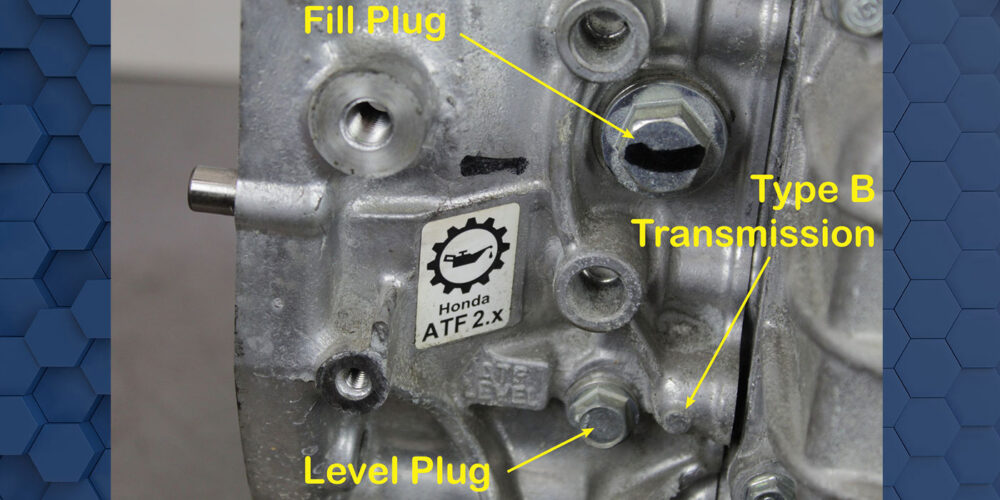
One thing to know about this unit is that it uses Honda ATF Type 2 fluid. Honda warns that if any type of fluid is used other than ATF Type 2, damage will occur.
There are two varieties of this transmission: Type A and Type B. Type B has round boss on the case to the right side of the fill plug and check level plug, as seen in Figure 2. Type A transmission will not have this boss.
The fill capacity is slightly different between these two transmissions:
- Type A requires 4.5L (4.8 U.S. qt.) when servicing the transmission. It uses 8.5L (9.0 U.S. qt.) after overhaul.
- Type B requires 4.3L (4.5 U.S. qt.) when servicing the transmission. It uses 8.3L (8.8 U.S. qt.) after overhaul.
There are two types of check level plugs as well. One has an integrated washer while the other has a separate sealing washer.
To fill the transmission, pour fluid in until it begins to trickle out the check level hole. Place the plug into the hole. Start the engine, and warm it up at idle speed to the normal operating temperature (when the radiator fan comes on twice). Step on the brake and shift the transmission to P→R→N→D→S→2nd→S→D→N→R→P position/mode and wait at least three seconds in each position/mode.
To shift into second gear, enter the Sportshift mode using the paddle shifter. Once completed, return to Park and turn off the engine. Carefully pull the check level plug, as the transmission and fluid will be hot. Fill until fluid begins to trickle out of the hole. Return the check level plug into the transmission and tighten.
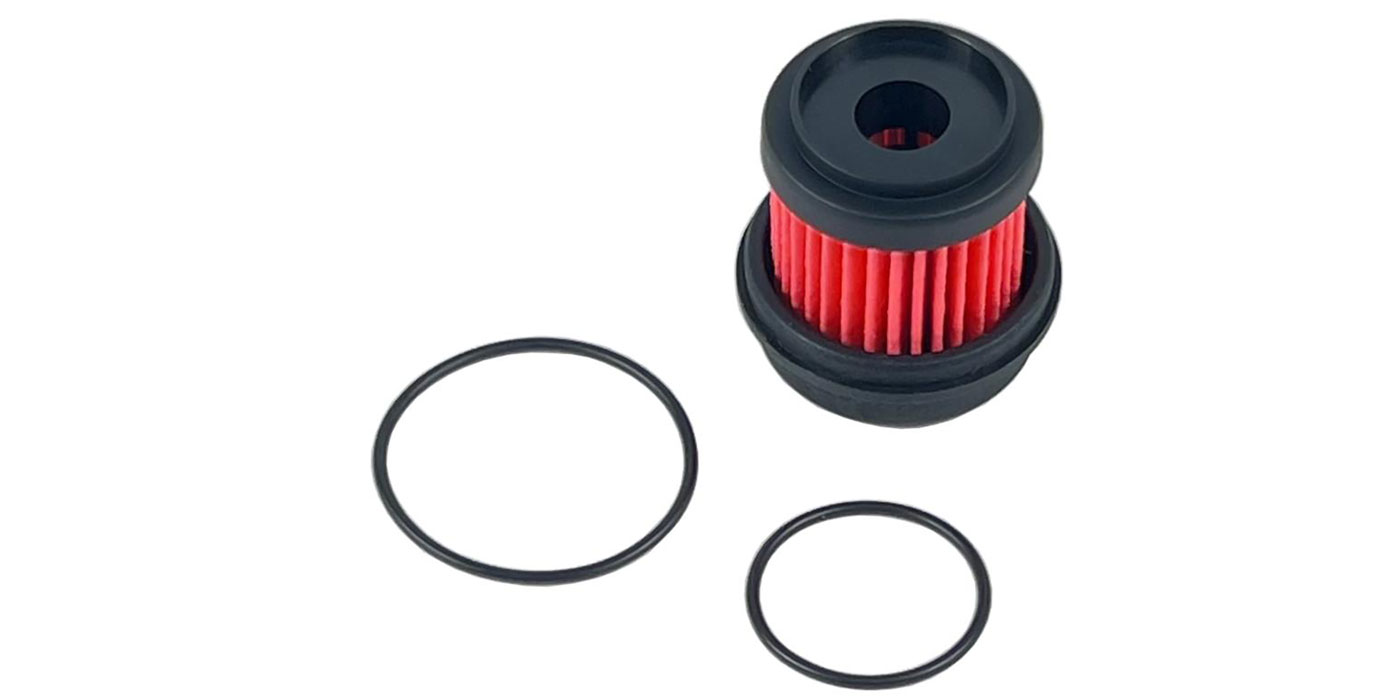
One aspect of servicing this transmission that can be easily overlooked is the lube filter located under the heat exchanger, as seen in Figures 3 and 4.
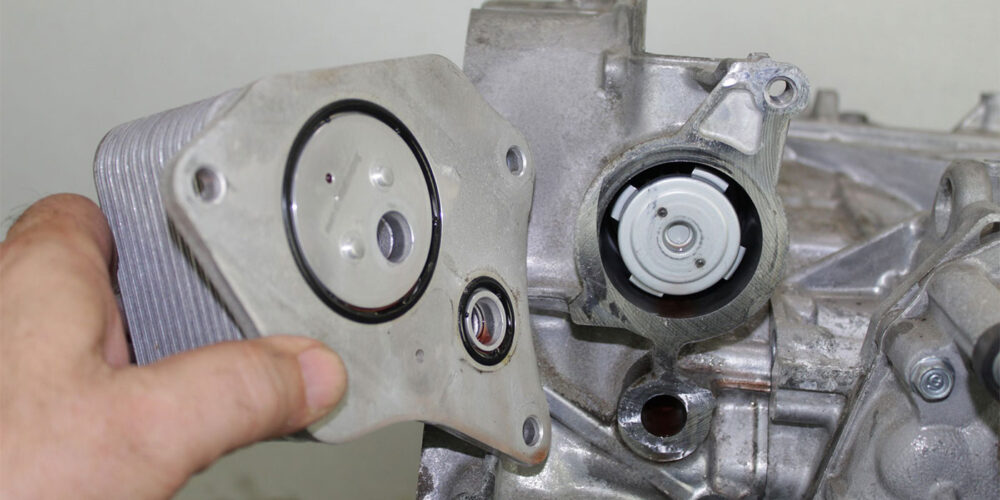
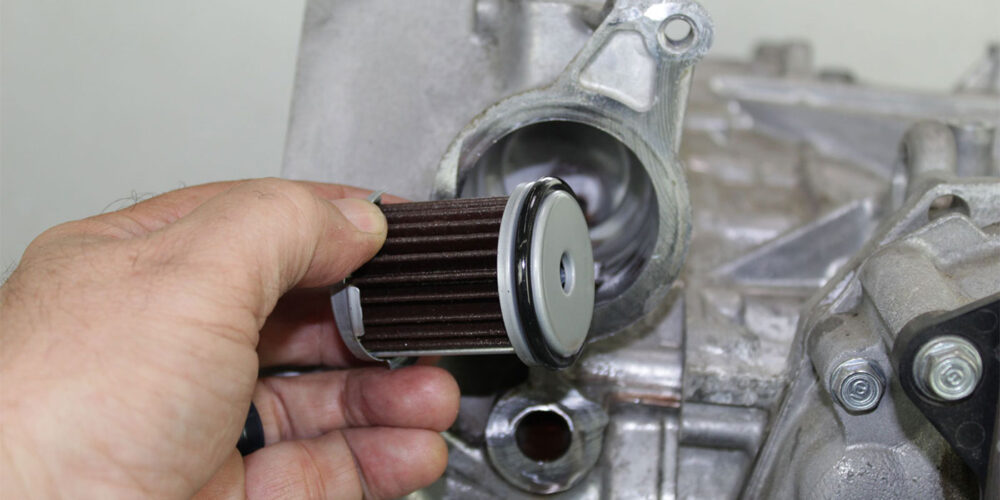
This filter should be changed when servicing the fluid. If the transmission needed to be exchanged or rebuilt, it is highly recommended that a new heat exchanger be included in the cost of the repair as well. This is too expensive of a unit to have it destroyed due to a clogged heat exchanger.
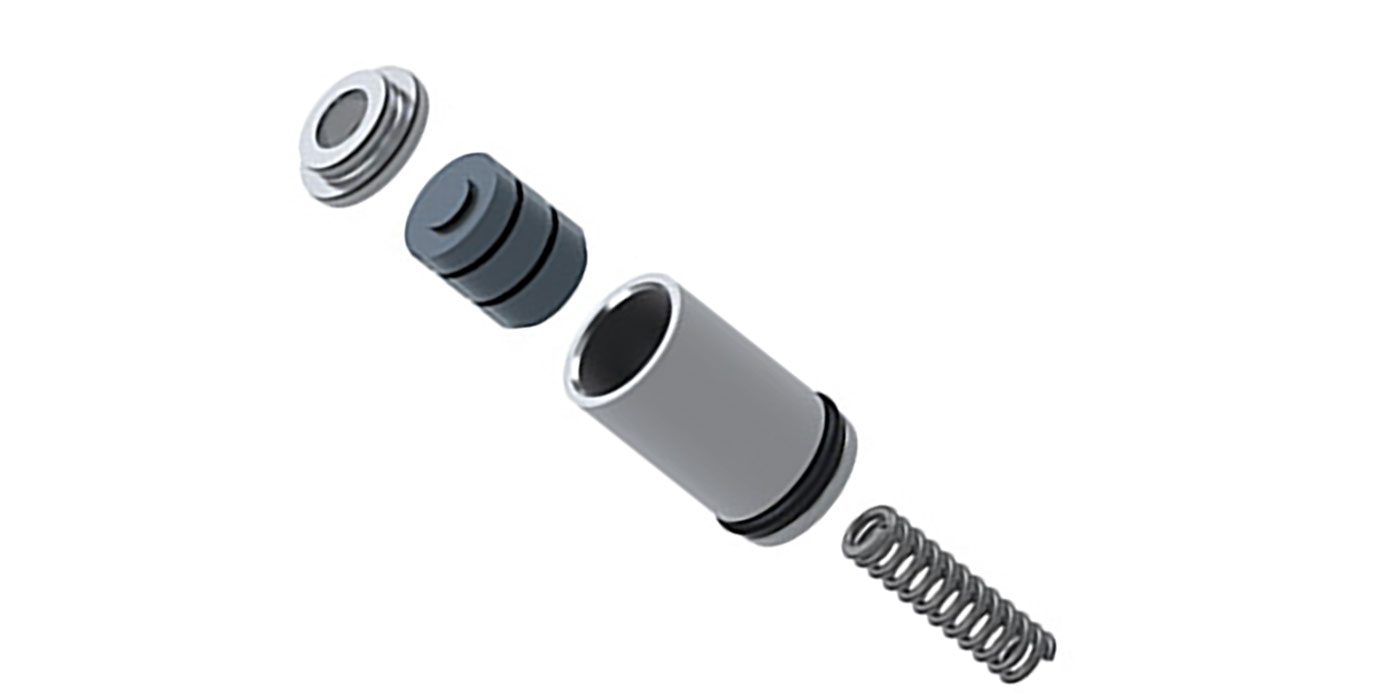
Getting back to the fluid service: as easy as it is to underfill this unit, it is as difficult to overfill it. But if it is overfilled, this transmission doesn’t use a conventional vent for the fluid to be exhausted. The vent for this transmission uses a breather assembly mounted on top of the transmission to maintain equilibrium inside the transmission, as seen in Figures 5 and 6.
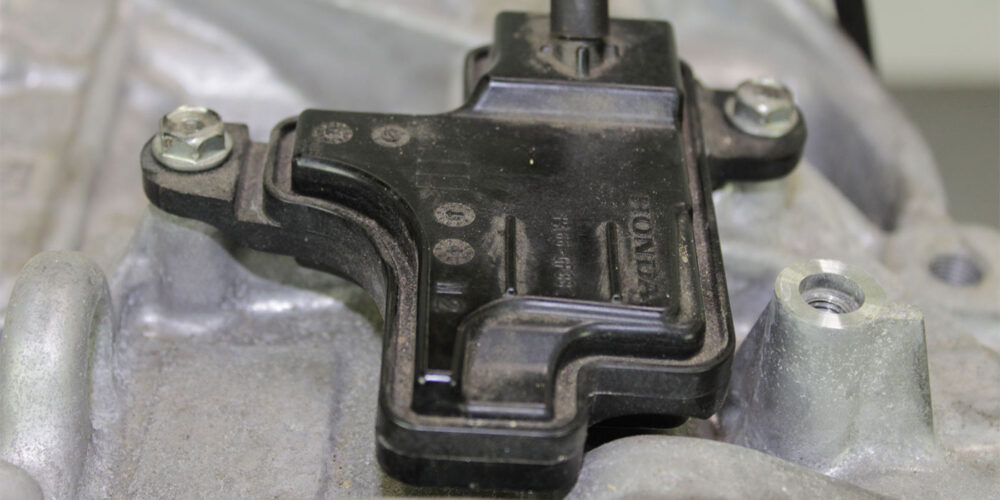
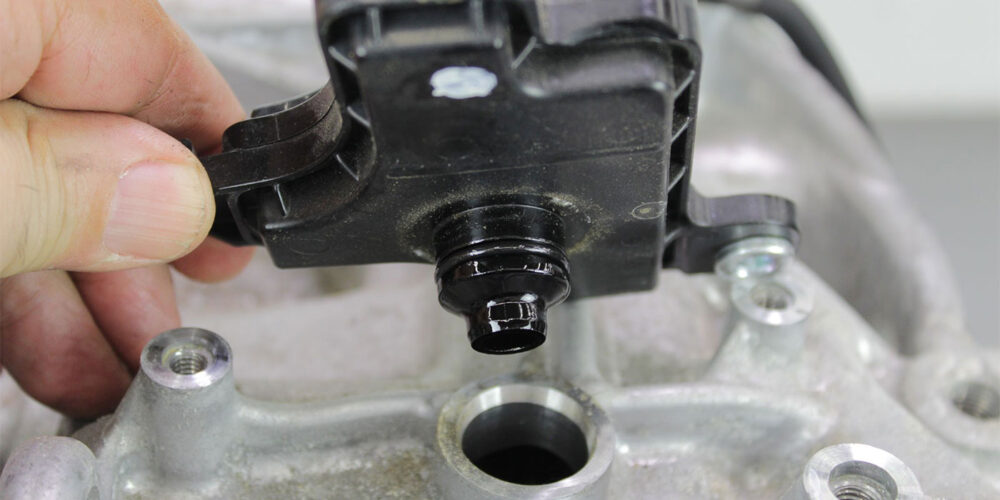
This is a sophisticated way to allow the transmission to breathe air when the air inside transmission expands or contracts due to heating and cooling of lubricating oil when the vehicle is running. It allows hot air to escape and for cool air to be brought into the transmission to lessen the possibility of overheating.
If this device fails, it can cause pressure buildup inside transmission, which could damage seals and cause leaks. When this breather assembly is removed while the transmission is under pressure, there will a notable sound as the pressure escapes informing you of this failure.
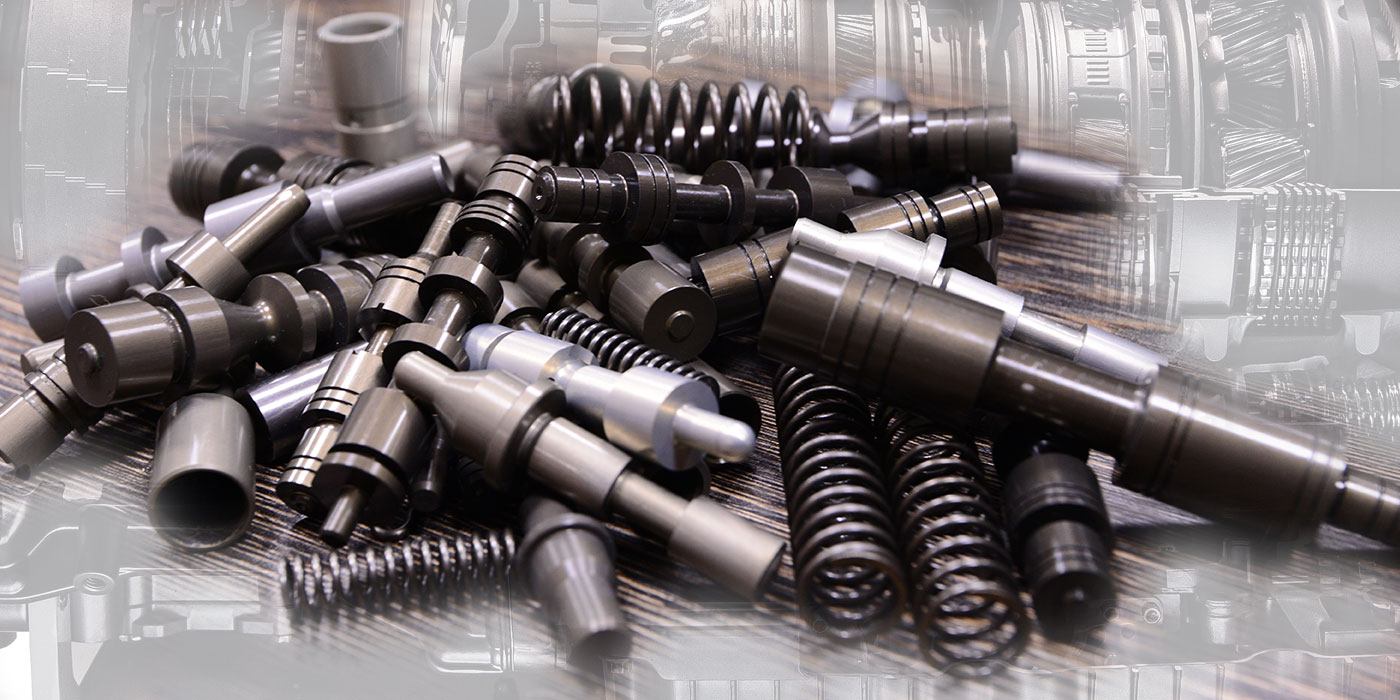
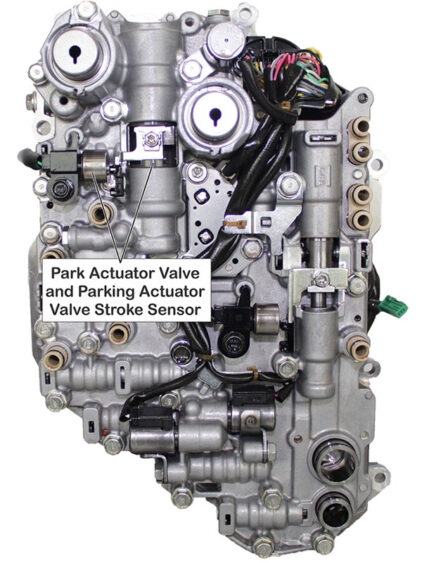
Another aspect of this transmission to be aware of is that it utilizes shift by wire technology. There is no cable or linkages going to a manual valve. Solenoids are used to control a Park Actuator Valve in the valve body to engage and disengage Park (Figure 7).
There are many failsafe features incorporated into this technology for obvious reasons. Let me provide two of them for you as an example. First, the P position/mode is automatically selected for safety in the following cases:
- A driver unbuckles the seat belt and opens the door with any other position/mode than P position/mode while the vehicle speed is less than 1 MPH with the engine running.
- A driver turns the vehicle to the Off (Lock) mode with any other position/mode than P position/mode while the vehicle speed is less than 1 MPH with the engine running.
There is a manual method of getting the transmission out of Park should the battery be dead and the vehicle need to be moved. On the upper left side of the rear of the transmission (the right side of the valve body side cover), locate a control shaft as seen in Figures 8 and 9.
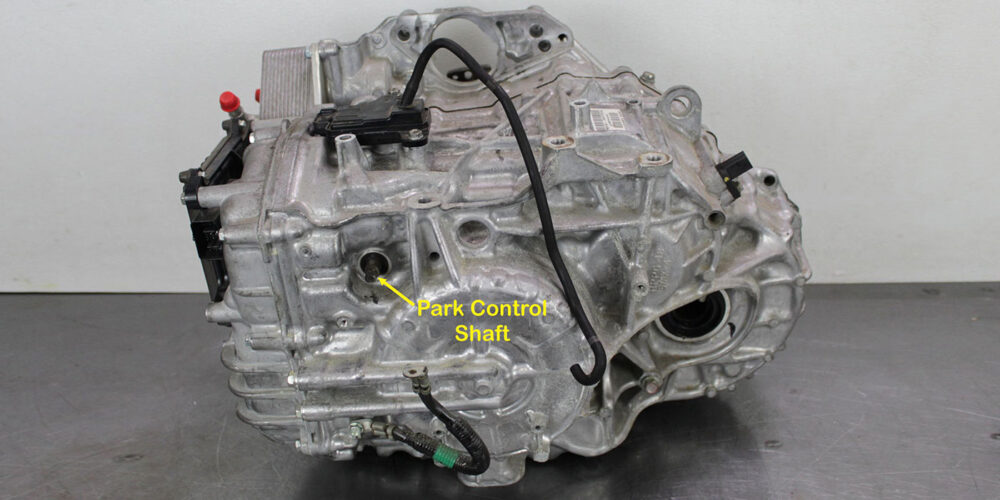
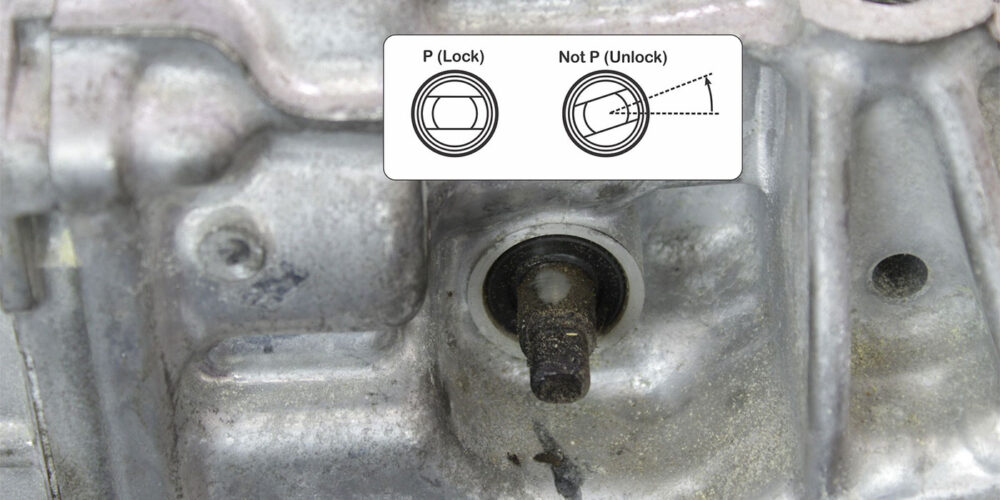
With an open-end wrench, rotate the control shaft 30 degrees counterclockwise to take the transmission out of Park.
If the battery is good, there is also a “Neutral Position Holding Mode” option available to you that can be useful. To enter this Mode:
- Park the vehicle on level ground and block all four wheels.
- Start the engine.
- Shift the transmission to N position/mode while pressing the brake pedal.
- Press and hold the N button again for 2 seconds.
- Confirm that the message “Neutral-Hold Mode On” is indicated on the gauge control module.
- Turn the vehicle to the Off (Lock) mode.
This function is automatically canceled about 15 minutes after entering the neutral position holding mode while the engine stops. If the negative terminal of the 12-volt battery is disconnected, the neutral position holding mode will also be canceled and the vehicle is shifted into P position. Just another ordinary day doing a fluid change.
Read more stories from our Technically Speaking column series here.