R&R Tech
- Author: Chris Adams
- Subject Matter: LCT1000
- Issue: No higher shift
Here in the Midwest the dog days of summer are here, creating a hot, humid environment and the intermittent issues that seem to come with it. You know…the types of concerns in which you have to drive the vehicle for an extended road test, and by the time you see what the issue is and get back to the shop, the heat from the engine compartment or under the vehicle is almost unbearable and you can’t touch anything without heat resistant gloves on. Good times.
That is where this story starts. A 2011 Chevrolet HD2500 6.6L equipped with a LCT1000 transmission came into the shop with a customer concern of no reverse and the indicator under the “R” is flashing. No power when pulling from a stop, and it won’t shift into higher gears on highway. Over the past few months we had seen a rash of bad Allison TCM’s with various different complaints, so I wondered if this might have been the case with this vehicle.
I started the evaluation by scanning all modules for DTCs and I found a P0721 “output speed sensor performance” code, and a P0722 “OSS low voltage” code, so this one appeared pretty straight forward, at first glance. Off I go for a road test intending to focus my attention to the OSS PID, so I set up the scan tool in graphing mode and saw that after about ten minutes while slowing down, the OSS signal drops out. (Figure 1)

When I went to take off from the stoplight the truck was in failsafe, so I pulled over and checked for codes and found the P0722 had returned. I went back to the shop to finish the evaluation and take a closer look at the OSS. I performed a battery and charging system test, which passed, so I let the vehicle sit for a couple hours while I checked out a few more vehicles. When I got back to it and went to unplug the OSS connector, the locking tab broke right off. The connection looked ok, as I saw no corrosion and the pin drag was good. I then unscrewed the sensor to make sure it was not mechanically damaged in some way, which it was not. I put my finger into the hole to make sure the reluctor ring was not damaged or loose, but I did not really expect to discover anything wrong there since it was a low voltage code I was chasing. It appeared to be ok.
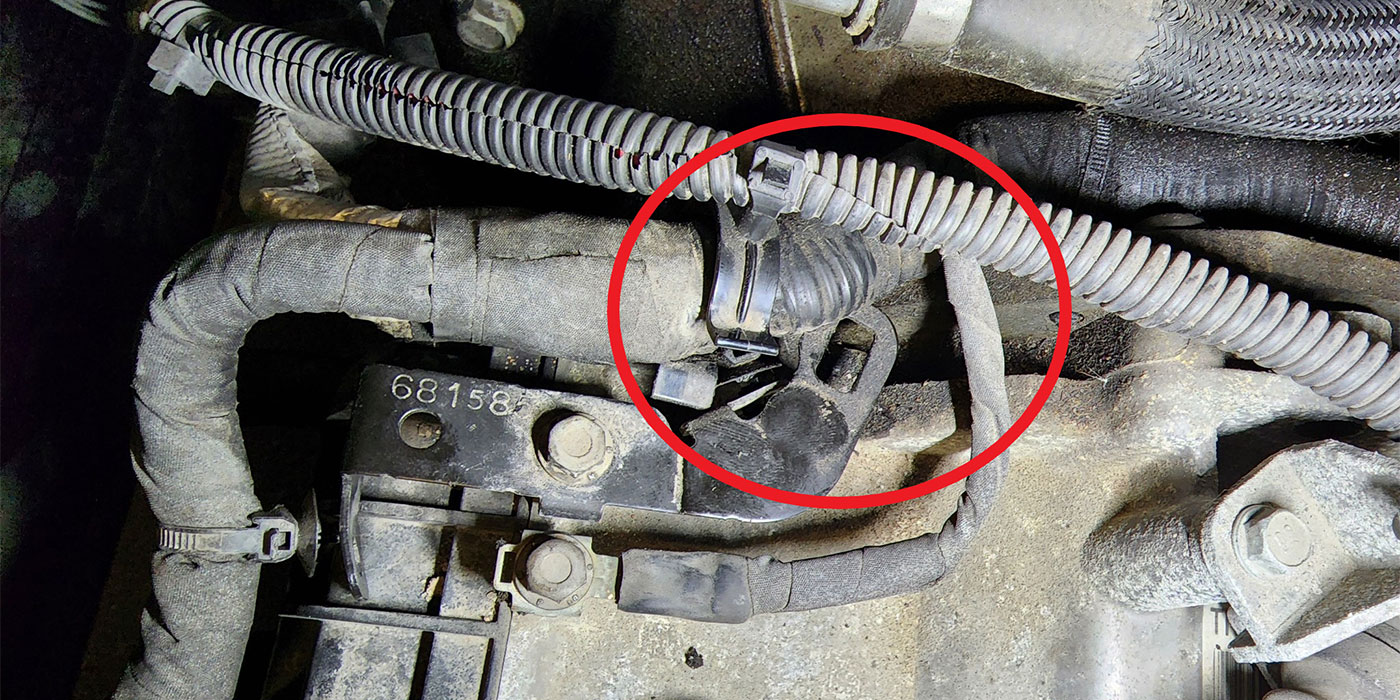
At this point I could have taken a different path, but I don’t think the outcome would have been any different. We have all seen our fair share of these plastic screw in sensors have issues in the past and I had looked over the wire harness routing as per the PI#0339C and did not see anything wrong with it, and we had a sensor in stock so I ordered the repair pigtail from GM and proceeded to replace the OSS and pigtail feeling fairly confident it would correct the issue. After another extended road test, you guessed it…the speed sensor signal dropped out again very similar to the first screenshot, but this time it had set a P0721 code. In retrospect I knew I should have sold diagnostic time to the customer and put a scope on the sensor, so now the diagnosis time is on me.

I connected the scope to the OSS right at the connector and headed out again, not really expecting to see a problem here since it was a new sensor and pigtail. The reluctor was not damaged, so I was really thinking it would end up being a wiring issue or a bad TCM.
After another long road test the OSS signal on the scope and the data PID both dropped out at the same time. What? Did I have a bad “new” sensor? Remember when I said I don’t think the outcome would have been any different? If I would have done this from the start I really think I would have still put a sensor in it.
I brought the truck back into a bay and removed the sensor while it was blazing hot. I think it was about 96°F that day, and I bravely stuck my finger into the t-case to check the reluctor again and I finally discovered the real issue: while the ring would not spin on the shaft (it is splined onto the shaft), it did slide forward and backward. Figure 2 is when I pushed it forward, and Figure 3 is when it was pushed back toward the driveshaft.
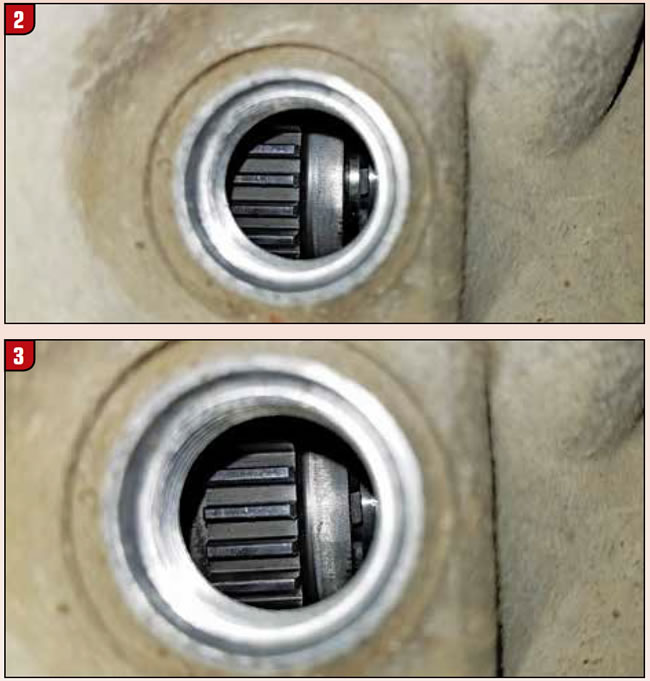
When it was forward the teeth were barely in the middle of the hole, and the sensor pickup is only about a 1/8″ wide. This appeared to be the issue. I put it back together and went out again to try to verify it, and was able to. Look at each one of the dropouts when I quickly applied the brakes. (Figure 4)

This confirmed that the issue was inside of the transfer case. After the transfer case was removed and I pulled the rear case half I could see what had happened: the snap ring on the backside of the rear bearing was broken into pieces. (Figure 5)
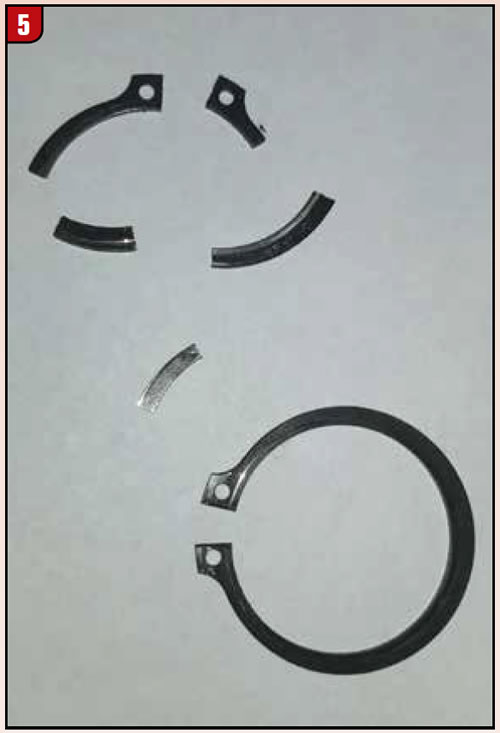
This allowed the output shaft to slide forward just enough so that when the reluctor was at the forward end of its travel, it was enough to move it out of the sensors range and lose the signal. We ordered a couple snap rings and a rear bearing, made sure all the pieces of the broken snap ring were accounted for, and put it all back together. Now working as designed, no codes returned and we were able to deliver the truck back to the customer.
Expect the unexpected.