Our shop recently took in a 1995 Ford F-250 with erratic downshift concerns. I started the initial evaluation with a visual inspection, fluids check, and a code scan. When scanning for codes, I was a little surprised that there weren’t any stored; per the customer concern, I was expecting an MLPS or a VSS code based on experience. Now it was time to go for a test drive and look for symptoms.
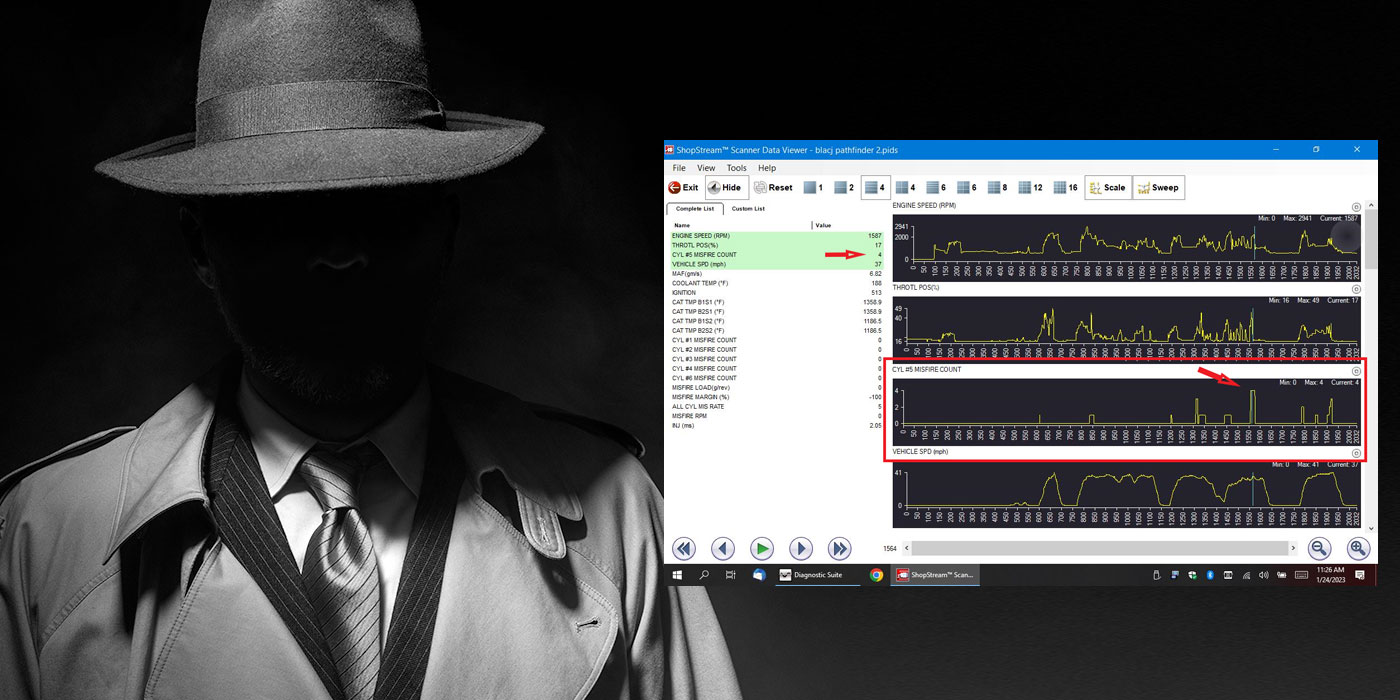
This 24-year-old truck was in less-than-pristine condition and steering it down the road was a little like herding goats; it was all over the place. For the first several minutes, everything worked well. It was when I got comfortable enough to get up to a higher speed (over 60 mph) that the speedometer started dropping out erratically. I previously had added a trigger point on my scanner and saved the data capture to review later.
Once I had guided this beast back to the shop, a study of the data confirmed that the PCM had seen the same dropout in speed that I saw on the speedometer. Knowing that the PCM relies on this speed signal to determine what gear the transmission needs to be in, I felt it must be addressed first.
I needed to review the speed signal circuit and controls for this model. It starts with the antilock speed sensor in the rear differential housing with a parallel star circuit to the ABS module and instrument cluster. The operating characteristics revealed a passive signal generator that was more common with these earlier models with an analog AC signal output. The instrument cluster has a programmable speedometer odometer module (commonly known as a PSOM) that converts the analog signal from the speed sensor into a digital signal with outputs for the speedometer and the PCM.
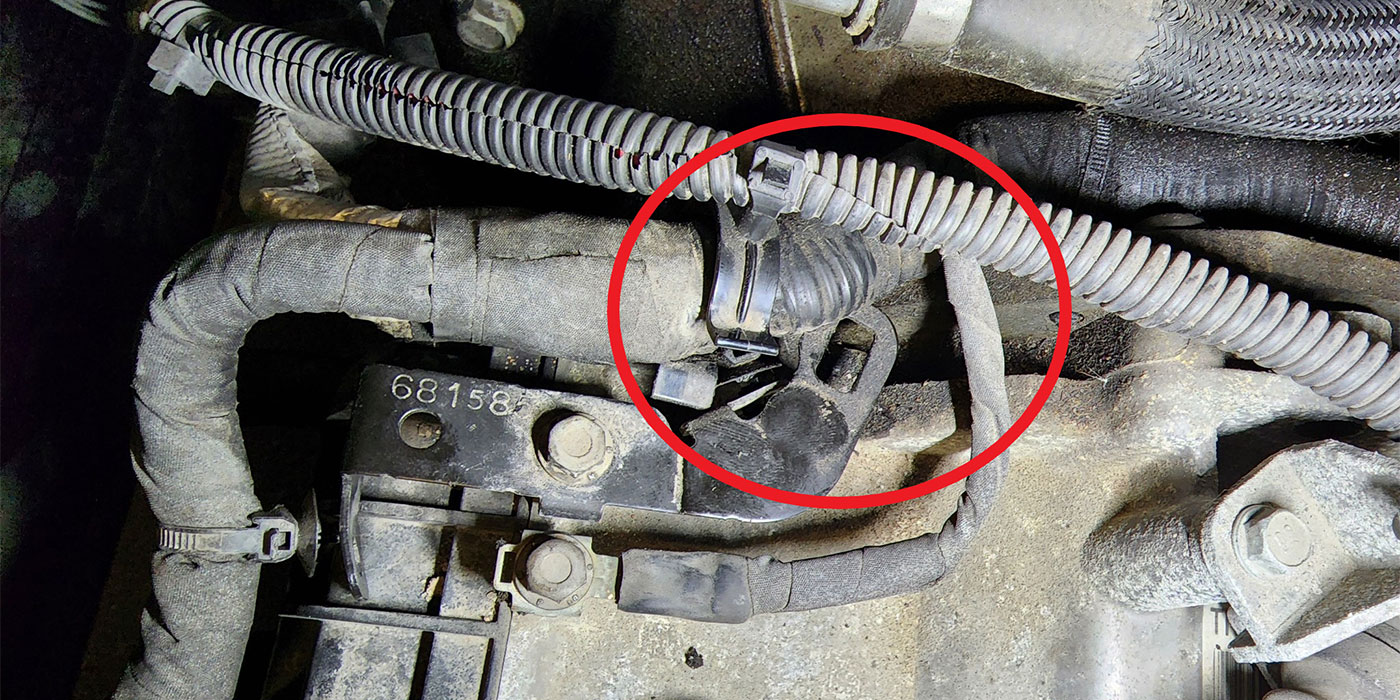
A visual inspection of the wiring harnesses and connectors didn’t reveal any concerns, so I did a drag test on the female connector terminals and found them all to be in decent shape. Next, I connected my multimeter to find that the circuit resistance was in specification for the speed sensor. Then a harness wiggle test was performed with no variations in the meter readings. Next, I connected the meter from the sensor circuits to the chassis ground and repeated the wiggle test of the harness, again with no problems found. Moving my meter to the speed signal circuit and performing the same test still showed no concerns.
At this point, I decided to reconnect everything except the ABS module and drive the truck again just to verify I hadn’t hidden the problem by moving harnesses and connectors. The same bounce in the speedometer was still present, so I could rule out the ABS module and felt confident with the circuits and connectors. I just happened to have one of these sensors sitting on the parts shelf, so what better test than to substitute “a known good part” that is easy to change, but guess what? Same result.
The PSOM in these trucks was well known for problems. It was decided to send the cluster out to be rebuilt. After receiving the cluster back from repair, I reassembled the vehicle and was off for a test drive only to find the speedometer bounce was still present. Now, to say that I was feeling a little defeated at this point would be an understatement, so after fussing at myself for a while, it was time to reevaluate the problem and solve the issue.
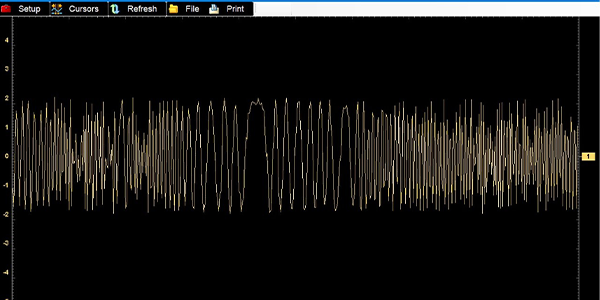
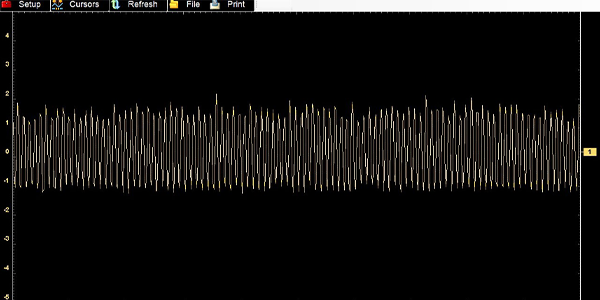
I decided to connect the lab scope (as I should have done before) to the speed sensor circuit and found the frequency was erratic. After moving the scope directly to the sensor in the rear axle with the circuit disconnected, I found the same results, a repeating pattern but not symmetric (Figure 1).
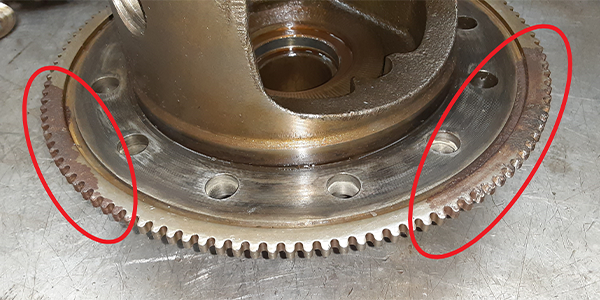
Stopping to think of what I may have missed, I decided to inspect the tone ring inside the axle. I could see rust damage to the tone ring and the ring gear with the rear cover removed. Seeing that the tone ring was rusted in two separate places and unevenly spaced gave me more insight into why the scope pattern was not symmetric, and the puzzle pieces started falling into place.
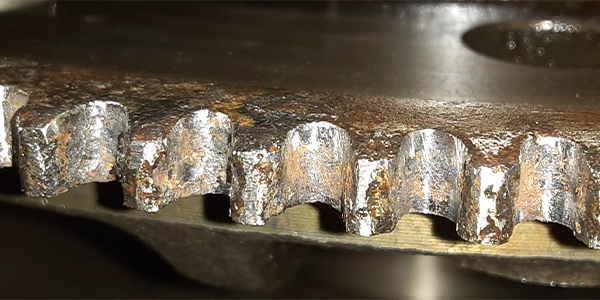
The ring gear must be removed to change the tone ring, so I removed the differential case to disassemble and evaluate. Not only did the tone ring have some severe rust pitting, but the ring gear also had serious pitting, the Trac-Lock (limited slip) clutches were worn out, the differential pinion shaft was badly worn, and the spider gears were galled with damage to the case as well. (See Figure 2 – 3).
Weighing the available options, we chose to rebuild what we had rather than installing a used part over 20 years old with the possibility of installing the same or a different problem. The rear axle was rebuilt with a new limited-slip case assembly, ring and pinion set, tone ring, and bearings. The lab scope was reconnected to get a comparison reading, and the frequency was clean and consistent (Figure 4).
I went for another test drive at highway speed, and the speedometer stayed steady, and the VSS PID in the PCM was smooth and consistent. An extended drive with varying speeds and several stop-and-go tests confirmed that the transmission was shifting properly and smoothly.
In this case, I got myself focused in one area and chased around in the wrong ballpark, convinced that it was an electrical issue when in fact, the cause was a mechanical problem. I pulled the trigger and shot my foot again (I hate it when that happens) before stepping back and rethinking the problem.
We just need to face challenges as an opportunity to learn and advance our skills in our careers and all parts of our life. It’s all a part of the repair process.
Gordon Kehler started working as an auto mechanic in 1975, achieved his ASE Master Certification in 1985, L1 in 1994, and both are kept current to date. He held GM master tech certification from 1991 to 2019. He joined the Certified Transmission team in 2019 as a Diagnostician. He and his wife of 40 years have raised three children and have six grandchildren.