Being relatively new to transmission diagnostics, I’m always learning new techniques to try and simplify the process. However, at times it still can be overwhelming. After my years as a reman plant worker and R&R technician, I find there is more of a mechanical approach in the transmission repair field compared to the electrical side I now see in my diagnostic role.
Roughly a month ago we had a 2010 Toyota Tundra Crew Max pickup with a 5.7L engine and an AB60 6-speed transmission come into the shop with some shifting issues. After reviewing the customer’s concerns from our check out sheet, along with any of the vehicle’s previous work history, I noticed that it was recently at a Toyota dealership to address the same concerns. The customer’s specific concerns consisted of an occasional no reverse, firm shifts and no PRNDL read-out on the dash, along with the check engine, traction control, ABS, and 4-low lights being illuminated.
Before getting ready to go on a road test, I scanned the truck and found a couple of transmission codes in the system: P0722 (Output Speed Sensor Circuit) and P0705 (Transmission Range Sensor Circuit Malfunction) and did a quick visual under the hood and underneath the truck. I saw that transmission work had recently been done. It appeared that the transmission pan had been removed, the MLPS switch looked new, and the Output Speed Sensor (OSS) also looked new. I also wanted to make sure these sensors had a secure connection to the wire harness, which they did. Once I took the truck out for a road test, I confirmed the firm shifts and additionally noticed harsh banging engagements from Park to Drive or Reverse. I also observed first, second, and third gears, but there were no commanded upshifts past third gear. In addition, I wasn’t getting an OSS signal or any PRNDL information from the transmission. I pulled over and decided to clear the codes to see if they would come back and if I could get it to shift past third gear. After the codes were cleared, they came right back on, and the upshift pattern was unchanged.
Before digging into this electrical problem, my next action was to reach out to the customer and gain some insight about the nature of the repairs he previously had done at the dealer, and why he ultimately decided to have us take a second look into his concern. A brief conversation revealed that the dealer had recommended a transmission replacement since replacing the MLPS and output speed sensors did not rectify the problem, and the customer wanted a second opinion.
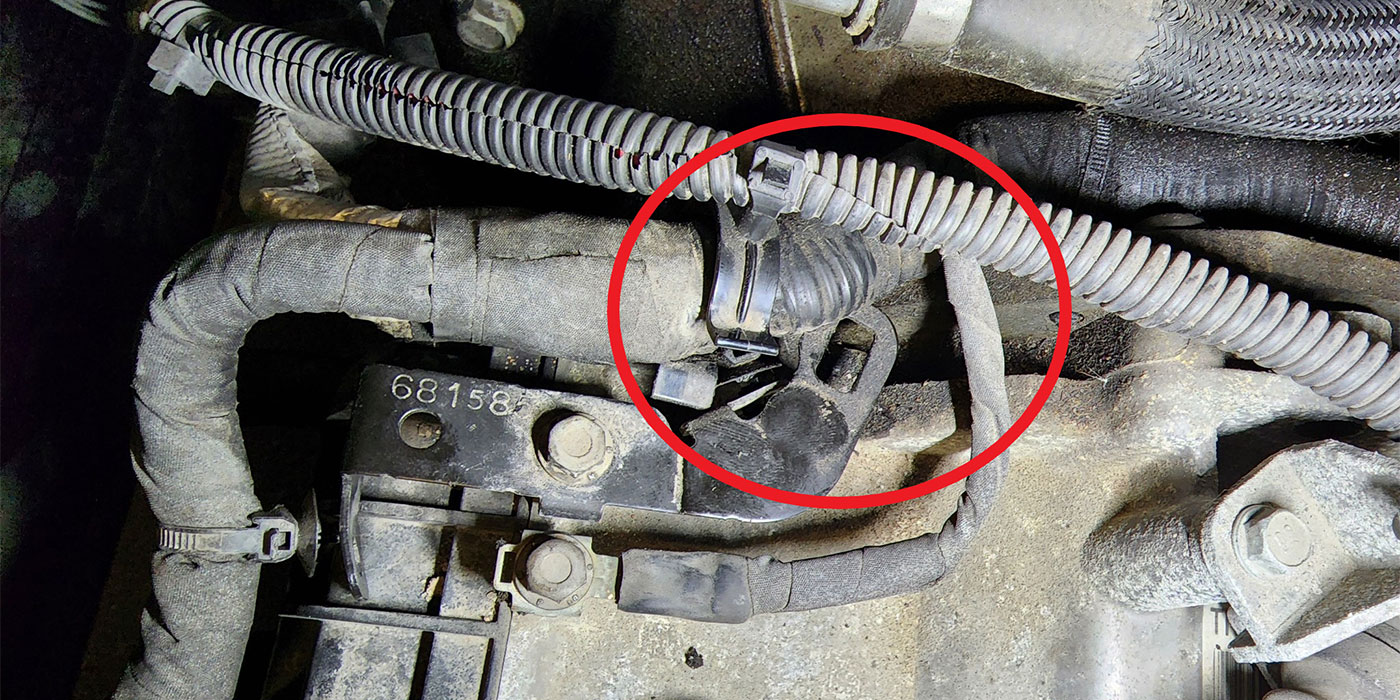
Applying this new information, I wanted to confirm that these new sensors had a good connection to the wire harness and didn’t have any damaged, broken or corroded pins. After a quick check, there were no obvious concerns, and I proceeded to move up the transmission wire harness, which runs over the top of the unit and up over the top side of the bell housing to the passenger side of the engine compartment where it plugs into the module. About halfway up the harness that branches to the module, I noticed some damage to the split-loom wire covering, and with an inspection mirror I could see what appeared to be where a critter may have chewed on the harness. At that point I let my manager know what I was seeing and requested some additional diagnostic time so that I could go further into this to confirm my suspicion that a transmission replacement is not warranted. The customer was happy to hear this and authorized us to spend a couple hours to repair the harness.
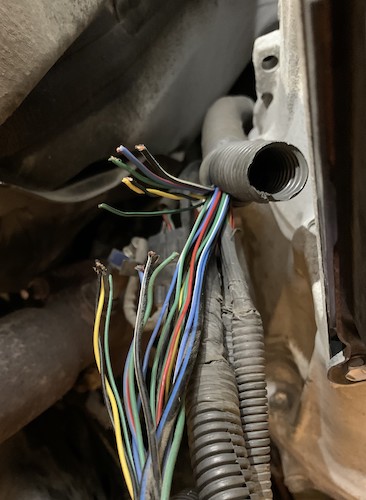
Since the damage was somewhat hard to see, I unplugged everything on the harness and unbolted all the brackets securing it to the case of the transmission. I also removed the front driveshaft to gain enough room to bring the harness to the side for further inspection and repair. This revealed a total of six wires with damage once I was able to open the harness.
Repairing the damaged wires was straight-forward and a new section of split loom tubing was spliced in and taped up. Once the harness and driveshaft were reinstalled, a road test confirmed a properly working and shifting transmission with no warning lights on the dash. Project complete! Or so we thought…
Fast-forward two-and-a-half weeks after the customer picked up the truck; we received a call from the customer stating the Tundra worked great, but now the same previous concerns had returned. Once the truck was checked back in at the shop, I did another visual check on the wire harness to check the recent repair and found no damage.
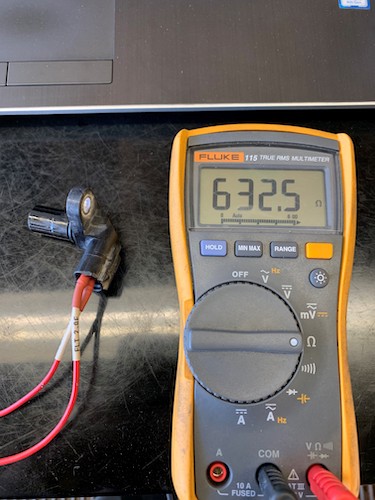
A quick scan and road test revealed similar shifting issues as before except the PRNDL was working correctly this time. The only code in the system was for the OSS and scan data showed no signal. I pulled the output speed sensor to visually see if the reluctor in the transmission was turning with the output shaft (which it was). Additionally, since the sensor was out, I also checked the resistance and it was within spec.
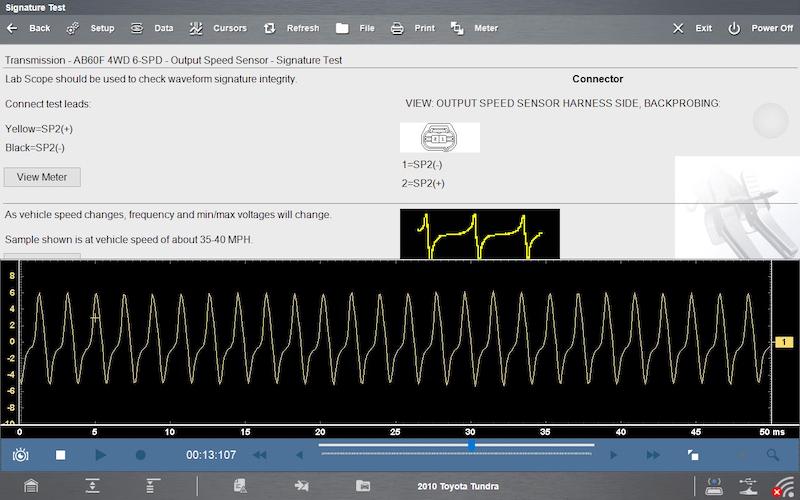
At this point I felt like the recipe was there to produce a good signal, but why wasn’t the computer reading it? Utilizing the Snap-On Zeus scope function and tapping into the output speed wires right at the module connector, I was able to see a waveform that varied with speed.

The signal that the sensor was producing was not familiar to me, so I looked at the component test information on the scan tool and compared the signal to what Snap-On suggested, and it was similar.
Next, I wanted to check the pin drag and retention between the module and connector before condemning the module as defective. The pins were in good condition and I found no issues there. Armed with this information I determined that the module must have sustained internal ECU damage from the handful of wires that had been previously chewed through and exposed. After the replacement module was installed the truck was back to shifting, correctly.
Whenever wires are exposed bare for any reason, they are susceptible to shorting out with each other. Sensitive electronics such as an ECU have a low-to-no tolerance for power being applied to internal circuits where there should be none. It would have been impossible to predict the eventual failure since the post-repair road test following the wiring repairs went without a hitch. In this case, it was a matter of coincidence, and when all was said and done, the customer still saved thousands of dollars of unnecessary repairs in the form of a transmission replacement and was happy with the outcome.
Jerry Dekay has worked in a reman plant and spent 14 years as an R&R Technician before becoming a diagnostician. He is an ASE Certified Master Tech and is currently working on L1 certification.