Torque Converter Tech Tips
- Subject: Checking torque-converter covers and pistons for cracks
- Units: E4OD, 518
- Vehicle Applications: Ford, Chrysler, Honda
- Essential Reading: Rebuilder, Diagnostician
- Author: Ed Lee
Attendees at the 2009 Torque Converter Rebuilders Association (TCRA) seminar in Tennessee were introduced to a couple of interesting methods of checking torque-converter covers for cracks.
Ken Kelly of Transmission Specialties in Aston, Pa., talked about one conventional method during the roundtable discussion at the seminar. His method also appeared as a Tech Tip in the July 2009 edition of the TCRA Newsletter. Ken’s method is called Dye Penetrant Inspection or Liquid Penetrant Inspection.
You can buy the materials needed to conduct this test as a three-part kit from your local welding supplier for less than $20. The kit consists of a cleaner, a penetrant and a developer. The cleaner is used to ensure the clean, dry, contaminant-free surface necessary for good results. After cleaning, you apply the penetrant to the surface of the part being tested (Figure 1).

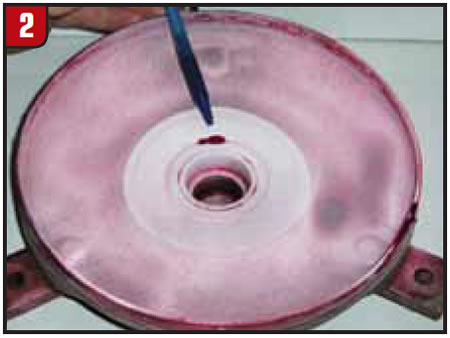
After allowing the penetrant 15 to 30 minutes to soak into all the crevices of the part, you can remove the excess penetrant by wiping with a lint-free cloth that has been lightly soaked with a cleaning solvent. The last step in the process is to apply the developer to the surface of the part. The developer will highlight any areas that the penetrant was able to get into (Figure 2). Allow the developer about 10 minutes for its blotting action to work fully. A visual inspection will now reveal any cracks or defects in the part.
The TCRA seminar attendees also learned about a less-conventional method on their tour of the DACCO torque-converter rebuilding facility. Robert Cravens, a longtime rebuilder, showed attendees his tap method to check for cracks in torque-converter covers. To illustrate his method, Robert held an E4OD cover by the pilot and lightly tapped the front of the cover in several places. He explained that a crack-free cover will emit a crisp, bell-like sound, but the area of a cover with a crack will have a dull thud sound.
The method appeared to be very simple and straightforward, but Robert cautioned that there are several important elements of the test that must be done correctly, beginning with how the cover is held.
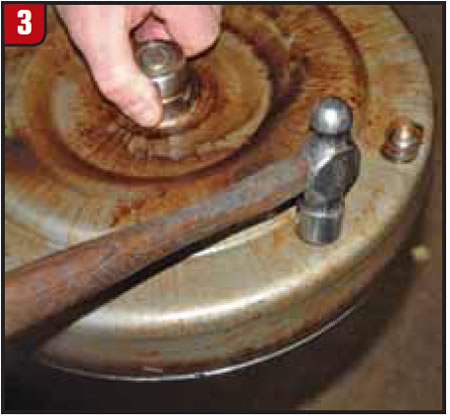
Holding the pilot lightly by your fingertips will yield the best results. Holding the cover firmly at its outer edge will muffle the sound and make it more difficult to identify a crack. The second element is where the cover is tapped. Robert taps the outside of the front of the cover directly over the torque-converter clutch (TCC) reaction surface (Figure 3).
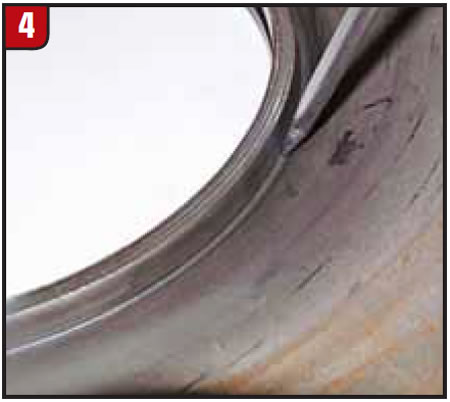
The value of checking for cracks is not limited to converter covers. Josh Bynum of Buffomatic in Glenmont, N.Y., uses a similar tap method to check his 518 TCC pistons for cracks. The 518 pistons are notorious for cracking, and the cracks are equally well known for being difficult to find because they are usually in the crease at the bottom of the pocket that houses the inside-diameter sealing ring (Figure 4). Although converter shops commonly discard 518 TCC pistons that are noticeably burned, they often mistakenly reuse pistons that appear sound but are actually cracked.
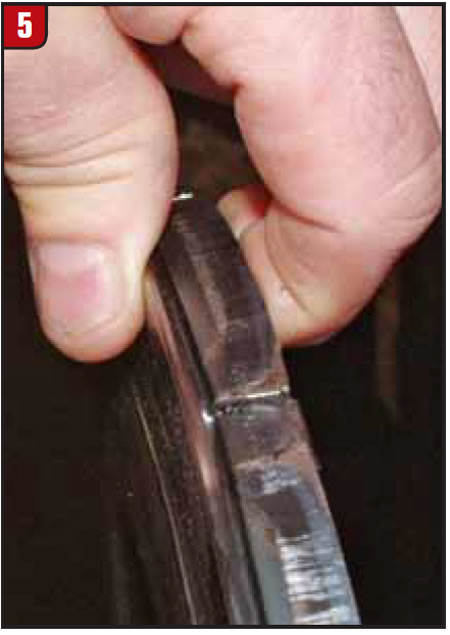
Josh’s technique for checking the pistons is quite similar to Robert’s method. Josh places the tips of his index and middle fingers into one of the spring pockets and lightly holds the piston by clamping his thumb onto the friction-material surface of the piston (Figure 5). He then taps on the front of the piston in four places (12, 3, 6 and 9 o’clock). Josh’s tapping tool of choice is a lathe chuck key, but a small ball-peen hammer also will work. When one or more of the taps produces a dull tinny sound, Josh verifies the leak by either holding the piston up to a high-intensity light or by using solvent and an air nozzle.
Many other pistons and covers have cracking issues. The late-model Honda piston shown in Figure 6 is a good example.
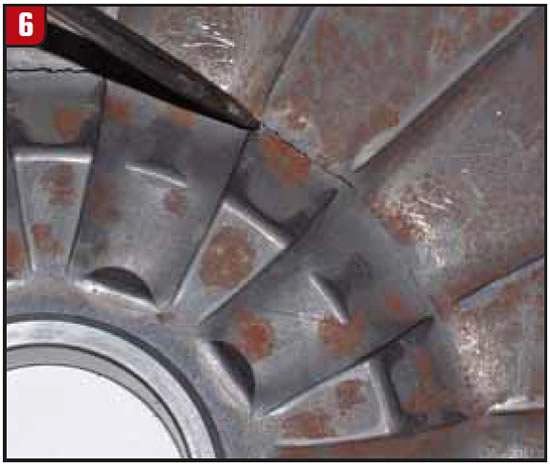
This piston was cleaned and was being prepped for rebonding before the crack was found. The location of the crack indicates that it was caused by the flexing action of the piston. Remembering what the industry experienced with cracks caused by flexing of E4OD or 4L80-E pistons, it is likely we will see many more Honda pistons cracking.

Ed Lee is a Sonnax Technical Specialist who writes on issues of interest to torque converter rebuilders. Sonnax supports the Torque Converter Rebuilders Association. Learn more about the group at www.tcraonline.com. ©Sonnax 2010


