


After internal repairs to the CVT VT20/25-E that required the disassembly of the variable-drive-pulley assembly, a pronounced rumbling noise is present in both forward and reverse ranges, accompanied by a jerking sensation in the vehicle.

The stationary sheave face of the variable-drive-pulley assembly has a shaft with three keyway slots in it that is used to index and lock the movable sheave face of the variable-drive-pulley assembly to the shaft. Two 6mm steel balls are used as the key in each slot (Figure 1). But during disassembly, these balls fall away and the technician does not have a chance to see their appropriate location, as this shaft has three shorter slots with a passage connecting to the drive-pulley primary feed limit apply-fluid circuit.
With the three keyway slots being much longer than the slots connecting to the apply-fluid circuit, it has caused some technicians to believe that the key-way balls need to be positioned in the shorter slots rather than the longer slots (Figure 2). When this occurs, some of the balls move out of position and travel through the drive-pulley primary-feed-limit apply-fluid circuit, ending in an apply-piston cavity (Figure 2). The pressure and force in this area cause the balls to roll around and beat against the piston, causing the rumbling noise and jerking sensation. Eventually the damage is severe enough to cause the piston seals to rip, and drive-pulley pressure drops. The belt then slips across the face of the sheaves, damaging both the belt and sheave faces.

A new or “good experienced” variable-drive-pulley assembly will need to be acquired along with a belt, and if the “good experienced” pulley assembly is taken apart to install new seals, place the keyway balls in the longer slots.
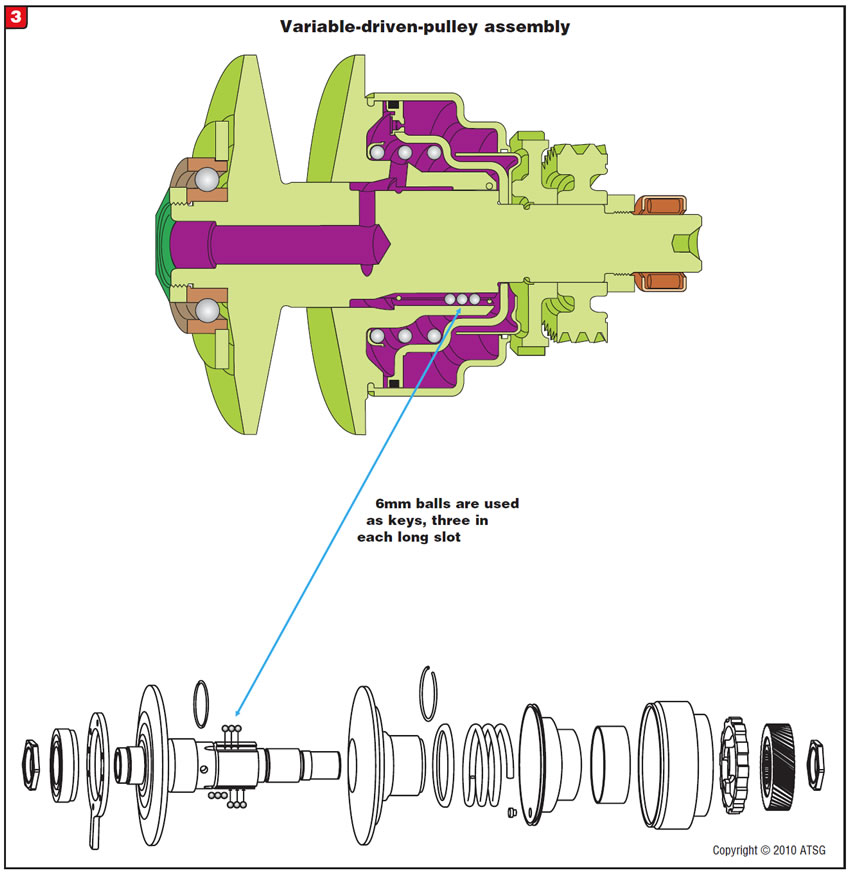
Note: Disassembly of the variable-driven-pulley assembly is also possible, and it too uses 6mm steel balls as keys in long slots. The difference here is that it uses three balls per slot (Figure 3).


Before and after repairs, a slight delayed engagement into drive occurs when the transmission is cold and becomes worse as fluid temperature increases.
Pressed into the input-shaft assembly is an input fluid-passage seal (Figure 4) that loses its sealing capabilities, and this often goes overlooked during repairs.
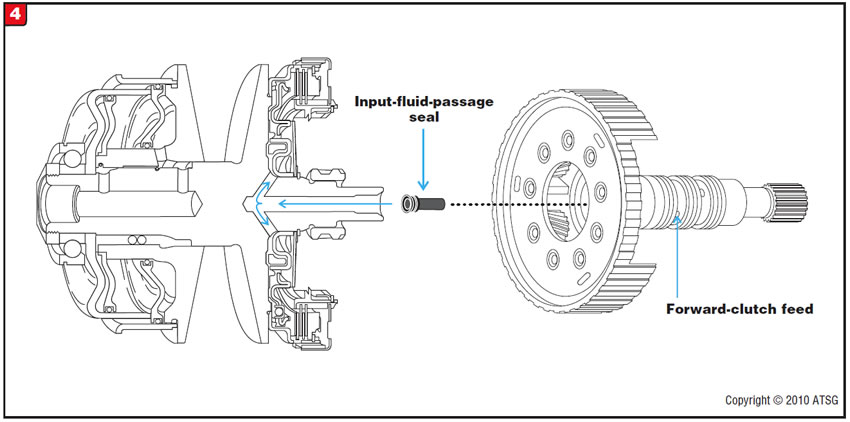
Replace the input fluid-passage seal. At the time of printing, this seal is included in a Precision kit.
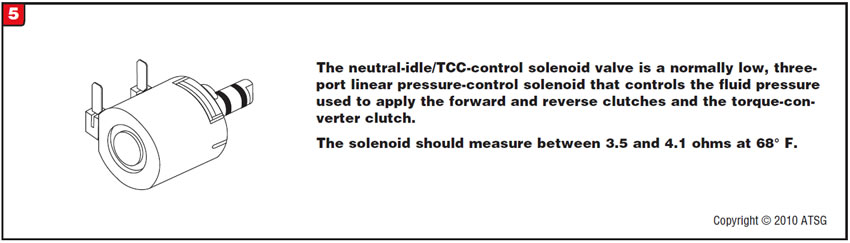
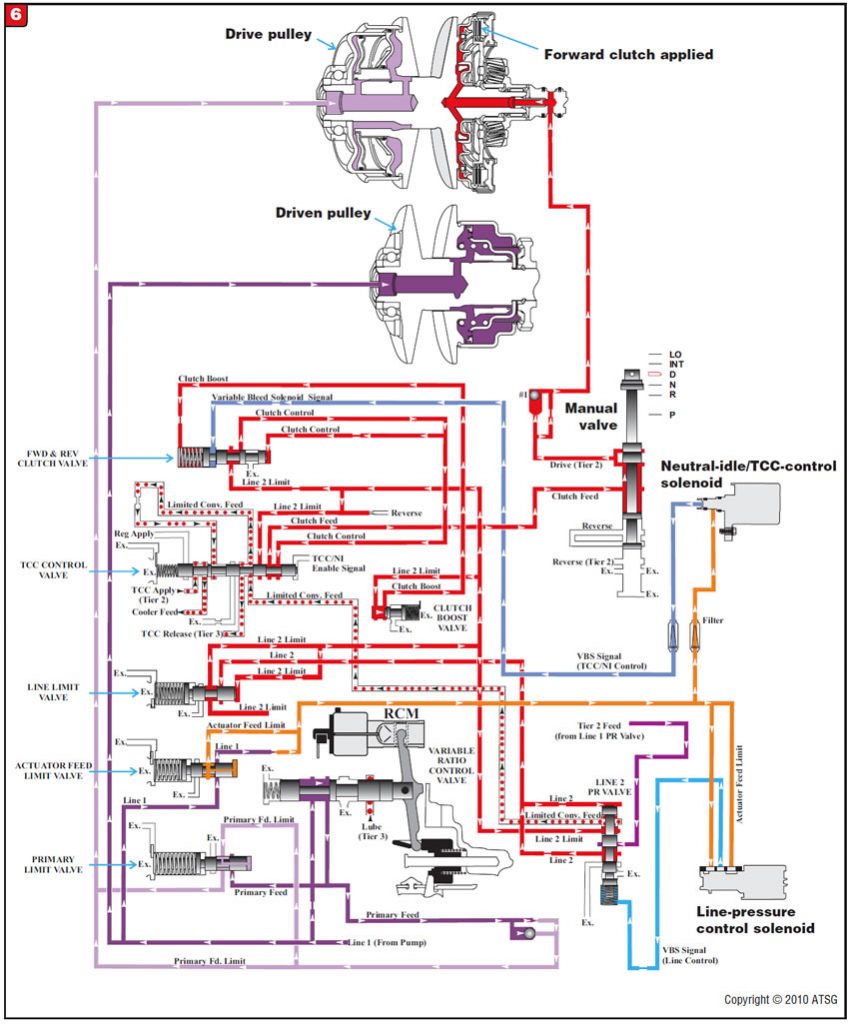
Additional causes for delayed forward engagement can be compromised sealing rings on the input shaft, a mechanically failed neutral idle/TCC on-off solenoid (Figure 5) and/or a problem with the forward- and reverse-clutch valve in the valve body (Figure 6). In these cases, TCC and Reverse engagement problems may also accompany the delayed forward engagement.


Upon disassembly of the transmission, the over-drive carrier is found to be discolored; it is an obvious lube-circuit problem. The cooler may be flushed or bypassed during the repair procedure and the transmission is rebuilt with special attention to bushing condition and unit endplay.
Unfortunately, the vehicle comes back in a relatively short time, and upon transmission disassembly the replacement overdrive carrier is discolored just like the original part.
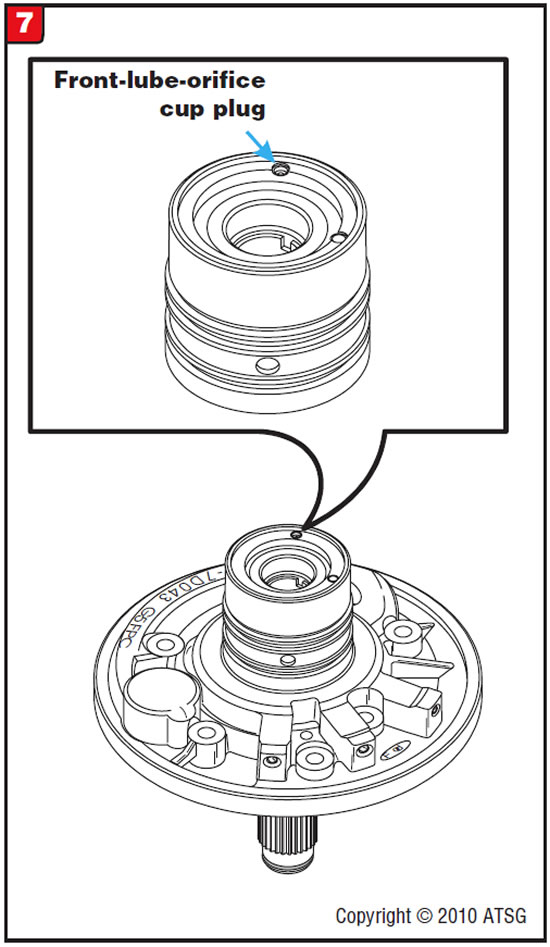
What was overlooked during the first rebuild was a small orifice cup plug in the top of the stator (Figure 7). This cup plug is part of the front lube circuit. There was debris in this passage that blocked the hole in the cup plug, preventing lube oil from reaching the over-drive carrier.
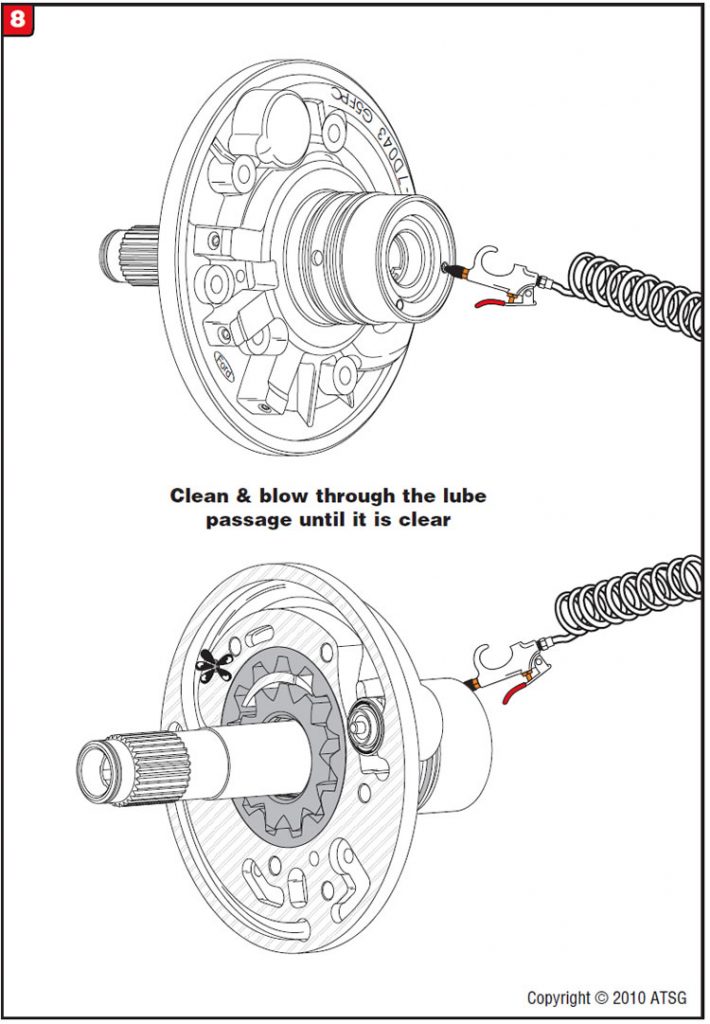
A standard rebuild procedure should be to blow this passage out with a rubber-tipped blow gun (Figure 8), flush with a pressurized cleaning chemical and then blow it out again until this passage is clear.
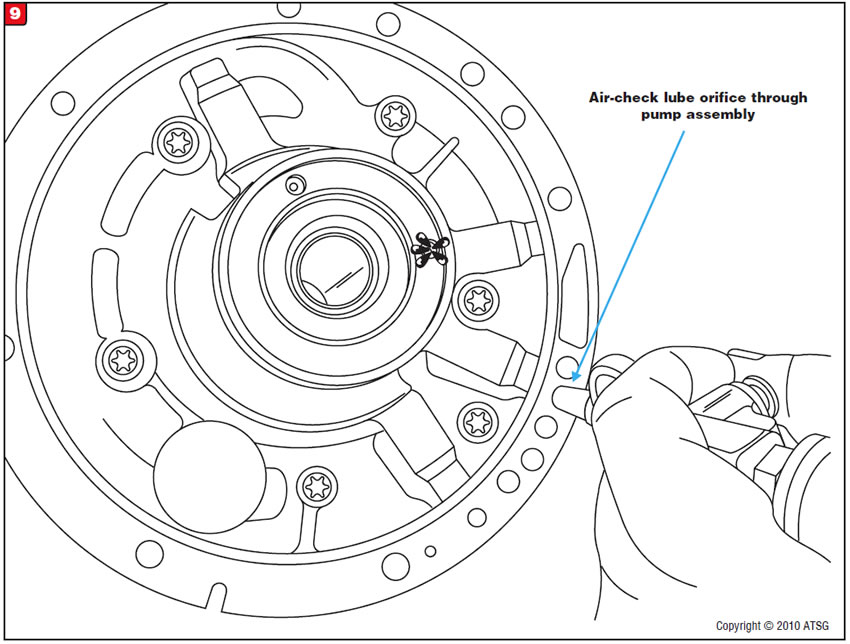
The lube orifice can be air-checked to ensure it is not clogged by blowing air into the passage shown in Figure 9 when the pump is assembled.

August 2011 Issue
Volume 28, No. 8
- VT20/25-E: Noise in forward and reverse after repairs
- VT20/25-E: Delayed forward engagement
- Ford 5R55W/S: Failure of overdrive carrier


